Gebrauchsanweisung , Notice d'utilisation et d'installation, Istruzioni per l'uso, User manual EFC 650-950 EFCL 650 CH 1200-600-900 Installatie- en gebruiksaanwijzing, Manual de Instruções, Instrucciones de montaje y manejo D F I UK NL P E
D Inhalt Seite 2 F Sommaire page 12 I Indice pagina 23 UK Contents page NL P Inhoudsopgave pagina 46 Índice pagina 57 Indice pagina 67 E 33 Inhalt D Sicherheitshinweise ............................................................................................................................................. 3 für den Küchenmöbel-Monteur ...............................................................................................................................
Sicherheitshinweise für den Küchenmöbel-Monteur Das Abluftrohr muß bei Abluftbetrieb vorzugsweise den Orignaldurchmesser des Gerätes haben. Achtung! Das Abluftrohr und die Befestigungsmanschetten sind nicht im Lieferumfang inbegriffen und müssen gesondert erworben werden. Auf Bestellung sind je nach Bedarf Rohre unterschiedlicher Formen und Durchmesser sowie ins Freie leitende Abluftsysteme (Teleskop-Mauerkasten) verfügbar, weitere Einzelheiten beim Kundendienst erfragen.
für den Benutzer In Übereinstimmung mit den Anforderungen der Europäischen Richtlinie 2002/96/EG über Elektround Elektronik-Altgeräte (WEEE) ist vorliegendes Gerät mit einer Markierung versehen. Sie leisten einen positiven Beitrag für den Schutz der Umwelt und die Gesundheit des Menschen, wenn Sie dieses Gerät einer gesonderten Abfallsammlung zuführen. Im unsortierten Siedlungsmüll könnte ein solches Gerät durch unsachgemäße Entsorgung negative Konsequenzen nach sich ziehen.
Allgemeines Die Dunstabzugshaube wird als Abluftgerät ausgeliefert und kann durch den Einsatz eines Aktivkohlefilters (Sonderzubehör) als Umluftgerät verwendet werden. Für den Umluftbetrieb wird der OriginalAktivkohlefilter aus dem Sonderzubehör benötigt. Hinweis! Einige Modelle sind bereits mit Aktivkohlefiltern ausgestattet, diese sind an einer der seitlichen Abdeckungen aus Polystyrol befestigt und müssen vor Gebrauch der Haube in Umluftbetrieb eingesetzt werden.
Bedienung der Dunstabzugshaube Die Dunstabzugshaube ist mit regelbarer Drehzahl ausgerüstet. Es ist ratsam, die Dunstabzugshaube einige Minuten vor Beginn des Kochens einzuschalten und sie ungefähr 15 Minuten nach dem Kochen weiterlaufen zu lassen, damit alle Gerüche sicher entfernt werden. Auf der Vorderseite des Gerätes befinden sich die Schalter: Lichtschalter: Der Schalter dient dazu, die Lampe, mit der die Dunsthaube ausgestattet ist, ein- und auszuschalten.
Wartung und Pflege Bevor irgendwelche Wartungsarbeiten ausgeführt werden, muss die Dunstabzugshaube vom Stromnetz getrennt werden. Reinigung Achtung Nichtbeachtung dieser Anweisungen zur Reinigung des Gerätes und zum Wechsel bzw. zur Reinigung der Filter kann zum Brand führen.
Aktivkohlefilter Der Aktivkohlefilter muß dann verwendet werden, wenn man die Dunstabzugshaube als Umluftgerät einsetzen möchte. Dazu wird der Original Aktivkohlefilter (siehe Sonderzubehör) benötigt. Austausch des Aktivkohlefilters Im Allgemeinen müssen Aktivkohlefilter zumindest einmal alle vier Monate ausgewechselt werden. Dieser Filter kann weder gewaschen noch wiederverwendet werden.
Sonderzubehör Aktivkohlefilter Type 200 Mauerkasten Abluftrohr Beim Kundendienst erfragen Beim Kundendienst erfragen Kundendienst Kundendienst Bei eventuellen Rückfragen und Störungen Kundendienst anrufen (siehe KundendienstStellenverzeichnis). Folgende Daten beim Anruf angeben: 1. Modellbezeichnung 2. E-Nr. 3. F-Nr. Diese Daten befinden sich auf dem Typenschild auf der Innenseite des Gerätes hinter den Fettfiltern.
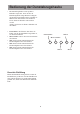
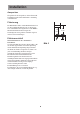
Installation Auspacken Überprüfen Sie bei Auspacken, ob das Gerät nicht beschädigt ist und ob alle Zubehörteile vollständig vorhanden sind. Platzierung Die Dunsthaube muß in einem Mindestabstand von 60 cm bei Elektroherden und von 70 cm bei Gasbzw. Gaskombiherden angebracht werden. Bild 5. Wenn die Installationsanweisungen des Gaskochgeräts einen größeren Abstand vorgeben, ist dieser zu berücksichtigen.
Installation Montage - Bild 6 Mittellinie an der Wand kennzeichnen, um das Montageverfahren zu erleichtern (1), zwei Löcher markieren und mit 12 mm Ø bohren (2). Zwei Wandhaken mit Dübel (3) und metrischen Schrauben einsetzen und festschrauben. Metallfettfilter abnehmen (4) und Kaminhaube einhängen und mit den Madenschrauben an den Wandhaken waagerecht ausrichten (5). 2/4 Löcher an der Wand markieren (6). Kaminhaube wieder aushängen und markierte Löcher mit einem Ø 8 mm Bohrer bohren.
Pour les appareils commercialises par la France Lors de sa fabrication, cet appareil a été construit selon des normes, directives et/ou décrets pour une utilisation sur le territoire français. Pour la sécurité des biens et des personnes ainsi que pour le respect de lenvironnement, vous devez dabord lire impérativement les préconisations suivantes avant toute utilisation de votre appareil.
Sommaire F Consignes de sécurité ...................................................................................................................................... 14 pour linstallateur .................................................................................................................................................... 14 pour lutilisateur ....................................................................................................................................................
Consignes de sécurité Cet appareil doit être installé par une personne qualifiée et selon les normes en vigueur. pour linstallateur Le tuyau dévacuation doit présenter un diamètre de 120 mm en version évacuation. Attention ! Le conduit dévacuation et les colliers de fixation ne sont pas fournis et doivent être achetés à part..
pour lutilisateur Cet appareil porte le symbole du recyclage conformément à la Directive Européenne 2002/96/ CE concernant les Déchets dÉquipements Électriques et Électroniques (DEEE ou WEEE). En procédant correctement à la mise au rebut de cet appareil, vous contribuerez à empêcher toute conséquence nuisible pour lenvironnement et la santé de lhomme. Il est recommandé de ne jamais laisser les foyers de cuisson sans récipient dessus.
Généralités La hotte est livrée en version évacuation mais peut, grâce à lemploi dun filtre à charbon actif (en option), être utilisée en version recyclage. Pour cela, il faudra vous procurer le filtre à charbon actif dorigine (voir Accessoires). Attention! Certains modèles sont déjà équipés avec des filtres à charbon; Ceux-ci sont fixés à une des protections latérales en polystyrène et doivent être montés avant dutiliser la hotte en version filtrante.
Utilisation de la hotte La hotte est équipée de vitesse réglable. Il est conseillé de mettre en marche la hotte quelques minutes avant le début de la cuisson et de la laisser fonctionner env. une quinzaine de minutes après la cuisson afin déliminer toutes les odeurs. Le bandeau de commandes de la hotte se trouve sur lavant de lappareil: Interrupteur déclairage : Cette touche sert à allumer ou à éteindre dont est équipée la hotte aspirante.
Entretien Débranchez la hotte avant tout entretien. Nettoyage Attention Attention: Débranchez lappareil avant le nettoyage. Nintroduisez pas dobjets pointus dans la grille de protection du moteur. Nettoyez les parties extérieures avec un détergent doux. Nutilisez jamais de produits abrasifs ou caustiques, de détergents corrosifs, de brosses ou de sablons à récurer. Nettoyez le bandeau des commandes et la grille du filtre à graisse avec un chiffon légèrement imbibé dun détergent doux.
Filtre à charbon Le filtre à charbon doit être mis en place lorsque la hotte est utilisée en version recyclage. Pour cela, il faudra utiliser le filtre à charbon actif dorigine (voir Accessoires). Remplacement du filtre à charbon Le filtre à charbon actif doit généralement être remplacé tous les quatre mois (en fonction des conditions dutilisation). Ce filtre ne peut être ni lavé ni réutilisé. Montage - Fig.
Accessoires (en option) Filtre à charbon Type 200 Service Après-vente Dans le cas de demandes de renseignement ou de pannes, veuillez appeler notre service après-vente (voir la liste de nos différents points de service après-vente). Lors de lappel, préciser : 1. La désignation du modèle 2. La référence 3. Le numéro de lappareil Ces données sont indiquées sur la plaque signalétique située à lintérieur de lappareil et visible après ouverture de la grille du filtre à graisse.
Installation Déballage Vérifiez que la hotte nest pas endommagée. Signalez immédiatement tout dégât dû au transport à la personne compétente et tout défaut ou manque au fabricant. Ne laissez pas traîner le matériel demballage pour éviter que les enfants ne jouent avec lui. Montage Min 60 cm La hotte aspirante doit être montée au mur. Une fois installée, elle doit être à au moins 60 cm des corps de chauffe électriques et 70 cm des brûleurs à gaz et mixtes. Fig. 5.
Installation Fixation - Fig. 6 Posez le gabarit de perçage contre le mur (1), marquez au crayon lemplacement des deux trous puis percezles (2 x Ø 12 mm) (2). Insérez les deux crochets avec chevilles (3). Enlevez les filtres à graisse métalliques (4) , accrochez la hotte, placez-la bien à lhorizontale en vous servant des vis de réglage (5). Marquez lemplacement des 2/4 trous sur le mur (6). Décrochez à présent la hotte et percez les trous (2 x Ø 8 mm).
Indice I Norme di sicurezza ............................................................................................................................................ 24 Per linstallatore ..................................................................................................................................................... 24 Per lutente .........................................................................................................................................................
Norme di sicurezza Per linstallatore Qualora la cappa venisse utilizzata nella versione aspirante, per un funzionamento ottimale dovranno essere osservate le seguenti norme: - tubo di uscita breve e diritto - ridurre al minimo le curve - evitare di installare tubi con angoli acuti, devono avere soltanto curve a largo raggio. - utilizzare tubi più larghi possibile (preferibilmente dello stesso diametro del foro di uscita).
Per lutente Questo apparecchio è contrassegnato in conformità alla Direttiva Europea 2002/96/EC, Waste Electrical and Electronic Equipment (WEEE). Assicurandosi che questo prodotto sia smaltito in modo corretto, lutente contribuisce a prevenire le potenziali conseguenze negative per lambiente e la salute. Coprire sempre gli elementi accesi per evitare che il calore in eccesso danneggi lelettrodomestico. Nel caso di fornelli alimentati a gas, petrolio e carbone evitare le fiamme libere.
Generalità La cappa viene fornita come apparecchio aspirante e può essere utilizzata anche con funzione filtrante inserendo due filtri a carboni attivo (accessorio speciale). Utilizzare filtri a carbone attivo originale (vedi accessori speciali). Attenzione! Alcuni modelli sono già provvisti di filtri a carbone, questi si trovano fissati ad una delle protezioni laterali in polistirolo e devono essere montati prima di utilizzare la cappa in versione filtrante.
Funzionamento della cappa La cappa è provvista di più velocità. Si consiglia di mettere in funzione la cappa alcuni minuti prima di iniziare a cucinare per fare in modo che si crei una depressione allinterno del locale e di lasciarla in funzione dopo aver terminato la cottura dei cibi per circa 15 minuti o fino alla scomparsa degli odori. I tasti per il controllo delle funzioni della cappa sono nella parte anteriore della cappa: Tasto luce: accende e spegne lilluminazione della cappa.
Manutenzione e cura Disconnettere sempre lapparecchio dalla rete elettrica prima di iniziare qualsiasi operazione di manutenzione. Pulizia Attenzione Attenzione: disconnettere lapparecchio dalla rete elettrica prima di effettuare qualsiasi operazione di pulizia. Non introdurre oggetti acuminati nella griglia di protezione del motore. Per lavare esternamente la cappa usare una soluzione detergente delicata. Non utilizzare detergenti caustici, polveri o spazzole abrasive.
Filtro al carbone Si raccomanda di utilizzare il filtro al carbone attivo soltanto durante il funzionamento della cappa nella versione filtrante. Per il funzionamento della cappa nella versione filtrante è necessario il filtro al carbone attivo originale (vedere Accessori Speciali). Il filtro ai carboni attivi non può essere né lavato, né riutilizzato. Di norma il filtro ai carboni attivi va sostituito ogni quattro mesi. Montaggio - Fig.
Accessori speciali Filtro al carbone Type 200 Servizio assistenza tecnica E possibile telefonare al nostro servizio di assistenza tecnica (vedere lista dei centri di assistenza tecnica) ogniqualvolta si desiderano informazioni o in caso di guasti. Si raccomanda di specificare: 1. Il codice del modello 2. Il numero di serie (E- Nr.) 3. Il numero di fabbricazione (F-Nr.) Questi dati si trovano nella targhetta di identificazione allinterno dellapparecchio dietro il filtro grassi.
Installazione Rimozione dellimballaggio Controllate che la cappa aspirante non sia danneggiata. Danni dovuti al trasporto vanno segnalati immediatamente al responsabile del trasporto. In caso di danni, difetti o pezzi mancanti, occorre comunicarlo tempestivamente al rivenditore. Tenete sotto controllo il materiale dimballaggio ed evitate che i bambini vi giochino. Min 60 cm Ubicazione La cappa va montata sul muro.
Installazione Montaggio - Fig. 6 Posizionare al muro la dima di foratura (1), marcare i due punti in corrispondenza dei fori da praticare quindi eseguire i fori (2 x Ø12mm) (2). Inserire i due ganci forniti di tasselli a muro (3). Togliere i filtri grasso metallici (4) e agganciare la cappa a camino, aggiustarla orizzontalmente agendo sulle viti di regolazione (5). Segnare 2/4 fori sulla parete (6).
Contents UK Safety warnings ................................................................................................................................................... 34 For the installer ...................................................................................................................................................... 34 For the user ..................................................................................................................................................
Safety warnings For the installer aforementioned measures. When the hood is used in its extraction mode, the following rules must be followed to obtain optimal operation: - short and straight outlet hose - keep bends in outlet hose to a minimum - never install the hoses with an acute angle, they must always follow a gentle curve. - keep the hose as large as possible (preferably the same diameter as the outlet hole).
For the user This appliance is marked according to the European directive 2002/96/EC on Waste Electrical and Electronic Equipment (WEEE). By ensuring this product is disposed of correctly, you will help prevent potential negative consequences for the environment and human health, which could otherwise be caused by inappropriate waste handling of this product. The cooker hood is designed to extract unpleasant odours from the kitchen, it will not extract steam.
Description of the appliance The cooker hood is designed to extract unpleasant odours from the kitchen, it will not extract steam. The hood is supplied as an extractor unit and can also be used with a recirculation mode by fitting a charcoal filter. You will need an original charcoal filter for this function (Available from your local Service Force Centre). Attention! Certain models are already equipped with charcoal filters.
Control Panel Best results are obtained by using a low speed for normal conditions and a high speed when odours are more concentrated. Turn the hood on a few minutes before you start cooking. The hood should be left on after cooking for about 15 minutes or until all the odours have disappeared.
Maintenance and care The hood must always be disconnected from the electricity supply before beginning any maintenance work. Cleaning the hood Warning Clean the outside of the hood using a damp cloth and a solution of water and mild washing up liquid. Never use corrosive, abrasive or flammable cleaning products or products containing bleach. . Never insert pointed objects in the motors protective grid.
Charcoal filter The charcoal filter should only be used if you want to use the hood in the recirculation function. To do this you will need an original charcoal filter (available from your local Service Force Centre). Replacing the charcoal filter The charcoal filter cannot be washed nor regenerated. The charcoal filter should be replaced every 4 months under normal use. Replacement filters are available from your local Service Force Centre. Fitting - Fig.
What to do if If your appliance fails to work properly please carry out the following checks. Symptom Solution The cooker hood will not start... Check that: The hood is connected to the electricity supply. Check that a fan speed has been selected The cooker hood is not working Check that: The fan speed is set high enough for the task. The grease filters are clean. The kitchen is adequately vented to allow the entry of fresh air.
Technical assistance service You are welcome to telephone our technical assistance service (see list of technical assistance centres) whenever you need information or in the unlikely event of a fault. For service in Australia call 1300 650 020. When calling, please be ready to specify: 1. The model code number 2. The serial number (E-Nr.) 3. The manufacturing number (F-Nr.) This information is shown on the registration plate inside the unit behind the grease filter.
Guarantee Conditions Standard guarantee conditions We, Electrolux, undertake that if within 12 months of the date of the purchase this Electrolux appliance or any part thereof is proved to be defective by reason only of faulty workmanship or materials, we will, at our option repair or replace the same FREE OF CHARGE for labour, materials or carriage on condition that: The appliance has been correctly installed and used only on the electricity supply stated on the rating plate.
Installation Unpacking Check that the cooker hood has no damages. Transportation damages should immediately be reported to the company responsible for the transportation. Damages, faults and any missing parts or documents should immediately be reported to the retailer. Take care of the packing materials so that small children cannot play with them. Min 60 cm Fitting The hood is to be mounted on the wall. When installed, the hood must be not less than 60 cm. above electric burners or 70 cm.
Electrical connection for UK only WARNING: DOUBLE INSULATED DO NOT EARTH Electrical Requirements Any permanent electrical installation must comply with the latest I.E.E. Regulations and local Electricity Board regulations. For your own safety this should be undertaken by a qualified electrician e.g. your local Electricity Board, or a contractor who is on the roll of the National Inspection Council for Electrical Installation Contracting (NICEIC) or a suitably competent person.
Wall unit mounting - Fig. 6 Put the template onto the wall (1) and drill two Ø12mm holes (2). Fit two hooks (3) on the drilled holes. Remove the metal filters (4) and hang the hood on the hooks and adjust the position of the hood using the two screws on the bottom of the hooks (5). Depending on the model, mark 2 or 4 points (6). Remove the hood and drill 2 or 4 Ø8mm holes on the marked points. Fit 2 or 4 Ø8mm wall dowels, Hang again the hood and fix the hood permanently with 2 or 4 screws 5X45 (7).
Inhoud NL Veiligheidsaanwijzingen .................................................................................................................................... 47 voor de keukenmeubel-monteur ............................................................................................................................. 47 voor de gebruiker ................................................................................................................................................... 48 Algemeen ....
Veiligheidsaanwijzingen voor de keukenmeubel-monteur onderdruk vermeden wordt. Omdat in ruimten zonder rookkanaalafvoer de regel geldt toevoeropening even groot als afvoeropening kan door de grotere opening van 500-600 cm2 de werking van de afvoerinrichting nadelig beïnvloed worden. Het gebruik van het apparaat als recirculatiekap is onder de genoemde omstandigheden zonder gevaar en valt niet onder bovengenoemde voorschriften.
voor de gebruiker Dit apparaat is voorzien van het merkteken volgens de Europese richtlijn 2002/96/EG inzake Afgedankte elektrische en elektronische apparaten (AEEA). Door ervoor te zorgen dat dit product op de juiste manier als afval wordt verwerkt, helpt u mogelijk negatieve consequenties voor het milieu en de menselijke gezondheid te voorkomen die anders zouden kunnen worden veroorzaakt door onjuiste verwerking van dit product als afval.
Algemeen Het apparaat wordt als afzuigkap geleverd en kan in combinatie met een koolfilter (extra leverbaar accessoire) als recirculatiekap worden gebruikt. Daarvoor is een origineel koolfilter nodig (zie Extra leverbare accessoires). Attentie! Enkele modellen zijn reeds voorzien van koolfilters, deze zijn aan een van de beschermplaten van polystyrol bevestigd en moeten gemonteerd worden voordat de afzuigkap als recirculatiekap gebruikt wordt.
Bediening van de afzuigkap De afzuigkap is voorzien van een motor met regelbaar toerental. Het verdient aanbeveling de afzuigkap enkele minuten voor u met koken begint aan te zetten en hem na het koken nog ongeveer 15 minuten aan te laten staan. De schakelaars bevinden zich aan de voorkant van de kap: Lichtschakelaar: Hiermee kan de verlichting van de afzuigkap worden in- en uitgeschakeld. Motorschakelaar: Hiermee kan de afzuigkap worden uitgeschakeld.
Onderhoud Voordat u werkzaamheden aan het apparaat gaat uitvoeren, eerst de stekker uit het stopcontact trekken. Reiniging Attentie Attentie: eerst de stekker uit het stopcontact trekken. Geen spitse voorwerpen in het beschermrooster van de motor steken. De buitenkant van het apparaat met een mild sopje reinigen. Gebruik geen scherpe reinigingsmiddelen, borstels of schuurmiddel. Het bedieningspaneel en het vetfilterrooster alleen met een vochtige doek en mild afwasmiddel reinigen.
Koolfilter Het koolfilter moet worden gebruikt, als het apparaat als recirculatiekap wordt gebruikt. Daarvoor is een origineel koolfilter nodig (zie Extra leverbare accessoires). Vervangen van het koolfilter Bij normaal gebruik moet het koolfilter elke 4 maanden worden vervangen. Dit filter kan niet worden gewassen en hergebruikt. Om een onberispelijke opname van de kookluchtjes te garanderen, moet het volume aan actieve kool zijn afgestemd op de luchtgeleiding van de kap.
Extra leverbare accessoires Koolfilter type 200 Muurkast Neem contact op met onze service-afdeling Neem contact op met onze service-afdeling Afvoerbuis Klantenservice Geef in geval van storing onze service-afdeling onderstaande gegevens door: 1. modelaanduiding 2. E-nummer 3. F-nummer Deze gegevens vindt u op het typeplaatje op de binnenzijde van de afzuigkap, achter de vetfilters. Constructie- en kleurwijzigingen in het kader van de technische ontwikkeling voorbehouden.
Reparatievoorwaarden Onze reparatievoorwaarden zijn conform de afspraak tussen de Consumentenbond en Vlehan*. Art. 1 Aan de consument zal na een melding van een storing zo mogelijk direct, doch uiterlijk binnen één werkdag worden medegedeeld op welke dag het bezoek van de technicus zal plaatsvinden. De reparatie zal als regel binnen zeven werkdagen na de melding zijn uitgevoerd. Art.
Technische gegevens Model EFCL 650 Afmetingen Hoogte Breedte Diepte Verlichting Vetfilter Totale aansluitwaarde Elektrische aansluiting 55-64,5 59,9 51,5 2 x 40W 2 250 W 220-240 V EFC650 87,5-111,6 59,9 51,5 2 x 40W 2 250 W 230 V EFC950 87,5-111,6 89,9 51,5 2 x 40W 3 250 W 230 V CH 1200 87,5-111,6 119,9 51,5 2 x 40W 4 250 W 230 V CH900 87,5-111,6 89,9 51,5 2 x 40W 3 250 W 230 V CH600 87,5-111,6 59,9 51,5 2 x 40W 2 250 W 230 V Constructie- en kleurwijzig
Installatie Montage - afb. 6 Boorsjabloon op de wand plaatsen (1), twee boorgaten markeren. Gaten 12 mm Ø boren (2). Twee wandhaken met pluggen (3) en metrische schroeven aanbrengen en vastschroeven. Metalen vetfilters verwijderen (4), de kap op de haken hangen en m.b.v. de stelschroeven horizontaal richten (5). 2/4 gaten op de wand markeren (6). Kap weer losnemen en de gemarkeerde gaten Ø 8 mm boren.
Índice P Indicações de segurança ............................................................................................................................... 58 para o instalador dos móveis de cozinha ............................................................................................................. 58 para o utilizador ................................................................................................................................................... 59 Informações gerais .....
Indicações de segurança para o instalador dos móveis de cozinha O tubo de evacuação do ar deve ter um diâmetro de 120 mm se o aparelho for utilizado para evacuar o ar para o exterior. Atenção: O tubo não é fornecido e deve ser adquirido separadamente.
Este aparelho está classificado de acordo com a Directiva Europeia 2002/96/EC sobre Resíduos de equipamento eléctrico e electrónico (REEE). Ao garantir a eliminação adequada deste produto, estará a ajudar a evitar potenciais consequências negativas para o ambiente e para a saúde pública, que poderiam derivar de um manuseamento de desperdícios inadequado deste produto. para o utilizador Todas as reparações devem ser feitas exclusivamente por um técnico especializado.
Informações gerais O exaustor de aspiração destina-se à evacuação do ar mas, graças ao uso de um filtro de carvão activo (acessório), pode ser utilizado como aparelho para a circulação do ar. Neste último caso, será preciso utilizar um filtro de carvão activo original (ver Acessórios). Atenção! Alguns modelos já são dotados de filtros de carvão activado, estes se encontram fixados a uma das protecções laterais em poliestireno e devem ser montados antes de utilizar a coifa em versão filtrante.
Uso do exaustor A coifa é dotada de velocidade regulável. Aconselha-se ligar a coifa alguns minutos antes de iniciar o cozimento e faze-la funcionar por mais 15 minutos após o fim do cozimento de modo a eliminar com segurança todos os odores. Os comandos se encontram na parte frontal da coifa: Tecla luz: esta tecla serve para ligar e desligar a luz Tecla Motor: Esta tecla serve para desligar o motor de aspiração. Velocidade 1: Esta tecla serve para seleccionar a velocidade/potência de aspiração 1.
Manutenção Isole o exaustor da fonte de alimentação eléctrica antes de efectuar qualquer operação de manutenção. Atenção Limpeza O não cumprimento das instruções fornecidas para a limpeza do aparelho e para a limpeza ou substituição do filtro pode provocar riscos de incêndio. O fabricante declina toda e qualquer responsabilidade pelos danos ao motor ou decorrentes de incêndio, provocados por uma manutenção inadequada ou pelo não cumprimento das indicações de segurança citadas anteriormente.
Filtro de carvão activo O filtro de carvão activo é utilizado quando o exaustor funciona na versão com circulação do ar. Deverão sempre ser utilizados filtros de carvão activo originais (ver Acessórios). Substituição do filtro de carvão activo Geralmente o filtro de carvão activado deve ser substituído pelo menos uma vez a cada 4 meses. Este filtro não é lavável, nem regenerável.
Acessórios Filtro de carvão activo TYPE 200 Serviço de assistência Para obter informações ou solicitar a assistência em caso de avaria, dirija-se ao nosso Serviço de Assistência Pós-venda (ver a lista dos pontos de serviço). No momento da chamada indique: 1. O modelo do aparelho 2. O número de referência 3. O número do aparelho Estes dados estão indicados na placa de referência posta no interior do aparelho, visível removendo a grade do filtro antigordura.
Dados Técnicos Modelo EFCL 650 Altura Dimensões Largura Profund. Iluminação Filtro antigordura Potência nominal total Ligação 55-64,5 59,9 51,5 2 x 40W 2 250 W 220-240 V EFC650 87,5-111,6 59,9 51,5 2 x 40W 2 250 W 230 V EFC950 87,5-111,6 89,9 51,5 2 x 40W 3 250 W 230 V CH 1200 87,5-111,6 119,9 51,5 2 x 40W 4 250 W 230 V CH900 87,5-111,6 89,9 51,5 2 x 40W 3 250 W 230 V CH600 87,5-111,6 59,9 51,5 2 x 40W 2 250 W 230 V Sujeito a alteração sem aviso prévio.
Instalação Montagem - Fig. 6 Posicionar o gabarito (1) à parede, marcar os dois pontos em correspondência dos furos a ser praticados e, então, executar os furos (2 x Ø12 mm) (2). Inserir os dois ganchos dotados de buchas para parede (3). Tirar os filtros gordura metálicos (4) e enganchar a coifa à chaminé, ajustá-la horizontalmente agindo nos parafusos de regulação (5). Marcar 2/4 furos na parede (6).
Indice E Recomendaciones de seguridad ...................................................................................................................... 68 Para el usuario ....................................................................................................................................................... 69 Generalidades ....................................................................................................................................................
Recomendaciones de seguridad para el montador de muebles medida del orificio de salida = a la medida del orificio de ventilación o sea un orificio de 500600 cm2, por lo que un orificio mayor puede perjudicar el funcionamiento de la campana. El uso de la campana en el modo de recirculación resulta sencillo y seguro, no haciendo falta respetar las prescripciones antedichas.
Este aparato lleva el marcado CE en conformidad con la Directiva 2002/96/EC del Parlamento Europeo y del Consejo sobre residuos de aparatos eléctricos y electrónicos (RAEE). La correcta eliminación de este producto evita consecuencias negativas para el medioambiente y la salud. Para el usuario Se recomienda no dejar los fuegos encendidos sin cubrir, ya que el excesivo calor dañaría el aparato. En caso de cocinas de gas, gasóleo o carbón, evitar absolutamente las llamas libres.
Generalidades La campana se entrega en modo extractor, pudiendo utilizarla también en modo de recirculación, instalando para ello un filtro de carbón activado (accesorio especial). Para esta función, es necesario un filtro de carbón activo original (véase el párrafo «Accesorios especiales»).
Funcionamiento de la campana La campana está dotada de velocidad regulable. Se aconseja activar la campana unos minutos antes de comenzar la cocción y dejarla en marcha hasta 15 minutos después de terminarla para desalojar completamente los olores. Los interruptores se encuentran en el frontal del aparato : Interruptor de la luz : sirve para encender y apagar la bombilla. Interruptor OFF del motor: sirve para desactivar el ventilador Pulsador 1: selecciona la velocidad 1 del ventilador.
Mantenimiento y cuidado Antes de realizar cualquier trabajo de mantenimiento, desconectar la campana de la alimentación eléctrica. Atención Limpieza De no observarse las instrucciones dadas para limpiar el aparato y sustituir el filtro, puede producirse un incendio. El fabricante recomienda leerlas y respetarlas atentamente.
Filtro de carbón activado El filtro de carbón activado solo se utiliza para la función de recirculación. Instalar siempre un filtro de carbón activado original (véase el párrafo «Accesorios especiales»). Los filtros de carbón no pueden, en ningún caso, limpiarse o regenerarse. El filtro de carbón tiene que ser reemplazado cada 4 meses cuando la campana se usa normalmente. Montaje - Fig.
Accesorios especiales Filtro de carbón activado Type 200 Servicio de asistencia técnica En caso de dudas o desperfectos, ponerse en contacto con nuestro centro de asistencia técnica (ver lista). En caso de avería se ruega indicar: 1. Modelo 2. E-Nr. 3. F-Nr. Estos datos pueden leerse en la placa de características colocada en la parte interna del aparato, quitando la rejilla del filtro para grasas.
Características técnicas Modelo EFCL 650 Dimensiones (en cm) Altura Ancho Profund.
Instalación Montaje - Fig. 6 Aplique la plantilla al muro (1), marque los puntos de fijación, perfore (2 x Ø12mm) (2). Monte dos tacos con ganchos (3) y los tornillos de regulación. Extraiga los filtros de grasas (4) y enganche la campana, nivele con los tornillos de regulación colocados en los ganchos (5). Marque los 2/4 puntos de fijación adicional (6). Extraiga la campana y realice los orificios (2/4 x Ø 8 mm).
The Electrolux Group. The world´s No.1 choice. The Electrolux Group is the world´s largest producer of powered appliances for kitchen, cleaning and outdoor use. More than 55 million Electrolux Group products (such as refrigerators, cookers, washing machines,vacuum cleaners, chain saws and lawn mowers) are sold each year to a value of approx. USD 14 billion in more than 150 countries around the world. © Electrolux 2003 LI1AQL Ed.