ENGLISH MODEL HT-SB38 SOUND BAR HOME THEATER SYSTEM OPERATION MANUAL Thank you for purchasing this SHARP product. To obtain the best performance from this product, please read this manual carefully. It will guide you in operating your SHARP product. HT-SB38 Sound Bar Home Theater system consisting of HT-SB38 (sound bar system) and CP-SW38 (active subwoofer system). Note: This product is recommended for flat panel TV (LED, LCD and Plasma). Accessories The following accessories are included.
Special Notes )RU XVHUV LQ 8 6 Note to CATV system installer: CAUTION 7KLV UHPLQGHU LV SURYLGHG WR FDOO WKH &$79 V\VWHP LQVWDOOHU¶V DWWHQWLRQ WR $UWLFOH RI WKH 1DWLRQDO (OHFWULFDO &RGH WKDW SURYLGHV JXLGHOLQHV IRU SURSHU JURXQGLQJ DQG LQ SDUWLFXODU VSHFL¿HV WKDW WKH FDEOH JURXQG VKDOO EH FRQQHFWHG WR WKH JURXQGLQJ V\VWHP RI WKH EXLOGLQJ DV FORVH WR WKH SRLQW RI FDEOH HQWU\ DV SUDFWLFDO RISK OF ELECTRIC SHOCK DO NOT OPEN CAUTION: TO REDUCE THE RISK OF ELECTRIC SHOCK, DO
Important Safety Instructions (OHFWULFLW\ LV XVHG WR SHUIRUP PDQ\ XVHIXO IXQFWLRQV EXW LW FDQ DOVR FDXVH SHUVRQDO LQMXULHV DQG SURSHUW\ GDPDJH LI LPSURSHUO\ KDQGOHG 7KLV SURGXFW KDV EHHQ HQJLQHHUHG DQG PDQXIDFWXUHG ZLWK WKH KLJKHVW SULRULW\ RQ VDIHW\ +RZHYHU LPSURSHU XVH FDQ UHVXOW LQ HOHFWULF VKRFN DQG RU ¿UH ,Q RUGHU WR SUHYHQW SRWHQWLDO GDQJHU SOHDVH REVHUYH WKH IROORZLQJ LQVWUXFWLRQV ZKHQ LQVWDOOLQJ RSHUDWLQJ DQG FOHDQLQJ WKH SURGXFW 7R HQVXUH \RXU VDIHW\ DQG SURORQJ WKH VHUYLFH OLIH RI WK
For U.S. customer only CONSUMER LIMITED WARRANTY SHARP ELECTRONICS CORPORATION warrants to the first consumer purchaser that this Sharp brand product (the "Product"), when ship in its original container, will be free from defective workmanship and materials, and agrees that it will, at its option, either repair the defect or replace the defective Product or part thereof with a new or remanufactured equivalent at no charge to the purchaser for parts or labor for the period(s) set forth below.
Precautions General z Keep your equipment at least 4" (10 cm) of free space along the sides, top and back for proper ventilation. Table/floor 4" (10 cm) 4" (10 cm) 0" (0 cm) 4" (10 cm) Wall mount 4" (10 cm) Warnings: z The supplied AC/DC adaptor contains no user serviceable parts. Never remove covers unless qualified to do so. It contains dangerous voltages, always remove mains plug from the main outlet jack before any service operation or when not in use for a long period.
Controls and indicators Sound Bar Front Panel 1 2 34 5 6 7 8 9 1. 2. 3. 4. 5. 6. Left Channel Speakers Right Channel Speakers On/Standby/Input/ Bluetooth Pairing Indicator On/Standby Button Input Button Pairing Button 7. Sound Mode Button 8. Volume Down / Up Button 9. NFC detection area Subwoofer Front view 1. 2. 3. 4. Rear view Bass Reflex Duct Woofer DC In Jack SW LINK (Subwoofer Link) button 2 1 4 3 Sound Bar Rear Panel 1. 2. 3. 4. 5. 6. 7.
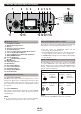
Controls and indicators (continued) 1 2 3 4 5 6 7 8 9 19 10 11 12 13 14 15 16 17 18 Remote Control 1. 2. 3. 4. 5. 6. 7. 8. 9. 10. 11. 12. 13. 14. 15. 16. 17. 18. 19.
Sound bar preparation Make sure to unplug the AC power cord before installing the sound bar or changing the position. 2 0DNH D KROH RQ WKH ZDOO IROORZLQJ WKH VFUHZ SRLQW PDUNV RQ WKH SDWWHUQ SDSHU E\ XVLQJ D GULOO 1-1/4” (32 mm) To mount the sound bar on the wall Caution: ● %H YHU\ FDUHIXO WR SUHYHQW WKH VRXQG EDU > OEV NJ @ IURP IDOOLQJ ZKHQ PRXQWLQJ RQ WKH ZDOO ● %HIRUH PRXQWLQJ FKHFN WKH ZDOO VWUHQJWK 'R QRW SXW RQ WKH YHQHHU SODVWHU RU ZKLWHZDVKHG ZDOO 7KH VRXQG EDU
Falling prevention ● Safety wires (not supplied) are useful to prevent the sound bar from falling.
Placing the system Installation image: Notes: ● The front panel of the sound bar is not removable. Caution: ● Do not change the installation direction when the sound bar is turned on. ● Do not stand or sit on the sound bar or subwoofer as you may be injured. ● Do not allow any objects to fall into or to be placed in the bass reflex duct.
System connections (continued) HDMI Connection Caution: Turn off all other equipment before making this connection. Audio and Video signal The illustration below shows the flows of the signals. DVD/Blu-ray TV 1. Method 1 This connection is for HDMI TV with ARC (Audio Return Channel). TV To HDMI (TV ARC) input terminal Digital tuner DVD, Blu-ray disc player or similar To HDMI output terminal Sound Bar To HDMI OUT (TV ARC) output terminal To HDMI input terminal 2.
Audio connections to TVs, DVD players, VCRs, etc. Other connection (without HDMI) The illustration below shows the flows of audio and video signals. TV Audio signal Video signal DVD/Blu-ray Disc Player Digital tuner, etc. Notes: z Refer to the operation manual of the equipment to be connected. z Fully insert the plugs to avoid fuzzy pictures or noises. z Connecting via this method may disable TV internal speakers.
Remote control Battery installation Use 2 “AA” size battery (UM/SUM-3, R6, HP-7 or similar). Batteries are not included. 1 2 3 Open the battery cover. Insert the batteries according to the direction indicated in the battery compartment. When inserting or removing the battery, push them toward the battery terminals. Close the battery cover. Notes: z The battery indicator will not correctly display the remaining capacity for approximately 10 seconds after the power has been turned on.
General control Sound Bar: 1. Press and hold the ON/STANDBY button during power on until the sound bar is turned off. The next time the unit is turned on and off again it will enter the low power consumption mode (Sound bar indicator turns off). 2. To return to the standby mode, perform step 1 above. The next time the unit is turned on and off again it will enter standby mode. z During standby mode, NFC function is activated once your device touches the supplied NFC tag when there is no HDMI connection.
General control (continued) To select a menu on the remote control Bass and Treble Control (remote control) 1. Press MENU button. 2. To select a menu, press or button, then press button. 3. Press or button to select an option in the desired menu. 4. To select another menu, press button and repeat steps 2 to 3 above. Menu/ Function Level/Mode 3D AUDIO 3D AUDIO 0 AV SYNC AV SYNC 0 APC 5 MIN SW LEVEL -5 1 Treble Control 1. Press the BASS/TREBLE button repeatedly to select treble. / 2.
General control (continued) APC (Auto Power Off Control) (remote control) 3D sound mode This sound bar can be set to turn off automatically if no signal or connection is detected. (During Audio In, HDMI, Optical In or USB function) 1. Select APC from the remote control menu to adjust the time. 2. The sound bar will enter the power standby mode automatically if no signal is detected after the preset time has elapsed.
Bluetooth one touch connection via NFC About NFC technology Near Field Communication (NFC) is a set of standards for devices (smartphones/tablets) to establish radio communi cation with each other by touching/tapping them together or bringing them into close proximity. Using NFC in this product simplifies the pairing method of Bluetooth connectivity. z This audio system supports NFC-enabled device with Android 4.1, Jelly Bean and higher.
Bluetooth one touch connection via NFC (continued) 3 NFC connection for audio playback Check that: z Your device (smartphone / tablet) has an NFC function. z NFC function on your device is turned on. z Screen lock function of the device is off. z This unit is not in Eco mode. 1 z Sound will be heard from the speakers of this unit via audio streaming. z Your device must be within 32 feet (10 meters) from the sound bar.
Listening to Bluetooth enabled devices (continued) Indicators on the sound bar display: Indicator (blue) Blinks Lights up No indication Listening to the sound Bluetooth status Check that: z The source device Bluetooth functionality is ON. z Pairing of this unit and the source device is completed. z Unit is in connected mode. In waiting or pairing mode Connected Unconnected However, the indication status is not displayed during standby mode or in other function.
Listening to USB mass storage device/MP3 player Note: This product is not compatible with MTP and AAC file systems from USB mass storage device or MP3 player. To play back USB/MP3 player 1 Select the USB function (on the sound bar or remote control. “USB” appears on the display). 2 3 Playback will start automatically. Otherwise press / . Select desired file to be played back by pressing the or button. z Title, Artist and Album name are displayed if they are recorded in the USB memory device.
Troubleshooting chart Many potential problems can be resolved by the owner without calling a service technician. If something is wrong with this product, check the following before calling your authorized SHARP dealer or service center. Symptom Possible cause z Wireless connection cannot be established. z Make sure there is no obstacles (especially metal) blocking between the sound bar and subwoofer. z Manually re-link the sound bar and subwoofer (refer page 13).
Troubleshooting chart (continued) Maintenance Condensation Sudden temperature changes, storage or operation in an extremely humid environment may cause condensation inside the cabinet or on the transmitter on the remote control. Condensation can cause the sound bar to malfunction. If this happens, leave the power on until normal playback is possible (about 1 hour). Wipe off any condensation on the transmitter with a soft cloth before operating the sound bar.
Specifications As part of our policy of continuous improvement, SHARP reserves the right to make design and specification changes for product improvement without prior notice. The performance specification figures indicated are nominal values of production unit. There maybe some deviations from these values in individual unit. Sound Bar Power source Power consumption DC IN 19V 3.42A: AC/DC adaptor (AC 100 - 240V ~ 50/60Hz) 20 W USB (MP3 / WMA) USB host interface z Complies with USB 1.1 (Full Speed)/2.