Technics Mini Changer System SC-CH515/717 Operating The photograph Before connecting, operating or adjusting this product, please read these instructions completely. [_ [_ Instructions shows the SC-CH717 model.
Thank you for purchasing this product. For optimum performance and safety, please read these operating instructions carefully. These operating instructions are applicable to models SC-CH717 and SC-CH515. These operating instructions, however, fundamentally explain the operation The model number and serial number of this product can be found on either the back or the bottom of the unit. Please note them in the space provided them for future reference.
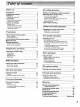
Before use Recording Precautions .............................. Supplied accessories ...................... Installation ............................... Stacking the components Connections ............................. 7 ............................. 8 Optional antenna connections ......................... External unit connection .............................. Location 4 6 7 of controls ....................... Amplifier section ....................................
Before using this unit please read these operating instructions carefully. Take special care to follow the warnings indicated on the unit itself as well as the safety suggestions listed below. Afterwards keep them handy for future reference. 3. 1. Power Source--The unit should be connected to power supply only of the type described in the operating instructions or as marked on the unit. 2.
Listening caution We Want You Listening For A Lifetime Selecting fine audio equipment such as the unit you've just purchased is only the start of your musical enjoyment. Now it's time to consider how you can maximize the fun and excitement your equipment offers. This manufacturer and the Electronic Industries Association's Consumer Electronics Group want you to get the most out of your equipment by playing it at a safe level. One that lets the sound come through distortion--and, hearing.
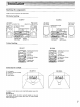
Please sories. [] check [] AC power supply cord For U.S.A.: (SJA172-1) For Canada: (SJA172) and identify ....................... [] Remote control transmitter the supplied acces- 1 pc. [] Speaker cords ............................. (For model SC-CH717: (For model SC-CH515: .................... 1 pc. [] Remote control batteries ..................... Flat cable [] (Long) .................................... (REX0511 ) 1 pc. [] (Short) .................................... (REX0512) 1 pc.
Stacking the components Install the various components Horizontal as shown below.
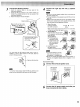
ST-CH505 _L-CH515 E-CH717 - SE-CH515D For SC-CH717 Connect the FM indoor antenna. Install the antenna on a wall at a height, Connect the flat cable. Adhesive 1. Connect the shorter flat cable and in a direction, which results in the best reception. Disconnecting Connecting only to the terminal of the tape FM indoor antenna (included) tuner/sound processor and amplifier. 2. Connect the longer flat cable to the terminal of the tuner/sound processor, compact disc changer, and cassette deck.
_ _ !i!_ _!_, !_ _!!_i!! i_ _!_!_!i__!_i_i !!i!,z!!! __ i!!_i_ i!!_!!!!i_!_!_ _!i!_z_i! !_!!!!!!!_ i!¸i_i_i!_! _!ii_ii!!!!_!i!!i!_i_i !!i!!!!_!!i!iiiiiii_!_ !!iiii_i_!! !!_!iiii!_!_! _iiiiiiii_!_! !iiiiiiii_ !!i!iiiii!_!_ !iii!ii!iii_i i!i!i!i!i!i_iz!_i !!i!i! _ _:_ _iiiiiii_iiiii _iiiiii_iiiiiiiiiiiiiiiiiiiiiiiii iiiiiiiiiiiiiiiiiiiiiiiiiiiiiiiiiiiiiiiiiiiiiiiiiiiiiiiiiiiii iiiiiiiii_iiiiii_iiiiiiiiiiiiiii_i ii_i iiiiii!iiiiiiiiiiiiii_!iiiii!iiiii!ii!iiiiiii!iiiiiii_ iiiiii_iiiii_iiiii_i iiii_iiii_ii Co
Optional antenna FM outdoor connections antenna AM outdoor (not included) If the FM indoor antenna does not provide satisfactory FM broadcasts, use an outdoor antenna. reception of You may need an outdoor antenna if you use this system in a mountainous region or inside a reinforced-concrete building, etc. An outdoor antenna should be installed only by a competent technician.
_ _ _:_:_ : __ _:::__::::_ _ _:_:_:_ __:_=::_:_: _:::::::::: __::::::::= _:=:::_:::_:_: : _:_:_! _!:::__:_ _:z_: ___zz __ _ __ ____ _____ ____:: _:::::_........................
The functions indicated by the numbers with black background (for example O) can also be activated from the remote control transmitter. (See pages 54-55.) ) II Amplifier Tuner/sound section No. Name _D Power "STANDBY _/ON" switch (POWER, STANDBY PO/ON) Ref. page (_ 16 Press to switch the unit from on to standby mode or vice versa. In standby mode, the unit is still consuming a small amount of power. (_ No.
z: SL-CH515 Compact RS-CH404 disc changer No. Cassette section Name Ref. page _0) Disc buttons (DISC 1, DISC 2, DISC 3) Stop button (D) _) Skip/search buttons ( ,_=-/_ , _._/_,_ ,-SKIP/-SEARCH) Only the skip function transmitter. (_ Loading drawer open/close (_ OPEN/CLOSE) No. Ref.
Battery installation Correct method of use Insert the batteries with this unit as shown below. Use two UM-4 "AAA", IEC R03 (1.5 V) or equivalent batteries. Tuner/sound processor 7m 30 ° t Insert the batteries in the correct polarities ((_, O). To remove the batteries, pull out the (_) side. Operation Use of batteries eDo not mix old and new batteries, or batteries of different types (carbon and alkaline, etc.).
Using the multi-control buttons, the following operations can be performed. When operating, the display shows which buttons are available for the operation. • Clock/timer settings eTuning or presetting the radio station eSelecting or adjusting the EQ or SPACE mode The chart below shows the display each operation. and the available buttons for For your reference: When you press and hold V.BASS, the display will change alternately showing the display example when the multi control buttons are used.
F CLOCK/ TIMER 2 (0., I This is a 12-hour display clock. ,/ \ CLOCK/ TIMER O These instructions explain 3-5 how to set the time for 6:25 p.m. on Wednesday. (_ Press "25". POWER STA,OBV S_N Switch on the power on the amplifier. TIMER CLOCK/ % Q Press CLOCK/TIMER lect "CLOCK". I--I /._ /._ 4, I'-I1--11 I I /._ ' 41 or 111: I--. • "-/I-- /1",_ "_l/ to select 4"---I'-L.SE_Ec_ ............ (_) Press SET to finish setting the time.
This feature allows you to set broadcast frequencies into the memory. You can then easily retrieve any of those broadcast frequencies by pressing • or II,, on the tuner/sound processor. Automatic memory presetting F The frequencies of the selected broadcast stations are automatically preset (in sequence from lower to higher frequencies) into the memory: "channels" 1 to 39 are available for the presetting of FM stations, "channels" 21 to 39 are available for AM stations.
Manual memory presetting This feature allows you to manually preset stations into any desired channel• o_ -_: 3.5 2 1 4 This example channel 1. shows how to memorize FM 88.1 MHz into preset Automatic scanning: Press and hold • FM or AM. Each you press TUNER/BAND, Presstime TUNER/BAND to select _ "FM", "AM" will appear in order. 2 or • until the displayed frequency begins to change.
Sequential play Sequential play refers to play all tracks on the loaded discs in sequence beginning with the first track of the first disc and continuing in order to the last track of the last disc. (---_-_| _ ='1 2,,4 5 r ! _J 6 T ©o,spL,, Currently playing track number POWER STANOaV _ Switch on the power on the --_ playing ,-_.'-' Currently disc I D Elapsed time S_N amplifier. (--&OPEN/ _LOS ] LOSE Press A OPEN/CLOSE open the loading drawer.
To select the desired discs oDo not cover the hole or slits. Otherwise the incorrect operation will take place. aDo not insert another disc onto tray placed at (_), although the tray is partially showing, its disc is in the play position. Press ____ to DISC select 1, DISC the disc 2 or DISC which 3 you want to play. The play will automatically start from the first track of the disc you select. To confirm O currently the total playing time of the disc playing Press DISPLAY.
='1 / j 0 0 0 0 0 o -SKIP/--SEARCH i<1<1/<1<1 IDt_/I_H Skip function Repeatfunction -SKIP / --SEARCH This function repeats the play of all tracks on the loaded discs. EPEAT REPEAT Press REPEAT before or during play. 3'-._ 3 _ _ - I-'). '" Press either ,-,-/,-_ or _,1_ until you reach the desired track. : To skip forward You can skip as many tracks as the number of times you press the button. ' I,il
_ii!i_ii_i_i_i_i_i_i_i_i_i_!_i_!_!_i_i_i_ii_iii_i_ii_i_i_i_i_i_i_i!i_i_i_i_i_i_i_i!i_i_i_;i_i_i!_i_i!i!i_i_i_!i!i!i_i!_i_i_i!i!i!i_i_i_i!i!i!_!i_i_:_i_i!iii!i!i_i_i_!i!i_!ii!ii_i_!_!i_i!i!i!i!ii_i_i!i!i_i!i!i!i!i_i!_!i!i!i!i!i!i!_!_i!i!i!i!i!_!i!_!i!i!i!i!i!i!i!i!i!i!i!i!i!i!i!i!i!i!_i!i! _i_:_iiiiiiiii_ii_iiii_iiiiiii_i_i_i_i_i_ii_;i_i;i_ _i_i_i;ii_!i!;i;_iiiiii;iii_;iiiii;i;iiiiiiiiiiii Program (Available play only from the remote allows you to program This function disc(s) in any order control) u
When "F" appears on the display: The number of programmed tracks is limited to 24. No further tracks can be programmed. When " : "appears on the display: The total playing time of the programmed' tracks has exceeded 99 minutes 59 seconds, However, programming and play are still possible. To clear a programmed track one by one: 1. Press CANCEL. CANCEL indicator will light. 2. Press DISC. 3. Press a numeric button (1-3) to specify the disc which contains the track you want to cancel. 4.
Direct Random access play play (Available only from the remote control) Direct access allows you to start sequential play from a specific track on a specific disc and to play all discs loaded in sequence. The changer will randomly choose a track from a randomly selected disc. Once the changer has played the selected track, it will make another selection at random, (No tracks will be repeated.) excluding the tracks already played.
Manual tuner operation Memory JII tuner operation Switch on the power and be sure you've completed the steps of "Automatic memory presetting" on page 17 or "Manual memory presetting" on page 18. This example shows how to tune in to the preset channel 1. 1 4 2 3 (2222_ Q2222) POWER STANDBY S_N Switch on the power on the amplifier. FM or AM. Presstime Each TUNER/BAND you press TUNER/BAND, to select _ "FM", "AM" will be displayed .-, in order. J.-t _ (-j 4,J-)........ ,'/; .........
i!i!iii!i!i!: Playback You can use either deck 1 or deck 2 for tape playback. 2 45 3 6 You can use normal, chrome and metal tapes for playback. 1 7 I This page shows an example using deck The player plays one side only, and then the tape automatically stops. C",.__: The player plays both sides 1. POWER STANDBY STANO_BN _ Switch on the power on the 8 times, and then the tape automatically stops. C_.,_: The player plays both sides of the tape, then automatically stops.
! To find (TPS: the beginning tape program To fast forward of a program I .,_TPs) I : The tape will play from the beginning tune. Press <1<1(TPS) or (TPS) I_1_ while the tape is in the stop mode. : The tape will be fast forwarded. : The tape will be rewound. of the next J : The tape will rewind to the beginning of the present tune. Then the tune will play again. If the reverse side (<]) of the tape is playing: The reverse operation should take place.
_i_!::i:!_!ii_i_!_ii!_!_i_i_i_i_iii_ii_iiii_iiiiiiiiiiiii_iii_i_i_i;i_iii_ii_i_!_iiiii_!_ii_iiiii_i_iiiiiiiii_ii_i_i_i_iii_ii_i_i_i_i_i_i_i_i_i_i_ii_ii_i_i_i_iiiiiii_ii_ii_iiiiiiiiiiiiii_iiii_iiiiiiiiiiiii_iiiiiii_iiiiiiiiii_iii_ii_iiiii@iiiiiii_iiiii_iiii_ii_ _ _ii_iiiii_iiii_ii_iiii_iiii_i_ii!iii!iii_iiiiiiii_ii_iii_iiiiiiii@_iii_i_ii_i_i_iii_i_i_i_iii_iiiiii_i _'iiiii_iii@iii_i_iiiiiiiiiiiiiiiiii_ii_i_i_i_ i_i_i_i_i_i_i _:_/:_.
TUN EI_I3ANO Q OOOO OOOO OOOO I SE-CH717 _" 0000 _ooo 0o0o o00o MUTING O' SE-CH51F.. 5D 66 0000 ! G'N 6 C:Z3CZ3 _J To mute the volume Easy play (Available only from the remote From the power standby condition, control} (Available only from the remote control) Press MUTING -20 dB. MUTING you can start play directly. _ Listening to compact discs (_ _LUME - STEREO MULTI CONT_L _--TUNING O #-'_. The playI_. will start from the first track, Press Lights.
Check that the tape's erasure prevention tabs (see page 57) are intact, and then insert the cassette into deck 2. The leader tape must be wound on beforehand. (See page 31 .) CCR_,O_\1/ " _ Press OPEN on deck 2 to load a _ cassette. Press CCRT to activate the CCRT Tuning--see (Computer Control cord page Re31) function. • _"---- TUNI_m ;1¢ L-IL-t , .... F_E_¢-T'T l 2 --- .... VOLUME MULXlCONTROL ! Press CLOSE on°ec. 2to close the cassette holder. .
To stop recording: _] Press 13. To cut an unnecessary part while recording: 1. Press REC PAUSE. The cassette deck will go into the recording standby state. 2. To resume recording, press <3 or D corresponding to the direction in which recording is taking place. CCRT recording function: CCRT (Computer Control Record Tuning) is the function which identifies the quality of the tape (concerning bias, level, equalizer) automatically and sets the most desirable recording condition.
About Dolby Noise Reduction system Using Dolby NR reduces tape hiss in the high-frequency range. It boosts the level of the high-frequency during recording, and lowers it by the same amount during playback, simultaneously reducing highfrequency interference incurred during the recording process. This system has the Dolby B-type of noise-reduction system. With Dolby B NR, the noise is reduced by 10 dB at high frequencies.
There are 2 ways to record from compact discs, one-touch and synchro-recording. See below for the information. editing Tape allotment Use this procedure The system calculates the length of the tape used, and safeguards against a break in the continuity of sound when the recording changes from one side of the tape to the other.
One-touch editing preparation To start one-touch You can use normal, chrome, and metal tapes for recording. Check that the tape's erasure prevention tabs (see page 57) are intact, and then insert the cassette into deck 2. There are 3 types of one-touch editing. Be sure to finish the procedure paration" on the left. _.,_:=:_.:oj___, 5 34 2 1 editing of "One-touch editing pre- o_q O,,., Q,L.,. O,,S,,,o. --....
Closing (LAST up the tape-end unrecorded To record with desired tone quality: sections Select the desired tone quality (see pages 42-44), FADE) To play back such recordings, processor to set to FLAT. You can specify I procedure. Lights. steps 2-3 of Use this editing mode when you record the tracks numbering higher than 24. You can edit the desired tracks of the desired disc(s) using this editing mode. (See "Program edit recording" and start editing.
Program edit-recording (LAST FADE mode only) You can record the desired tracks of the desired disc(s) on the CD tray using LAST FADE mode. _--_'R_I _ ,o 5 5]_ =_ [oooo 2 o,,_:::=_:_.°oJlo _ F -.o...o...o...o. o-=;J 00(=)0 C)OO0 C)O00 L 3 O0 CZ) OOOOC__l O °°l 8 The cassette deck will automatically rewind the tape back to the beginning where the recording can be made. So you don't have to rewind the tape in advance. 1 Repeat steps 4-6 to complete the program.
Linking up several discs (LINK) When "LINK" indicator flashes after the edit-recording of loaded disc(s) has finished, you can subsequently edit-record the same or another disc(s) on the remaining blank portion of the tape. 1 ='1 I o_1 to,._=zm=_..OjL= _ o-. I • Finish the first edit-recording 2 o O of the loaded disc(s). To cancel the LINK function Press Iq. 1 _ Press OPEN/CLOSE to replace disc(s) and press it again. The time remaining on tape i,i,i i ' -,[.:_ Flashes.
Synchro recording You can use normal, chrome, and metal tapes for recording. I_---_,,_l ='1 _ [ 34 7 9 Lo,-_==_.._Io _ o_j 6 285 1 ,J J C::_ C:==) C::_ _( L, It--r-il ' 0 0 I. I. 0 I [] I -SKIP / --SEARCH Check that the tape's erasure prevention tabs (see page 57) are intact, and then insert the cassette into deck 2. The leader tape must be wound on beforehand. (See page 31 .) _ Press OPEN to load a cassette in deck 2. 8 Press REC PAUSE.
You can use normal, chrome and metal tapes for recording. The recording level and the noise reduction effect of the original (playback) tape will be recorded on the new tape just as they were in the original recording. 1 2 3 546 1 I ='1 I II,- I d • O1-DECK-20 Press INT on the tuner/sound processor to select "TAPE". Check that the tape's erasure prevention tabs (see page 57) are intact, and then insert the cassette into deck 2. The leader tape must be wound on beforehand. (See page 31 .
(For SC-CH717 only) I DISPLAY Changing the output level display RANGE Changing The display will change in 3 steps. Select the desired display. level scale Change the output level scale of the source you are listening to. RANGE DISPLAY the output Press DISPLAY. Press RANGE. Each time you press RANGE, the display will change as follows: Each time you press DISPLAY, the display will change as shown in the illustration. ® 4 AMP -., I I @ u. _ METER Xl I'_ _ "7 u.
About equalization curves (EQ) Use this sound mode when you want to change the tone according to the type of music. There are 5 equalization curves preprogrammed to this system. (See page 42.) About simulated (SPACE) listening environments Use this sound mode when you want to create the "live" manGe sound. perfor- There are 3 simulated listening environments system. (See page 43.
iiiii_iiiiiiiii2ii_i_ii_i_i_i_i_i_ii_i_i_iii_ii_i_i_i_i_i_ii_i_i_iiii_i_i_iiii_i_i_%iii_i_;i_iiiiiiii_i;_ii_i_ii_;ii_iii_i_;!_ii_ii;_;i_iiiii_i_i_ii_iii_ii_ii i:i:i;i;iii_ii_ _i:iii;i_ii_iii_ _ii_®iiiii_iiJ_i_iiii_i_i_iiiiii_i_ii_i_iiii_i_i_iii_i_i_iiiiiiiiiiii_@i_i_i_@_ii_iii_1_i_iiii_ iii_J_®iiiii_ To retrieve the preprogrammed 5 types of equalization _'---_-_1.. _ equalization curves are preprogrammed =/ curves (EQ mode) to this system. 3 I ..I O0 ONIFt.AT 2.
To retrieve the preprogrammed 3 types of simulated listening environments simulated are preprogrammed listening environments (SPACE mode) to this system. J/I 1.2 3 / rl oO ON/FLAT 1 MODE Press MODE to select SPACE moOo. Each time you press MODE, EQ and SPACE mode will be alternately switched. About the pre-programmed environments simulated 1. DISCO Use to create powerful bass sounds found in discos. I-- I-- TI 7"1 L..U • 4 _'LEF_C -LsEL_CT T vol.uueuuL*n CO.TnOL1 L .£t .m .
To adjust ("USER" EQ and SPA CE mode) To listen with augmented "---_-_,_1.. _ bass (V.BASS) ='11 You can adjust equalization curves and simulated listening environments as you like, and store them as the USER mode in its memory. _L_-_ _t_ '-_ o'_ °__zJ 2 --.., O0 V.BASS O0 0 V.eASS Select the equalization curve or simulated listening environment of which you want to adjust the tone. Press V.BASS to ON. (_ VOtUMEMUL_ICONTROL L .U I-- I I-- L L L.
Make sure that you have completed "Setting the time" on page 16. About the types of timer operation There are 3 types of timer operation. You can use below timer modes in conjunction. See page 51 for details. Play timer (see pages 46-47): Select this timer when you want to use the timer as an alarm clock. You can wake up with listening to music (CD, tuner, tape) at a desired volume level and time. _:30 a.m.,pl_ay [ a CD with a little _,_der Record timer volume._ j..
Setting the play timer c_o_K/2 3.-6 TIMER (0"" 8 1 @) / oo [] PLAY 0 The followin 9 e×ample shows how to set the play timer for; playing a _) CO at -46 dB everyday from Monday through Friday 6:30 a.m. to (_)Press • or • minutes. to select the 7:40 a.m. VO,UMe oo_//( -_\\,__ Adjust the volume level for the / i \ timer play on the amplifier. (]) Press SET. CLOCK/ TIMER % (_Press CLOCK/TIMER three times to select [] PLAY.
_) (_ Press or • to select the desired_1source, L -L / I-- 7"/ o. .ui \ _L,,__=__ ...... CLOCK/ TIMER % To confirm the play timer: Press CLOCK/TIMER to show [] PLAY on the display. 17"1 I--I I f-I I I 4 =Ut_ CONT ROk J (_ Press SET, When you select tuner, select a desired preset channel using <1 or I_, and then press SET. The display will show the ON time, OFF time, the source you select, and the volume level in 2 second steps.
Setting the record timer c,oc_l 2~5 TIMER 7 / r_REC 0 The following example shows how to set the record timer for; recording FM preset channel 1 on Saturday from 8:30 p.m. to 10:00 p.m. 4 c,oc_ TIMER O Press CLOCK/TIMER twice to select [] REC. ,........... t.J_ I_ __ H_. ...... ,r,_.?c ,- 4, _ (_ ':--" _, I % 2_ _ - 4, SET. O Press • day. [,;,;f or • to select the [ ,'-"1;,- , m. ,-/;-', :"- _,o _ ........... ] ,,],. _ ,,_, (_) Press SET. <.
Q Press < or • to select the desired preset channel. ,',.', 4, CLOCK/ TIMER To confirm % Press CLOCK/TIMER the record timer: to show [] REC on the display. MULTiCONmOL n-,,'-,,,I--" t_ % IW I-r ,_ S_LEC, Q Press SET. Prepare recording. 1. Insert a for cassette into deck The display will show the ON time, OFF time, the broadcast band you select, in 2 second steps. 2. 2. Select the Dolby NR. 3. Select the reverse mode. 4. Select the tape travel direction.
To use the sleep timer _'qb_ c_ use _._,\s_\me_ _£_\_r_ \e sw_\ch _.hepower to the standby mode at a specified time (within a range of 1 minute to 120 minutes from the present time). J,I CLOCK/ 2 1 SLEEP Q2) T|MER 0000 0000 0000 0000 0000 0000 J 0000 0000 C5_<559 O0 The following example mode after 30 minutes. shows how to set the system to standby CLOCK/ TIMER While enjoying the desired source: 1 clocK/ TIMER (_)Press CLOCK/TIMER four 41, I-- I--I--I 4 -" "- '-- '- "" --*_'_" .....
To use each timer mode in conjunction To go to sleep listening the next morning and record out from to a tape, listening a radio and wake to a compact broadcast up disc, Timer sequence of priority: S_eep timer, record timer, play timer is the timer operation of priority in order. Be sure not to make each timer setting overlap. while going Example 1: 11:30 p.m. SLEEP TIMERI REC TIMER_ 12:00 a.m. 1. Make a record timer setting. (See pages 48-49.) 2. Make a play timer setting for a compact disc.
This function mutes the vocal track but leaves the accompaniment allowing you to enjoy "KARAOKE" (singing with an accompaniment). ='11 1 4 1 4 f 3 ) H SE-CH515D KARAOKE Plug type: M6 monaural type When R ONLY lights: Press once. To record your "KARAOKE" 3 Press KARAOKE to ON. "VOICE MUTE", "L ONLY", "R ONLY" and light off (FLAT) will be displayed, in order, each time you press KARAOKE. VOICE MUTE You can use a normal CD. L ONLY or R ONLY You can use a sound multiplex CD, or CD graphics.
,/ Listening to an external source _U_ Start playing the source to be recorded. See the instruction You can connect DCC (or DAT) or analog turntable to this system. concerned manual of the unit for operating instructions. The following example shows when you select DCC. EXT 1 % To stop recording: Press EXT to select the external source. Press [] on the cassette deck. O IlL L 7"// I--I / I'-/ T F" L I"t i REC PAUSE .
iiiii!ii!ii!iiii_!_,!iiii_i_!:i!iii_! ¸!i!!ill _:ii!_iii '_:_ :.Li:i_iiiiiiii_iL:_:_ ,,:,:::::i_ _::=:_:_:_ 0 f ,'.'_,o-o.:o | _ I_BD OOOO 0000 _'5_ OOOON OOO01 ooooi .(_.o o o I -_ooo _0]o,'.0]o 0000 0000 (_S)CZ) k.
r .Q,bo_ QO_Q 1 ,0 0 0,01 I0 0 0"0_ QO00 0000 OOOO ,.o..o..o..9., I I 0000 0000 0000 Q _Z) C) CZ) 0 CZ) C_ CZ) ooo[_ OO oooi CD (ZD Tone control Tape section 1_ Finding the beginning of a (_ rewinding listening environment or off (_(_ Fast forwarding or section © ON_LAT O on Switching between PRESET and USER mode Press and hold.
Only compact discs having this mark can be used with this unit. _I-ICOMPAIElr' If the disc is brought dIGITAL AUDIO To remove a disc from warm environment, on the disc from a cold to a moisture may form its case Wipe this moisture off with a soft, dry, }int-free cloth before using the disc. Press the center holder and lift the disc holding it by the edges.
i_iiiiiiiii@ Maintenance of external surfaces To clean this unit, use a soft, dry cloth. If the surfaces are extremely dirty, use a soft cloth dipped soap-and-water solution or a weak detergent solution. Selection of cassette Wring the cloth well before wiping the unit. Wipe once again with a soft, dry cloth. Never use alcohol, paint thinner, benzene, or chemically treated cloths to clean this unit.
Before requesting service for this unit, check the chart below for a possible cause of the problem you are experiencing. Some simple checks or a minor adjustment on your part may eliminate the problem and restore proper operation. If you are in doubt about some of the check points, or if the remedies indicated in the chart do not solve the problem, refer to the directory of Authorized Service Centers (enclosed with this unit) to locate a convenient service center, or consult your dealer for instructions.
J Problem J Probable cause(s) When there is a television Suggested remedy J set nearby The picture on the TV disappears or stripes The location and orientation incorrect, of the antenna are appear on the screen. The wiring at the back of the system is unsuitable. If you are using an indoor antenna, change to an outdoor antenna. Separate the antenna wire of the TV set from the system. While listening to tapes Sound is low, intermittent, Heads are dirty. Clean the heads.
TUNERISOUND PROCESSOR • section Pre-amplifier 120v, AC60 Hz Power supply Dimensions (Wx H x D) (SC-CH717) Input sensitivity/impedance AUX, DCC Output level DCC RECOUT 250 mV/15 k_ (SC-CH515) 150 mV/1.5 k_ Weight (SC-CH717) Frequency response AUX, DCC 30 Hz-20 270x 118.5x335 (105_'x421/32"x 133/16") 270x 118.5x336 mm (105/8"x 421/32"x 137/32") 5.3 kg (11.7 lb.) 5.1 kg (11.2 lb.) kHz (SC-CH515) • EQ, SFP section Center frequency Fixed mode SPACE GEQ • 80, 250, 1 k, 4 k, 12.