
Operation Manual


1
Remove any bones and cut food
into 1-2cm (
1
⁄2-1”) cubes.
2
Fit the rubber ring base
bt
o
n the
b
ottom of the chopper bowl. (This
stops the bowl sliding on the
w
orktop.)
3
Fit the chopper blade over the pin
in the bowl
3
.
4
Add your food.
5
Fit the chopper cover, turn and lock
4
.
6 Fit the power handle to the
chopper cover
5
- turn clockwise
to lock.
7 Plug in. Hold the bowl steady. Then
press the Turbo button.
Alternatively press the Turbo button
in short bursts to achieve a pulsing
action.
8 After use, unplug and dismantle.
EE
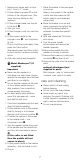
Metal Masherpro™ (if
supplied)
important
G
Never use the masher in a
saucepan over direct heat. Always
remove the saucepan from the heat
and allow to cool slightly.
G
Do not tap the masher on the side
of the cooking vessel during or
after mashing. Use a spatula to
scrape excess food away.
G
For best results when mashing
never fill a saucepan etc., more
than half full with food.
1 Cook hard vegetables and fruit and
drain first before mashing.
2 Fit the masher collar to the masher
shaft by turning in a clockwise
direction until it locks in position
6
.
3 Fit either the coarse or fine screen
to the masher shaft – turn
clockwise to lock
7
.
4 Turn the masher upside down and
fit the paddle over the central hub
and turn anti-clockwise to secure
8
.
(If the collar is not fitted
then the paddle will not
secure in place).
5 Fit the power handle to the masher
assembly - turn clockwise to lock.
6 Plug in.
7
Place the masher in the saucepan
or bowl etc.
S
elect a low speed on the variable
c
ontrol and then press the ON
button (refer to recommended
u
sage chart).
G
M
ove the masher in an up and
down movement throughout the
m
ix until the desired result is
a
chieved. Increase the speed if
required.
8 After use release the ON button
and unplug.
9 Turn the power handle
anticlockwise and remove the
masher assembly.
10Remove the paddle from the
masher by turning clockwise.
11Remove the screen by turning anti-
clockwise
9
and then lift off.
12Unscrew the collar from the masher
shaft.
optional attachment (not
supplied in pack)
Mini chopper - refer to “service and
customer care” section to order.
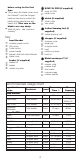
care and cleaning
G
Always switch off and unplug
before cleaning.
G
Do not touch the sharp blades.
G
Some foods, eg carrot, may
discolour the plastic. Rubbing with
a cloth dipped in vegetable oil may
help to remove discolouration.
G
Do not use abrasives.
7