
Owner's Manual


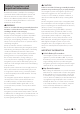


Table Of Contents
- Quick Start Guide
- Instruction Manual (Downloaded from Kenwood Website)
- Resetting the Unit
- What Do You Want To Do?
- Table of Contents
- Before Use
- How to Read this Manual
- Basic Operations
- DVD/Video CD (VCD) Operation
- CD/Audio and Visual Files/iPod/App Operation
- Radio and HD Radio Tuner Operation
- SiriusXM Operation
- Bluetooth Control
- Setting Up
- Controlling Audio
- Remote control
- Appendix
- Troubleshooting
- Error Messages
- Specs
- GPS Navigation Instruction Manual (Downloaded from Kenwood Website)
- Table of Contents
- Getting Started
- Finding Locations
- Finding a Location by Category
- Searching Within a Category
- Finding a Location Using the Search Bar
- Changing the Search Area
- Finding Fuel Stations and Prices
- Finding an Address
- Finding a City
- Finding an Intersection
- Finding a Location Using Coordinates
- Finding a Location by Browsing the Map
- Find a Location Using Quick Search
- Saving a Home Location
- Going Home
- Editing Your Home Location Information
- Finding Recently Found Places
- Clearing the List of Recently Found Places
- Finding Parking
- Setting a Simulated Location
- Saving a Location
- Saving Your Current Location
- Starting a Route to a Saved Location
- Editing a Saved Location
- Assigning Categories to a Saved Location
- Deleting a Saved Location
- Navigation
- Starting a Route
- Previewing Multiple Routes
- Following a Route
- Using the Navigation Map
- Adding a Point to a Route
- Taking a Detour
- Stopping the Route
- Using Suggested Routes
- Using Exit Services
- Finding Exit Services
- Navigating to an Exit
- Using Find Ahead
- Avoiding Road Features
- Adding a Custom Avoidance Area
- Avoiding a Road
- Disabling a Custom Avoidance
- Deleting Custom Avoidances
- Enabling Advanced Detours
- Taking a Detour Around Specified Areas
- The Map Pages
- Customizing the Map Layers
- Viewing the Trip Log
- Changing the Map Data Field
- Changing the Map Perspective
- Customizing Map Buttons
- Removing Buttons from the Map
- Viewing a List of Turns
- Viewing the Entire Route on the Map
- Viewing the Next Turn
- Viewing Junctions
- Viewing Traffic Alerts
- Viewing Trip Information
- Resetting Trip Information
- Viewing Current Location Information
- Finding Nearby Services
- Directions to Your Current Location
- Using the Apps
- About the Apps
- About ecoRoute
- Creating a Vehicle Profile
- Resetting Your Vehicle Profile
- Calibrating Fuel Economy
- Taking the ecoChallenge
- About ecoChallenge Scores
- Hiding Your ecoChallenge Score
- Resetting Your Score
- Viewing Your Fuel Economy
- About the Mileage Report
- Viewing a Mileage Report
- Exporting a Mileage Report
- Setting Routes that Use Less Fuel
- Viewing the Weather Forecast
- Viewing Weather Near a Different City
- Viewing the Weather Radar
- Viewing Weather Alerts
- Checking Road Conditions
- Planning a Trip
- Editing a Trip Itinerary
- Navigating to a Saved Trip
- Editing a Saved Trip
- Viewing Previous Routes & Destinations
- Using the World Clock
- Viewing the World Map
- Using the Calculator
- Finding Parking
- About Real-Time Traffic Cameras
- Traffic Information
- Understanding Traffic
- Traffic Data Using INRIX Traffic Service
- About the Traffic Icon
- Traffic on Your Route
- Viewing Traffic on Your Route
- Manually Avoiding Traffic on Your Route
- Taking an Alternate Route
- Viewing Traffic on the Map
- Searching for Traffic Delays
- Viewing a Traffic Incident on the Map
- Understanding Traffic Data
- Customizing the Settings
- Appendix
- Caution for Smartphone Users

10 ñ English
How to insert an SD Card/
microSD Card
DNX8
DNX7
1) Press <G> button for 1 second.
2) Hold the SD card with the label facing up,
and insert it into the slot until it clicks.
0
Labelled side
DNX6
DNX5/4
1) Hold the microSD card with the label side
facing right and the notched section down,
and insert it into the slot until it clicks.
Ñ Eject an SD Card/ microSD Card
1) Push the card until it clicks and then remove
your finger from the card.
2) The card pops up so that you can pull it out
with your fingers.
Common Operations
Ñ Popup menu
1 Press the
DNX8
DNX7
<MENU> button/
DNX6
DNX5/4
Volume knob.
Touch to display the popup menu. The contents of
the menu are as follows.
: Displays the Screen Adjustment screen.
: Turns the screen off.
: Displays the display view.
: Turn on or off the external device power supply.
(DNX892, DNX7150BT only)
: Displays the SETUP Menu screen.
: Displays the Audio Control Menu screen.
: Displays the control screen of current source.
Icon feature differs depending on the source.
Ñ General
There are some functions which can be operated
from most screens.
(Graphic Equalizer)
Displays Graphic Equalizer screen.
[6] (RETURN)
Returns to previous screen.
(Common menu key)
Touch to display the common menu. The contents
of the menu are as follows.
: Turn on or off the external device power supply.
(DNX892, DNX7150BT only)
: Displays the SETUP Menu screen.
: Displays the Audio Control Menu screen.
: Displays the control screen of current source.
Icon feature differs depending on the source.
: Closes the menu.