Top-Freezer Refrigerators www.Hotpoint.com Safety Instructions . . . . . . . . . .2–4 Operating Instructions Additional Features . . . . . . . . . . . .9 Automatic Icemaker . . . . . . . . . .10 Controls . . . . . . . . . . . . . . . . . . . . .5 Crispers and Pans . . . . . . . . . . .8, 9 Shelves and Bins . . . . . . . . . . . .6, 7 Care and Cleaning . . . . . . .
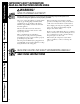
Safety Instructions IMPORTANT SAFETY INFORMATION. READ ALL INSTRUCTIONS BEFORE USING. WARNING! Use this appliance only for its intended purpose as described in this Owner’s Manual. SAFETY PRECAUTIONS When using electrical appliances, basic safety precautions should be followed, including the following: Operating Instructions ■ This refrigerator must be properly installed and located in accordance with the Installation Instructions before it is used.
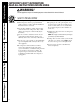
DANGER! RISK OF CHILD ENTRAPMENT PROPER DISPOSAL OF THE REFRIGERATOR Before You Throw Away Your Old Refrigerator or Freezer: Refrigerants All refrigeration products contain refrigerants, which under federal law must be removed prior to product disposal. If you are getting rid of an old refrigeration product, check with the company handling the disposal about what to do. ■ Take off the doors. ■ Leave the shelves in place so that children may not easily climb inside.
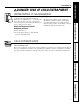
WARNING! HOW TO CONNECT ELECTRICITY Do not, under any circumstances, cut or remove the third (ground) prong from the power cord. For personal safety, this appliance must be properly grounded. The power cord of this appliance is equipped with a 3-prong (grounding) plug which mates with a standard 3-prong (grounding) wall outlet to minimize the possibility of electric shock hazard from this appliance. Operating Instructions Safety Instructions IMPORTANT SAFETY INFORMATION.
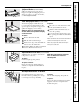
www.Hotpoint.com The controls on your refrigerator will look like one of the following: Safety Instructions About the controls on the refrigerator. Operating Instructions Installation Instructions Control Settings Initially, set the control(s) at 5 (some models have only one control). Allow 24 hours for the temperature to stabilize. Several adjustments may be required.
Safety Instructions About the shelves and bins. Not all features are on all models. Rearranging the Shelves Shelves in the refrigerator and freezer compartments are adjustable. Refrigerator Compartment Tilt the shelf up at the front. Some models have wire shelves that can be adjusted in the same manner. Lift the shelf up at the back and bring the shelf out. To replace: While tilting the shelf up, insert the top hook at the back of the shelf in a slot on the track.
Spillproof Shelves (on some models) Spillproof shelves have special edges to help prevent spills from dripping to lower shelves. To remove or replace the shelves, see Rearranging the Shelves. Safety Instructions www.Hotpoint.com Slide-Out Spillproof Shelf (on some models) To replace: Place the rear of the shelf on the shelf frame just behind the front bar. Slide the shelf back until the tabs are above the openings. NOTE: The shelves are shipped with tape on the back.
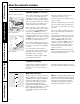
Not all features are on all models. Fruit and Vegetable Crispers Excess water that may accumulate in the bottom of the drawers or under the drawers should be wiped dry. Operating Instructions Safety Instructions About the crispers and pans. Adjustable Humidity Crisper (on some models) Slide the control all the way to the HIGH setting to provide high humidity recommended for most vegetables. Slide the control all the way to the LOW setting to provide lower humidity levels recommended for most fruits.
www.Hotpoint.com Not all features are on all models. Crisper Removal Unload the bottom shelf before attempting to remove the storage drawers. To Remove: Operating Instructions Lift the drawers up slightly while pulling them past the stop location. If the door prevents you from taking out the drawers, first try to remove the door bins. If this does not offer enough clearance, the refrigerator will need to be rolled forward until the door opens enough to slide the drawers out.
Safety Instructions Operating Instructions Installation Instructions About the automatic icemaker. A newly-installed refrigerator may take 12–24 hours to begin making ice. Automatic Icemaker (on some models) There are 2 types of icemakers: Power Switch Icemaker The icemaker will produce approximately 3 to 31⁄2 lbs. of ice in a 24-hour period, depending on the freezer compartment temperature, room temperature, number of door openings and other use conditions.
www.Hotpoint.com Cleaning the Outside The door handles and trim. Clean with a cloth dampened with soapy water. Dry with a soft cloth. Cleaning the Inside To help prevent odors, leave an open box of baking soda in the fresh food and freezer compartments. Unplug the refrigerator before cleaning. If this is not practical, wring excess moisture out of sponge or cloth when cleaning around switches, lights or controls. Do not wash any plastic refrigerator parts in the dishwasher.
Preparing for Vacation For long vacations or absences, remove food and unplug the refrigerator. Move the refrigerator control to the O (off) position and clean the interior with a baking soda solution of one tablespoon (15 ml) of baking soda to one quart (1 liter) of water. Leave the doors open. Set the icemaker power switch to the O (off) position or move the feeler arm to the STOP (up) position (depending on model) and shut off the water supply to the refrigerator.
Installation Instructions Refrigerator Models 18 and 19 If you have questions, call 800.GE.CARES (800.432.2737) or visit our Website at: www.Hotpoint.com BEFORE YOU BEGIN CLEARANCES Read these instructions completely and carefully. Allow the following clearances for ease of installation, proper air circulation and plumbing and electrical connections. • IMPORTANT – Save these instructions for local inspector’s use.
Installation Instructions INSTALLING THE WATER LINE BEFORE YOU BEGIN (ON SOME MODELS) WHAT YOU WILL NEED Recommended copper water supply kits are WX8X2, WX8X3 or WX8X4, depending on the amount of tubing you need. Approved plastic water supply lines are GE SmartConnect™ Refrigerator Tubing (WX08X10002, WX08X10006, WX08X10015 and WX08X10025). • Copper or GE SmartConnect™ Refrigerator Tubing kit, 1/4″ outer diameter to connect the refrigerator to the water supply.
Installation Instructions Install the shutoff valve on the nearest frequently used drinking water line. WHAT YOU WILL NEED (CONT.) • A GE water supply kit (containing tubing, shutoff valve and fittings listed below) is available at extra cost from your dealer or from Parts and Accessories, 800.626.2002. 1 SHUT OFF THE MAIN WATER SUPPLY Turn on the nearest faucet long enough to clear the line of water. • A cold water supply. The water pressure must be between 20 and 120 p.s.i. (1.4–8.1 bar).
Installation Instructions INSTALLING THE WATER LINE 4 FASTEN THE SHUTOFF VALVE (CONT.) 7 CONNECT THE TUBING TO THE VALVE Fasten the shutoff valve to the cold water pipe with the pipe clamp. Place the compression nut and ferrule (sleeve) for copper tubing onto the end of the tubing and connect it to the shutoff valve. Pipe Clamp Make sure the tubing is fully inserted into the valve. Tighten the compression nut securely.
Installation Instructions 9 CONNECT THE TUBING TO THE 10 TURN THE WATER ON AT THE REFRIGERATOR SHUTOFF VALVE Tighten any connections that leak. NOTES: • Before making the connection to the refrigerator, be sure the refrigerator power cord is not plugged into the wall outlet. • We recommend installing a water filter if your water supply has sand or particles that could clog the screen of the refrigerator’s water valve. Install it in the water line near the refrigerator.
Installation Instructions REVERSING THE DOOR SWING IMPORTANT NOTES 1 REMOVE THE FREEZER DOOR When reversing the door swing: • Read the instructions all the way through before starting. • Handle parts carefully to avoid scratching paint. • Set screws down by their related parts to avoid using them in the wrong places. • Provide a non-scratching work surface for the doors. IMPORTANT: Once you begin, do not move the cabinet until door-swing reversal is completed.
Installation Instructions 2 REMOVE THE REFRIGERATOR 3 TRANSFER TOP HINGE TO DOOR THE LEFT Tape the door shut with masking tape. Interchange hinge and screws at top right with screws at the top left of cabinet. Do not tighten screws on hinge side at this time. Remove the center hinge pin with a 3/8″ socket and ratchet. Plastic Washer Hinge Pin Center Hinge Bracket Fresh Food Door Remove the tape and tilt the door away from the cabinet. Remove and save the washer on the hinge pin.
Installation Instructions REVERSING THE DOOR SWING (CONT.) 5 TRANSFER CENTER HINGE 4 TRANSFER BOTTOM HINGE BRACKET TO THE LEFT BRACKET TO THE LEFT For models with a base grille, remove it by grasping it about 6″ from each end and pulling its bottom edge toward you. Remove the center hinge bracket by removing the three Torx® screws. NOTE: Keep these screws with the hinge bracket. They are long screws and will be used when installing the hinge on the other side.
Installation Instructions 7 TRANSFER REFRIGERATOR 7 TRANSFER REFRIGERATOR DOOR DOOR HANDLE TO THE RIGHT HANDLE TO THE RIGHT (CONT.) To remove the handle: Remove the plug button by carefully prying under the edge with a putty knife. Remove the exposed screw holding the handle. Transfer the door plug button to the opposite side. Handle Plug Reinstalling the handle: Attach the handle to the right side of the door. Button Remove the two screws holding the handle to the top of the door.
Installation Instructions REVERSING THE DOOR SWING (CONT.) 9 REHANG THE REFRIGERATOR 8 TRANSFER FREEZER DOOR HANDLE TO THE RIGHT DOOR Remove the screws holding the handle to the top and bottom of the door. Remove handle. Lower the refrigerator door onto the bottom hinge pin. Plastic Washer Straighten the door and line it up with the center hinge bracket. Reinstall the center hinge pin with a 3/8″ socket. Turn it until it extends through the hinge bracket and into the door.
www.Hotpoint.com Newer refrigerators sound different from older refrigerators. Modern refrigerators have more features and use newer technology. Do you hear what I hear? These sounds are normal. ■ The new high efficiency compressor may run faster and longer than your old refrigerator and you may hear a high-pitched hum or pulsating sound while it is operating. ■ You may hear a whooshing sound when the doors close. This is due to pressure equalizing within the refrigerator.
Safety Instructions Operating Instructions Installation Instructions Troubleshooting Tips Consumer Support Before you call for service… Troubleshooting Tips Save time and money! Review the charts on the following pages first and you may not need to call for service. Problem Possible Causes What To Do Freezer door pops open when refrigerator door is closed This is normal if, after popping open, the freezer door closed on its own. • This indicates that there is a good seal on the freezer door.
Possible Causes What To Do Automatic icemaker (on some models) does not work Icemaker power switch is not on. •On power switch models, set the power switch to the I (on) position. On feeler arm models, move the feeler arm to the ON (down) position. Water supply turned off or not connected. •See Installing the water line. Freezer compartment too warm. •Wait 24 hours for the refrigerator to completely cool down. Piled up cubes in the storage bin cause the icemaker to shut off. •Level cubes by hand.
Hot air from bottom of refrigerator Normal air flow cooling motor. In the refrigeration process, it is normal that heat be expelled in the area under the refrigerator. Some floor coverings will discolor at these normal and safe temperatures. Food freezing in the refrigerator Food too close to the air vent at the back of the refrigerator. • Move the food away from the air vent (near the controls). Refrigerator control is set too cold.
GE Service Protection Plus™ GE, a name recognized worldwide for quality and dependability, offers you Service Protection Plus ™—comprehensive protection on all your appliances— No Matter What Brand! Benefits Include: • Backed by GE • All brands covered • Unlimited service calls • All parts and labor costs included • No out-of-pocket expenses • No hidden deductibles • One 800 number to call We’ll Cover Any Appliance. Anywhere. Anytime.
Consumer Product Ownership Registration Dear Customer: Thank you for purchasing our product and thank you for placing your confidence in us. We are proud to have you as a customer! Follow these three steps to protect your new appliance investment: 1 2 3 Complete and mail your Consumer Product Ownership Registration today. Have the peace of mind of knowing we can contact you in the unlikely event of a safety modification. Read your Owner’s Manual carefully.
Safety Instructions Notes.
Consumer Support Troubleshooting Tips Installation Instructions Operating Instructions Safety Instructions Notes.
All warranty service provided by our Factory Service Center, or an authorized Customer Care® technician. To schedule service, on-line, 24 hours a day, visit us at www.Hotpoint.com, or call 800.GE.CARES (800.432.2737). Please have serial and model numbers available when calling for service. Staple your receipt here. Proof of the original purchase date is needed to obtain service under the warranty.
Consumer Support. Hotpoint Website www.Hotpoint.com Have a question or need assistance with your appliance? Try the Hotpoint Website 24 hours a day, any day of the year! You can also shop for more great Hotpoint products and take advantage of all of our on-line support services designed for your convenience. Schedule Service www.Hotpoint.com Expert Hotpoint repair service is only one step away from your door.