EN FRONT LOAD WASHER USE & CARE GUIDE FR LAVEUSE Á CHARGEMENT FRONTAL GUIDE D’UTILISATION ET D’ENTRETIEN ES LAVADORA DE CARGA FRONTAL GUÍA DE USO Y CUIDADO 157029280 August 2020
Important Safety Instructions Keep a record for quick reference The model and serial numbers of your washer are found on the serial plate located inside the door opening. Record and retain these numbers. Purchase date Electrolux model number Table of Contents Important Safety Instructions........................ 2 Features....................................................... 5 Operating Instructions.................................. 6 Controls and Settings.................................
Important Safety Instructions WARNING - RISK OF FIRE To reduce the risk of fire, electrical shock, or injury to persons when using this washer, comply with the basic warnings listed below. Failure to comply with the Important Safety Instruction warnings could result in property damage, serious personal injury, or death. WARNING Please read all instructions before using this washer.
Important Safety Instructions Prevent Injury • To prevent shock hazard and assure stability during operation, the washer must be installed and electrically grounded by a qualified service person in accordance with local codes. Installation Instructions are packed in the washer for installer’s reference. Refer to Installation Instructions for detailed grounding procedures. If the washer is moved to a new location, have it checked and reinstalled by a qualified service person.
Features 2 3 5 1 10 6 4 7 8 9 1. Control Lock 6. Cascading Wash Vanes 2. LED Display 7. Stainless Steel Wash Drum 3. Laundry Product Dispenser Drawer 8. Pump Filter Cleanout 4. Door Striker 9. Adjustable Leveling Legs 5. Inner Glass with Small Article Redistribution Ramp 10. Door Latch with Safety Lock As an ENERGY STAR® Partner, Electrolux Major Appliances has determined that this product meets the ENERGY STAR® guidelines for energy efficiency.
Operating Instructions Normal Operating Sounds You may or may not hear the following sounds from your new washer: A. DRAIN HOSE The washer has a flexible drain hose to carry water from the washer to the stand pipe of your home. You will hear water flowing into your stand pipe. This is a normal part of the operation of the washer. B. WATER VALVES/DISPENSER As water enters the dispenser system, it is common to hear a water flowing sound.
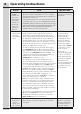
Operating Instructions STEPS TIPS 1. Sort laundry • Sort by recommended cycle and water into loads temperature. that can • Separate white, light, and colorfast items from dark be washed and non-colorfast items. together. • Separate items that shed lint from items that attract lint. Casual, synthetic, knit, and corduroy items will pick up lint from towels, rugs, and bedspreads. • Separate heavily soiled items from lightly soiled items.
Operating Instructions STEPS • Press the power button and select the appropriate cycle and settings for each load. Add cycle options as desired. 6. Close the washer door and start the washing cycle. 7. Remove items from washer when cycle has ended. TIPS IMPORTANT • See Cycle Selection, Cycle Settings, and Cycle Follow fabric care label Options for detailed descriptions of cycle controls. instructions on items to • See Settings Chart to determine which settings are be washed. available for each cycle.
Operating Instructions Adding Laundry Products 1. Detergent Flap 2. Main Wash 3. Fabric Softener 4. Prewash 5. Bleach 4 1 2 3 Detergent, liquid chlorine bleach and liquid fabric softener will be dispensed at the proper times in the cycle. IMPORTANT Use of multi-product (detergent plus softener) sheets or color-absorbing sheets NOT recommended. They could disable your machine and result in unwarranted repair costs. 5 IMPORTANT Do not mix liquids and powders.
Operating Instructions Main wash - Powder Detergent • Ensure the flap is in the upward position. • Add the recommended amount of highefficiency powder detergent to the “Main Wash” detergent chamber. Prewash For heavily soiled or stained loads, select the prewash option. Add the recommended amount of detergent to the prewash detergent compartment. Place the main wash detergent flap in the upward position for powder detergent.
Controls and Settings 11 Cycle Selection Cycle Options / Cycle Status Display Not all cycles, options, or features listed are available on every model. Console shown above for reference only. Your model may differ. heavy duty Cycle Selection Use this cycle for heavily soiled, durable Press the power button to turn on the unit. garments - ex. towels, sports gear, or fabric tote Turn the cycle selector to the desired cycle. bags.
Controls and Settings rinse & spin Select for loads that need a cold water rinse or to add fabric softener that may have been omitted in a regular cycle. Add the fabric softener to the dispenser chamber. Select the spin speed appropriate for the load. NOTE Steam refresh is not a washing cycle. It is intended for clean, dry clothes. Take care not to load items with stains. NOTE • Steam may not necessarily be visible inside drum during the steam cycles. • Steam may not be present during entire cycle.
Controls and Settings 13 Cycle Settings Appropriate wash temperature, spin speeds, soil level and options will be displayed for each cycle. The settings can be changed before the cycle is started. Make modifications according to fiber content, colorfastness and soil level. If changes are attempted after the cycle starts a signal will beep.
Controls and Settings Cycle Options To add options, press the desired option button and an indicator light will illuminate. To delete options, press the option button again and the indicator light will turn off. To protect your fabrics, not all options are available with every cycle. If an option is not appropriate for the cycle, the indicator will not light. Occasionally, a setting and option in the same cycle will conflict with each other. When this happens, incompatible selections will be excluded.
Controls and Settings 15 1 2 1. Cycle Countdown Other Features Control Lock To avoid having someone accidentally start or stop the washer, press the control lock button . To unlock the controls, press the control lock button again . Mute Sound A chime will sound at the end of the cycle when this option is not activated. The signal can be turned on or off by pressing the mute sound button. Please note that activating the mute sound option will not mute all sounds emitted by the console.
Controls and Settings Settings Chart heavy duty whitest whites sanitize jeans rinse & spin steam refresh clean washer my favorite hand wash delicates fast wash colors activewear normal These Temperatures, Spin Speeds, Soil Levels, and Options are available with the following cycles: hot warm cold tap cold spin speed max high medium low no spin soil level max h
Stain Removal Guide 17 Safe Stain Removal Procedures To reduce the risk of fire or serious injury to persons or property, comply with the basic warnings listed below: • Read and comply with all instructions on stain removal products. • Keep stain removal products in their original labeled containers and out of children’s reach. • Thoroughly wash any utensils used. • Do not combine stain removal products, especially ammonia and chlorine bleach. Dangerous fumes can result.
Stain Removal Guide Stain Removal Suggestions STAIN Adhesive tape, gum, rubber cement Baby formula, dairy products, egg Beverages (coffee, tea, soda, juice, alcoholic beverages) Blood Candle wax, crayon Chocolate TREATMENT Apply ice. Scrape off excess. Place stain down on paper towels. Saturate with prewash stain remover or nonflammable dry cleaning fluid. Use product containing enzymes to pretreat or soak stains. Soak for 30 minutes or more. Wash. Pretreat stain.
Care and Cleaning 19 Inside Routine Cleaning (Preventive) To help prevent odors, mold or mildew, leave the door open for a few hours after use or whenever the washer is not in use. IMPORTANT Items left in washer while performing the clean washer cycle will cause a severe outof-balance situation that could damage the washing machine. 5. CAUTION ENTRAPMENT and TIP-OVER HAZARD Do not leave the door open if there are small children or pets present.
Care and Cleaning Performing Manual Drain In the event the washer will not drain under its own power due to a power outage or clogged drain pump you can drain the water left in the drum manually. CAUTION BURN HAZARD Do not attempt to manually drain the drum if it is full of hot water. Allow water to cool before proceeding with manual draining. 1. Open pump cleanout door and lower the flap in front of the drain pump filter. 4. Repeat the process until all the water has been drained.
Care and Cleaning 21 Other Inside Routine Cleaning (Preventive) 4. Cleaning Dispenser Drawer Area NOTE Detergent and fabric softener may build up in the dispenser drawer. Residue should be removed once or twice a month. 1. 2. 5. Remove the drawer by pulling the drawer out until it stops. Reach back into the back of the drawer cavity and press down firmly on the lock tab. Pull out the drawer. 6.
Care and Cleaning Inside Cleaning (Aggressive) In cases where the clean washer cycle along with care and cleaning of rubber gasket folds isn’t done, and severe odor, mold, mildew, or residue buildup have developed, follow the below cleaning procedure to help alleviate the problem. Cleaning Procedure - Washer Drum Ensure the wash drum is empty (or no clothes load). 1. Open the detergent drawer and place the main wash detergent flap in the upper position.
Care and Cleaning 23 Outside Routine Cleaning • When washing is completed, wipe top and sides of washer with a damp cloth. Turn water faucets off to prevent pressure buildup in the hoses. • Clean the cabinet with mild soap and water. Never use harsh, gritty or abrasive cleansers. • If the cabinet becomes stained, clean with diluted chlorine bleach (1 part bleach to 8 parts water). Rinse several times with clear water. • Remove glue residue from tape or labels with a mixture of warm water and mild detergent.
Solutions to Common Problems Common Washing Inquiries Many washing problems involve poor soil and stain removal, residues of lint and scum, and fabric damage. For satisfactory washing results, follow these suggestions provided by The Soap and Detergent Association. PROBLEM POSSIBLE CAUSES Blue stains • Undiluted liquid detergent or fabric softener dispensed directly onto fabric. SOLUTIONS PREVENTIVE MEASURES • Avoid overfilling detergent and fabric softener compartments of dispenser.
Solutions to Common Problems 25 PROBLEM POSSIBLE CAUSES SOLUTIONS Pilling (Fibers ball up and cling to fabric) • Pilling is normal with synthetic and permanent press fabrics. This is due to abrasion from normal wear. • Use a lint brush or shaver to remove pills. Residue or powder on dark items; Stiff, harsh fabrics • Undissolved • Rewash load. detergent. • Some granular detergents can combine with hard water minerals to form a residue. • Overloading washer. Wrinkling • Overloading washer.
Solutions to Common Problems PROBLEM Residue stains/ buildup, mold or mildew stains in gasket POSSIBLE CAUSES • Moisture in washer. • Use of non-HE detergent. • Overdosing detergent. • Overloading wash drum. • Leaving a wet load set in washer. • Cold water washes which may not completely dissolve and remove detergents. Residue • Moisture in the stains/ washer. buildup, mold • Use of non-HE or mildew detergent. stains in • Overdosing detergent.
Solutions to Common Problems 27 Service Prevention Checklist Before calling for service, review this list. It may save both time and expense. The list includes common occurrences that are not the result of defective workmanship or materials in this washer. OCCURRENCE POSSIBLE CAUSES Noise High pitch “jet engine” noise. Rattling and clanking. • A certain amount of motor whine is normal during the spin cycle. • Foreign objects such as coins or safety pins may be in drum or pump.
Solutions to Common Problems OCCURRENCE POSSIBLE CAUSES SOLUTION No or slow water • Water inlet hoses are not • Install Hot and Cold water hoses and turn fill. installed. on Hot and Cold water supply valves. • Water supply valves are not • Turn on Hot and Cold water supply turned on. valves. • Water supply is not adequate • Test water pressure at another faucet in in installation. the house. Water pressure must be at least 30 psi (260 kPa).
Solutions to Common Problems 29 OCCURRENCE POSSIBLE CAUSES SOLUTION • Do not overload washer. See Operating Instructions. • Load is too small. • Add 1 or 2 similar items to help balance the load. • Load is out of balance. • Rearrange load to allow proper spinning. • Drain hose is kinked. • Straighten drain hose. Water does not • Water supply is not adequate • Check another faucet in the house. Wait enter washer or it in area. until water supply and pressure increase. enters slowly.
Solutions to Common Problems In some instances, an alarm code will be shown on the display and a tone will be emitted by the unit. The alarm code will be flashed in alternating fashion between the letters “AL” and a specific two-character code. Before calling for Service, refer to the table below for possible solutions to the alarm codes listed. ALARM CODE POSSIBLE CAUSES SOLUTION AL 10 AL 20 AL 40 AL 91 AL F0 AL H0 The appliance is not filling with water properly.
Limited Warranty 31 For the applicable warranty period as set forth below, as measured from your original date of purchase, Electrolux will repair or replace any parts of this appliance that prove to be defective in materials or workmanship when such appliance is installed, used and maintained in accordance with the provided instructions. Warranty Periods: • All parts — One year including labor. In addition, your appliance is covered by a one year, parts only, limited warranty.
electrolux.