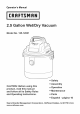
Operator's Manual 2.5 Gallon Wet/Dry Vacuum Model No. 125.12001 • Safety • Assembly CAUTION: Before using this product, read this manual and follow all its Safety Rules and Operating instructions. • Operation • Maintenance • Parts • Espa_ol Sears Brands Management Corporation, WWW. crafts man. COrn Hoffman Estates, = p_gina 16 IL 60179 U.S.
Warranty CRAFTSMAN ONE YEAR FULL WARRANTY FOR ONE YEAR from the date of purchase, this product is warranted against defects in material or workmanship. A defective product will be replaced free of charge. For warranty coverage details to obtain free replacement, visit the web page: www. craftsman.corn/warranty This warranty does not cover bags, filters, hose or attachments, which are expendable parts that can wear out from normal use within the warranty period.
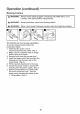
starting, unplug powercordbefore changing orcleaning filter. • DonotleaveWet/Dry Vacunattended whenplugged in.Unplug fromoutlet whennotinuseandbefore servicing. •TurnoffWet/Dry Vacbefore unplugging. • Donotputanyobjectintoventilation openings. Donotvacuum withany ventilation openings blocked; keepfree ofdust,lint,hairoranything thatmay reduce airflow. • Keephair,looseclothing, fingers, and allpartsofbodyawayfromopenings andmoving parts. • Toreduce theriskoffalls,useextra carewhencleaning onstairs.
Introduction This Wet/Dry Vac is intended for vacuuming wet and dry materials may be used as a blower. Read this operator's manual to familiarize yourself with the product features and to understand the specific usage of your new Wet/Dry Vac. and Table of Contents Section Page Warranty ................................................. 2 Section Maintenance Page ......................................... 11 Important Safety Instructions ........... 2 Emptying the Collection Tank ........
Assembly Remove entire contents of carton and check for parts inside the collection tank. Check each item against the Carton Contents List. If any parts are missing or damaged please call 1-800-469-4663 for replacement. Carton Content Key A B C D E F G H I List Description ........................ Qty. Vac Assembly. ........................ 1 Wall Mounting Support ......... 1 Hose ...................................... 1 Crevice Tool ........................... 1 2-in-1 Utility Nozzle ...............
Assembly (continued) Before beginning assembly of product, make sure all parts are present. Compare parts with Carton Content List and diagram. If any part is missing or damaged, do not attempt to assemble the product. Contact customer service for replacement parts. Estimated Assembly Time: 15 minutes Tools Required for Assembly: Drill, Screwdriver Helpful Tools: Level Ak WARNING: Do not plug in power cord to power outlet, make sure plug is disconnected before assembling the wet/dry vac.
Assembly (continued) For your convenience this vacuum comes with a wall mounting support for storage. IMPORTANT? * Do not mount the rack over 5 feet from the floor. e Do not screw the rack to drywall only. Secure the screws to a stud. * Do not hang from or sit on the vacuum when on mounting rack. o Do not use the vacuum while it is mounted on the wall mounting support. o Empty the collection tank before mounting the vacuum on the wall. 11. Make sure the rack is level and mark the hole locations.
Operation Vacuuming Dry Materials ,_ WARNING: Be sure to read, understand and apply all the information in the important Safety instructions section at the beginning of this operator's manual. Do not vacuum in areas with flammable gases, vapors, or explosive dusts in the air. Flammable gases or vapors include but are not limited to: lighter fluid, solvent type cleaners, oil=base paints, gasoline, alcohol or aerosol sprays.
Operation (continued) Vacuuming Liquids WARNING: Be sure to read, understand and apply all the information in the important Safety instructions section at the beginning of this operator's manual. Do not vacuum in areas with flammable gases, vapors, or explosive dusts in the air. Flammable gases or vapors include but are not limited to: lighter fluid, solvent type cleaners, oil=base paints, gasoline, alcohol or aerosol sprays.
Operation (continued) Blowing Feature ,_ WARNING: Always wear safety goggles complying with ANSi Z87.1 (or in Canada, CSA Z94.3) before using blower. WARNING: Keep bystanders clear from blowing debris. WARNING: Wear a dust mask if blowing creates dust that might be inhaled. This Wet/Dry Vac has blowing capabilities. To use the blower feature follow the instructions listed. 1. Verify that the power cord is disconnected from the outlet. (Fig.l) 2.
Maintenance Emptying the Collection Tank 1. Verify that the power cord is disconnected from the outlet. (Fig. 1) 2. Disconnect the hose from the vacuum. (Fig. 2) 3. Undo the latches and removethe power head from the collection tank. (Fig. 3) Place power head on a soft, clean surface upside down. 4. Clear all dirt or debris from the collection tank and hose into a proper waste container. (Fig. 4) 5. Clean or replace the filters. (Fig. 5) See filter cleaning instructionson page 11-12. 6.
Maintenance Installing & Cleaning (continued) Foam Sleeve Filter installing Foam Sleeve Filter 1. Verify that the power cord is disconnected from the outlet. (Fig. 1) 2. Remove power head and place in upside down position. Follow instructions to remove cloth filter. Cleaning Foam Sleeve Filter 1. With the removed power head in the upside down position, carefully remove foam sleeve filter. (Fig. 4) 2. Use a mild soap and water solution to wash foam sleeve filter and rinse with 3.
Troubleshooting [_ UNPLUG TROUBLESHOOTING. ARNING:BEFORE TO REDUCE THE RiSK OF ELECTRIC SHOCK Problem Vacuum Possible will not operate. Causes 2) 2) Unplug and check the power cord. If damaged, have it repaired by a professional. Faulty power cord. 4) Switch out from motor cover. Reduced efficiency and motor/speed vibration, Action 1 ) Check power supply - cord, breakers, fuses. 3) Collection Dust comes Corrective 1 ) No power supply. tank is full. in the wrong position.
Repair Parts 125.12001 2.5 Gallon Wet/Dry Vac Always order by part number, not by key number. Always mention the model number when ordering parts. The model number is found on the serial plate located on the vacuum. To order parts, call 1-800-46g-4663. _l_ WARNING: Servicing of double-insulated wet/dry vacuum. With double-insulated wet/dry vacuum, two systems of insulationare provided instead of grounding.
Repair Parts (Continued) 2.
Manual del operador Aspiradora Para Materiales Secos De 2.5 Galones N_m. de modelo H_medos/ 125.12001 • Seguridad • Ensamble PRECAUCION: Antes de usar este producto, este manual • Operaci6n lea • Mantenimiento y siga todas • Piezas las reglas de seguridad e instrucciones de operaci6n. • English= Page 1 Sears Brands Management Corporation, WWW. crafts man. COrn 16 Hoffman Estates, IL 60179 EE.UU.
Garantia GARANTIATOTAL DE UN ANO DE CRAFSTMAN DURANTE UN AIgO a partir de la fecha de compra, este producto est_ garantizado contra defectos de material o mano de obra. Un producto defectuoso ser_ reemplazado sin ningOn costo. Para detalles sobre la cobertura de la garantia para obtener un reemplazo gratuito, visite la p_gina web: www. craftsman.
desatendida cuando la enchufe. Desconectela del tomacorriente cuando no esta en uso y antes de realizar el servicio. •Apague la aspiradora de material h0medo/seco antes de desconectarla. •No coloque ning_n objeto en las aberturas de ventilaci6n. •No aspire con ninguna de las aberturas de ventilaci6n bloqueadas; mantengalas libres de polvo, pelusa, cabello o cualquier objeto que pudiera reducir el flujo de aire.
Introducci6n Esta aspiradora de material humedo/ seco est_ dise_ada para aspirar materiales humedos y secos, adem_s puede usarse como un soplador. Lea este manual del operador para familiarizarse con las caracteristicas del producto y para entender el uso especifico de su nueva aspiradora de material hOmedo/seco. [ndice Secci6n P_gina Secci6n Garantfa ................................................................................
Ensamble Retire todo el contenido de la caja y verifique si hay partes dentro del tanque de recolecd6n. Verifique cada parte contra la lista de contenido de la caja. Si falta cualquier parte o est_ dahada Ilame al 1-800-469-4663 para redbir un reemplazo Lista Del Contenido De La Caja Clave Descripci6n A Ensamble .....................................Cantidad B Soporte C Manguera D Herramienta E Boquilla F Filtro de tela ....................................................
Ensamble (continuaci6n) Antes de comenzar a ensamblar el producto, aseg0rese de que todas las partes est_n presentes. Compare las partes con la lista de contenido de la caja y el diagrama. Si falta alguna parte o est,1 dahada, no intente ensamblar el producto. Comuniquese con servicio al cliente para obtener piezas de reemplazo. Tiempo de ensamble estimado: 15 minutos Herramientas requeridas para el ensamble:Taladro, destornillador Herramientas 0tiles: Nivel 5. _h.
Ensamble (continuaci6n) Para su comodidad, soporte de montaje esta aspiradora incluye un en muro para almacenamiento. IMPORTANTE: • • No monte el colgador a m_s de 5 pies del suelo. No atornJlle el colgador OnJcamente a un muro de tablarroca. • Asegure los tornJllos a un travesaffo. • No se cuelgue nJ se apoye sobre la aspiradora cuando est6 en el colgador. • No use la aspiradora mientras est;_ montada en el soporte de montaje en muro.
Operaci6n Aspiraci6n de Matedales Secos ADVERTENCIA: Asegurese de leer, entender y aplicar toda la informaci6n de la secci6n de instrucciones de seguridad importantes que est_ al inicio de este manual de operaciones. No aspire en _reas con gases inflamables, vapores o polvos explosivos en el aire.Los gases o vapores inflamables incluyen entre otros: liquidos encendedores, limpiadores de tipo solvente, pinturas con base de aceite, gasolina, alcohol o aerosoles.
Operaci6n (continuaci6n) Aspiraci6n de Liquidos ADVERTENCIA: Asegurese de leer, entender y aplicar toda la informaci6n de la secci6n de instrucciones de seguridad importantes que est_ al inicio de este manual de operaciones. No aspire en _reas con gases inflamables, vapores o polvos explosivos en el aire. Los gases o vapores inflamables incluyen, entre otros: liquidos encendedores, limpiadores de tipo solvente, pinturas con base de aceite, gasolina, alcohol o aerosoles.
Operaci6n (continuaci6n) Funci6n de Soplado A ADVERTENCIA: Siempre use lentes de seguridad que cumplan (o en Canada, CSA Z94.3) antes de usar el soplador. a ADVERTENCIA: Mantenga a los transeuntes lejos de los desechos ADVERTENCIA: Use una m_scara de polvo si el soplado Parausar lacaracteristica de soplado, siga las instrucciones que seenumeran a continuaci6n: 1. Verifique que el cable de corriente est_ desconectado del tomacorriente.(Fig.1) 2.
Mantenimiento Como Vaciar el Tanque de Recoleccion AVISO: El filtro incluido est_ hecho de un material de 1. Verifique que el cable de corriente est6 desconectado del tomacorriente.(Fig. 1) 2. Desconecte la manguera de la aspiradora.(Fig. 2) 3. Abra los pasadores y retire ]a cabeza motriz de] tanque de recolecci6n. 4. (Fig. 3) Coloque la cabeza motriz en una superficie suave y limpia en posici6n invertida. 5.
Mantenimiento (continuaci6n) Instalacion y Limpieza del Filtro de Manga de Espuma Limpieza del filtro de manga de espuma Instalaci6n del filtro de manga de espuma 1. Verifique que el cable de corriente est6 desconectado del tomacorriente.(Fig. 1) 2. Retire [a cabeza motrizy col6quela en posici6n [nvertida. Siga las [nstrucciones para quitar el filtro de tela. 3. Con cuidado deslice el filtro de manga de espuma hacia abajo pot la caja del filtro asegur_indose de que cubra toda [a caja.(Fig. 2 y3) 4.
Resoluci6n de Problemas ANTES DE RESOLVER UN PROBLEMA. [, ASPIRADORA ADVERTENC,A: PARA RE_UC,R ELR,ESGO _E_ESCARGAS ELECTR,CAS. _ESCONECTE LAi Problema La aspiradorano funciona. Causas posibles 1) No hay suministrode energia. Accion correctiva 2) Cable de corriente defectuoso. 2) Desconecte y revise el cable de corriente.Si esta dai_ado, envielo a reparar con un profesionat. 3) El tanque de recolecci6n esta Ileno. 3) Vacie el tanque de recolecci6n.
Piezas de Repuesto 125.12001 Aspiradora De Material Humedo/Seco De 2.5 Galones Siempre ordene por numero de pieza y no por numero de clave.Siempre mencione el numero del modelo cuando ordene piezas.EI numero de modelo seencuentra en la placa de serie que se encuentra en la aspiradora. Para ordenar piezas, Ilame al 1-800-469-4663. _1 ADVERTENCIA:C6mo dar servicio a una aspiradora de material humedo/seco de doble aislamiento.
Piezas de Repuesto (Continuaci6n) Aspiradora De Materiales H0medos/Secos I De 2.