
User Manual
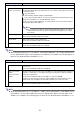


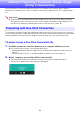


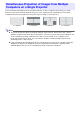
Table Of Contents
- Contents
- Establishing a Network Connection Between a Computer and the Projector
- Configuring Projector Network Settings
- Using a Computer to Configure Projector Network Settings
- Preparing for C-Connection
- Network Projecting a Computer Screen Image (Using C-Connection)
- C-Connection Details
- Advanced Operations
- Ports Used for TCP/UDP

28
4.
Move the mouse cursor to the line where the name of the projector you want to
connect with is located, and then click the [Connect] button.
If the “Login code” dialog box appears at this time, input the 4-digit login code shown on the
projector’s network standby screen (page 6).
After connection between C-Connection and the projector is established, a blue check mark
( ) will be shown to the left of the connected projector’s name on the projector list. The
name of the connected projector will be shown at the top of the C-Connection window.
The C-Connection window style changes from the list panel to the info panel. If you do not
perform any operation after that, the display will switch to the mini panel.
5.
To start computer screen projection, click .
This projects the computer screen image from the projector.
To freeze the computer screen image currently being projected, click k. The frozen screen
image will continue to be projected until you click to resume or until you stop projection.
6.
To stop projection, click Y.
The connection between C-Connection and the projector is maintained even after projection is
stopped. To resume projection, click .
To terminate a connection between C-Connection and the projector, perform the steps below.
(1) Click to display the list panel.
(2) Move the mouse pointer to the button of the projector you are connected to.
(3) Click the button.
To project using auto projector search
1.
Establish a network connection between your computer and the projector.
For connection procedures, see the information below.
– “Connecting the Projector to an Existing Wireless LAN Access Point” (page 7)
2.
On the computer, start up C-Connection.
C-Connection will search for projectors on the network and display a list panel that shows all
of the projectors it finds. An auto search operation covers only the projectors on the same
network subnet as the computer.
3.
Move the mouse cursor to the line where the name of the projector you want to
connect with is located, and then click the [Connect] button.
The remainder of this procedure is the same as that under “To project using a Favorites list to
select a projector” (page 27), from the point after the [Connect] is clicked in step 4.
Chrome OS version: On the dialog box that appears when you click in step 5 of the
procedure, select what you want to share and then click the [Share] button.
Info panel Mini panel