Cover EN CT-S400/410 USER’S GUIDE Getting Ready to Play Preparing a Power Supply Connecting Headphones (Option) Connecting a Pedal (Option) Selecting a Musical Instrument Tone Changing the Pitch in Semitone Units (Transpose) Fine Tuning (Tuning) Sustaining Notes After Keyboard Keys Are Released Saving and Recalling a Setup (MY SETUP) Playing a Built-in Song Linking with a Smart Device (APP Function) Configuring Settings Troubleshooting CTS400-E-2A
Included and Optional Accessories Use only accessories that are specified for use with this Digital Keyboard. Use of unauthorized accessories creates the risk of fire, electric shock, and personal injury. • You can get information about accessories that are sold separately for this product from the CASIO catalog available from your retailer, and from the CASIO website. https://support.casio.
Contents General Guide EN-6 Getting Ready to Play EN-8 Preparing a Power Supply . . . . . . . . . . . . . . . . . . . . . . . . . . . . . . . . . . . . . . . . . . . . . . . . . . . EN-8 Preparing the Music Stand . . . . . . . . . . . . . . . . . . . . . . . . . . . . . . . . . . . . . . . . . . . . . . . . . . EN-12 Connecting Headphones (Option). . . . . . . . . . . . . . . . . . . . . . . . . . . . . . . . . . . . . . . . . . . . . EN-12 Connecting a Pedal (Option). . . . . . . . . . . . . . . . . .
Contents Saving and Recalling a Setup (MY SETUP) EN-68 Saving to MY SETUP . . . . . . . . . . . . . . . . . . . . . . . . . . . . . . . . . . . . . . . . . . . . . . . . . . . . . . EN-68 Recalling a MY SETUP . . . . . . . . . . . . . . . . . . . . . . . . . . . . . . . . . . . . . . . . . . . . . . . . . . . . . EN-71 Enabling MY SETUP Power On Recall. . . . . . . . . . . . . . . . . . . . . . . . . . . . . . . . . . . . . . . . . EN-72 Renaming a MY SETUP . . . . . . . . . . . . . . . . . . . . . . . .
Contents Recording Your Keyboard Play EN-116 Easy Keyboard Play Recording . . . . . . . . . . . . . . . . . . . . . . . . . . . . . . . . . . . . . . . . . . . . . EN-117 Deleting an Easy Recording . . . . . . . . . . . . . . . . . . . . . . . . . . . . . . . . . . . . . . . . . . . . . . . . EN-122 Overdub Recording (Multi-track Recording) . . . . . . . . . . . . . . . . . . . . . . . . . . . . . . . . . . . . EN-123 Copying a Tone Recording or Rhythm Recording as a Multi-track Recording . . . . . . . .
Contents Reference EN-171 Troubleshooting . . . . . . . . . . . . . . . . . . . . . . . . . . . . . . . . . . . . . . . . . . . . . . . . . . . . . . . . . EN-171 Error Indicators . . . . . . . . . . . . . . . . . . . . . . . . . . . . . . . . . . . . . . . . . . . . . . . . . . . . . . . . . . EN-174 Product Specifications. . . . . . . . . . . . . . . . . . . . . . . . . . . . . . . . . . . . . . . . . . . . . . . . . . . . . EN-176 Song List . . . . . . . . . . . . . . . . . . . . . . . . . . . . . . .
General Guide ■ Front Panel P(Power) button ☞EN-23 SONG button ☞EN-77 RHYTHM button ☞EN-88 VOLUME knob ☞EN-25 TONE button ☞EN-31 SURROUND button ☞EN-43 Dial ☞EN-18 LCD 5 buttons ☞EN-16 a button ☞EN-77 REGISTRATION button ☞EN-110 TEMPO button ☞EN-27 MENU button ☞EN-19 RECORD button ☞EN-117 HOME button ☞EN-16 Speakers Percussion instrument list Chord root names PITCH BEND wheel ☞EN-38 • The numbers to the right of the ☞ symbol are reference page numbers.
General Guide ■ Back USB TO HOST port ☞EN-158 USB TO DEVICE port ☞EN-13 Power terminal (DC 9.5V) ☞EN-8 PHONES/OUTPUT jack ☞EN-12, EN-163 AUDIO IN jack ☞EN-164 PEDAL jack ☞EN-13 • The numbers to the right of the ☞ symbol are reference page numbers.
Getting Ready to Play Preparing a Power Supply Though either an AC adaptor or batteries can be used for power, use of AC adaptor power is normally recommended. Using the AC Adaptor Use only the AC adaptor (JEITA Standard with unified polarity plug) specified for this Digital Keyboard. Use of a different type of AC adaptor can cause malfunction. AC Adaptor Type: AD-E95100L (JEITA Standard plug) AC adaptor DC 9.
Getting Ready to Play Using Batteries for Power • Be sure to turn off power before loading batteries. • Use commercially available AA-size alkaline batteries or AA-size rechargeable nickel metal hydride batteries. • Low battery power can cause abnormal operation. If this happens, replace batteries with new ones. If you are using rechargeable batteries, charge them. ■ Batteries Note the precautions below when using rechargeable batteries. • Use Panasonic Group AA-size eneloop rechargeable batteries.
Getting Ready to Play ■ Specifying the Battery Type 1. Turn on the Digital Keyboard. • See “Turning Power On or Off” (page EN-23). 2. Press MENU. This displays the menu screen. 3. Use U and I to select the 5 buttons menu (page EN-16) that includes SETTING. 4. Press SETTING. This displays the setting screen. 5. Use U and I to select “Battery”. 6. Rotate the dial or use – and + to select “Alkaline” (alkaline batteries) or “Ni-MH” (nickel-metal hydride batteries). 7.
Getting Ready to Play ■ Low Battery Indication A battery icon appears on the display to let you know when battery power is getting low. Declining Battery Power Black battery icon (not flashing) Battery Replacement Required White battery icon (flashing) • Low battery power may cause notes to become distorted, or other problems. • You can conserve battery power by using headphones and by reducing the volume level. • Continued use with low batteries may cause power to turn off suddenly.
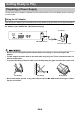
Getting Ready to Play Preparing the Music Stand Insert the music stand legs into the back of the Digital Keyboard. Music stand Connecting Headphones (Option) Plugging in headphones cuts off output from the built-in speakers, which means you can practice playing even late at night without disturbing others. • Be sure to turn down the volume level before connecting headphones. Stereo mini plug PHONES/OUTPUT jack (3.5mm stereo mini jack) • Headphones do not come with this Digital Keyboard.
Getting Ready to Play Connecting a Pedal (Option) To use a pedal, connect it to the PEDAL jack on the back of the Digital Keyboard. Pedal (option) PEDAL jack (6.3mm standard jack) • A pedal unit does not come with this Digital Keyboard. • Use the optional (SP-3, SP-20) pedal. Connecting the Wireless MIDI & audio adaptor (Option) To pair this Digital Keyboard with a Bluetooth capable external device, you need to plug the Wireless MIDI & audio adaptor into the Digital Keyboard’s USB TO DEVICE port.
Getting Ready to Play Attaching a Strap (Commercially Available) 1. Attach a strap (commercially available) to the left and right strap pins on the bottom of the Digital Keyboard. 2. Cover the strap pins with the strap locks. Strap (commercially available) Strap lock Strap pin • After attaching the strap, check to make sure that the strap is securely attached to the Digital Keyboard. • Do not pick up the Digital Keyboard by the strap alone.
Operations Common to All Modes Display Screen Contents (1 (2 (3 (4 Setting name Battery icon Recording status Tempo Setting Measure/Beat Sub-display Status 5 buttons menu items Part Sub-title Setting item Setting • Display contents may become difficult to read at certain viewing angles. • For information about how to adjust display contrast, see “Configuring Settings” (page EN-140).
Operations Common to All Modes Home Screen Pressing HOME causes [TONE] to appear on the screen, which indicates the tone setting screen. This is the home screen. You can use the home screen to select the instrument tone you want to use, and to configure various settings. • You can customize the home screen to suit your specific needs. For details, see “Customizing the Home Screen (Home Customization)” (page EN-137).
Operations Common to All Modes ■ Setting Screen (SETTING) 5 buttons menu 5 buttons • Long-pressing – or + when selecting a number or value scrolls through settings at high speed. • To return a number or value to its initial default or recommended setting, press – and + at the same time. • Long-pressing U or I when changing to another item or page scrolls through items or pages at high speed. Changing the Button Long-press Time You can specify the required button long-press time.
Operations Common to All Modes 4. Use U and I to select “Button Long Press Time”. 5. Rotate the dial or use – and + to change the button long-press time value. Setting Display Name Short Short Normal Normal Long Long 6. To exit the setting operation, press EXIT. Dial Operations Rotate the dial to change a number (tone number, etc.) or value (tempo value, etc.
Operations Common to All Modes Selecting a Function from a Menu You can use the menu screen to select from a variety of different functions. 1. Press MENU. This displays the menu screen. 2. Use U and I to select the 5 buttons menu that includes the function you want to select. • To return to the previous screen or exit the setting operation, press EXIT.
Operations Common to All Modes Inputting Characters Use the procedures below to edit MY SETUP data names and USB flash drive file names (user data names). Cursor (flashing) • USB flash drive (page EN-150) file names can be up to 231 characters long. • Up to 22 characters can appear on the display at a time. If you input more than 22 characters, the display will scroll horizontally, and a numeric page indicator (such as 1/11) will appear on the display.
Operations Common to All Modes Replacing a Character with a Different One 1. Use U and I to move the cursor to the character you want to replace. 2. Rotate the dial to change the character. This displays the –/+ screen. • • • • After you rotate the dial once to select a character, you can change the selection further using – and +. To go back to the previous screen, press BACK. Repeat steps 1 and 2 as required. The characters shown in the table below are supported for USB flash drive file names.
Operations Common to All Modes • The characters shown in the table below are supported for user data (MY SETUP) names. : G T a n { ! " # $ % & ' ( ) * + , . / 0 1 2 3 4 5 6 7 8 9 ; < > = ? @ A B C D E F H I J K L M N O P Q R S U V W X Y Z [ ] \ ^ _ ` b c d e f g h i j k l m o p q r s t u v w x y z } | (First cell in the above table is blank.) Deleting a Character 1. Use U and I to move the cursor to the character you want to delete. 2. Press DELETE.
Playing on the Keyboard Turning Power On or Off 1. Press P (Power) to turn on Digital Keyboard power. The Digital Keyboard becomes operational after a few seconds. 2. To turn off power, long-press P (Power) until the display goes blank. • Turning off power normally causes the tone and rhythm number and other settings to return to their initial defaults. However, the settings below are remembered.
Playing on the Keyboard Auto Power Off While Auto Power Off is enabled, power turns off automatically after about 30 minutes of non-operation. • Auto Power Off is disabled while a song is playing and while the APP function is being used. ■ Disabling Auto Power Off You can disable Auto Power Off to ensure that power does not turn off automatically during a concert, etc. 1. Press MENU. This displays the menu screen. 2. Use U and I to select the 5 buttons menu that includes SETTING. 3. Press SETTING.
Playing on the Keyboard 4. Use U and I to select “Auto Power Off”. 5. Rotate the dial or use – and + to select “Off”. 6. To exit the setting operation, press EXIT. Adjusting the Volume Level 1. Rotate the VOLUME knob. This changes the volume level.
Playing on the Keyboard Using the Metronome The metronome lets you play and practice along with a steady beat to help keep you on tempo. You can also set a tempo that is suitable for your practice. Start/Stop 1. Press HOME. This displays the home screen. 2. Press METRONOME. This displays the metronome screen. 3. Press START. This starts the metronome, and displays measure and beat numbers. 4. To stop the metronome, press the STOP. • On the home screen, you can also press a to start the metronome.
Playing on the Keyboard Changing the Metronome Tempo Use the procedure below to change the tempo of the metronome. 1. Press TEMPO. This displays the tempo screen. 2. Rotate the dial or use – and + to change the tempo value. • You can specify a tempo value in the range of 20 to 255. • To return the setting to its initial default, press – and + at the same time. 3. To exit the setting operation, press EXIT.
Playing on the Keyboard Specifying the Metronome Beats Per Measure You can use the procedure below to configure a setting that sounds a chime on the first beat of each measure, and a click for the remaining beats. • Available settings are Off, or a value of 1 to 16 beats. 1. Press HOME. This displays the home screen. 2. Press METRONOME. This displays the metronome screen. 3. Rotate the dial to change the beat value.
Playing on the Keyboard Changing the Metronome Sound Volume Level 1. Press HOME. This displays the home screen. 2. Press METRONOME. This displays the metronome screen. 3. Press the VOLUME 5 buttons. This displays the metronome volume level setting screen. 4. Rotate the dial to adjust the volume level. • • • • • You can specify a volume level value from 0 to 127. After you rotate the dial once to select a value, you can change the selection further using – and +.
Playing on the Keyboard Listening to Demo Play 1. Press HOME. This displays the home screen. 2. Press DEMO. This displays the demo screen and starts demo song play. • After playback of one song finishes, playback of the next song starts automatically. Playback returns to the first song after playback of the final song is complete. • The first song played by demo play is a special demo song. The other songs are SONG function songs 1 to 110.
Controlling the Sound of a Performance Selecting a Musical Instrument Tone Your Digital Keyboard lets you select tones for a wide variety of musical instrument sounds, including violin, flute, and more. The same song can sound completely different when played with a different instrument type. Selecting a Tone 1. Press TONE. This displays the tone screen, which shows the tone number and tone name. Tone Number Tone name 2. Rotate the dial to select a tone.
Controlling the Sound of a Performance Playing with Touch Response Touch Response alters tone volume in accordance with keyboard pressure (press velocity). This provides you some of the same expression capabilities you get on an acoustic piano. Changing Touch Response Sensitivity 1. Press HOME. This displays the home screen. 2. Press TOUCH and then select the Touch Response setting you want. Touch Response settings are described in the table below.
Controlling the Sound of a Performance ■ Adjusting Volume When Touch Response is Disabled (Touch off Velocity) 1. Press HOME. This displays the home screen. 2. Long-press TOUCH. This displays the setting screen, which shows setting items for touch off velocity. 3. Rotate the dial or use – and + to change the setting. 4. To exit the setting operation, press EXIT.
Controlling the Sound of a Performance Using a Pedal A pedal can be used to change notes while playing. Under initial default settings, pedal sustain is assigned to the pedal, so it can be used as a damper pedal. A pedal unit does not come with this Digital Keyboard. Purchase one separately from your retailer. Changing Pedal Functions 1. Press MENU. This displays the menu screen. 2. Use U and I to select the 5 buttons menu that includes PEDAL. 3. Press PEDAL. This displays the pedal screen. 4.
Controlling the Sound of a Performance ■ Disabling the Pedal Effect for Individual Parts 1. Press MENU. This displays the menu screen. 2. Use U and I to select the 5 buttons menu that includes PEDAL. 3. Press PEDAL. This displays the pedal screen. 4. Press UPPER1. • “U1” disappears from the display, indicating that the pedal effect is no longer applied to the UPPER1 part. 5. To apply the pedal effect to the UPPER1 part, press UPPER1 again.
Controlling the Sound of a Performance Sustaining Notes After Keyboard Keys Are Released While sustain is enabled, notes are sustained longer when keyboard keys are released. 1. Press TONE. This displays the tone screen. 2. Press SUS. This displays “SUS”. 3. Press and release keyboard keys. The notes are sustained for a relatively long time. 4. To disable sustain, press SUS again.
Controlling the Sound of a Performance ■ Adjusting the Note Sustain Time Use the procedure below to change the sustain time when sustain is enabled. 1. Press TONE. This displays the tone screen. 2. Long-press SUS. This displays the sustain screen, which shows setting items for the UPPER1 part sustain time. 3. If required, press UPPER1, UPPER2, and LOWER to select the part whose setting you want to configure. 4. Rotate the dial to change the setting.
Controlling the Sound of a Performance Using the Pitch Bend Wheel You can use the pitch bend wheel to smoothly slide the pitch of notes you are playing upwards and downwards. 1. While playing a note on the keyboard with your right hand, rotate the pitch bend wheel upwards or downwards with your left hand. The amount the note bends depends on how much you rotate the pitch bend wheel.
Controlling the Sound of a Performance 4. If required, press UPPER1, UPPER2, or LOWER to select the part whose setting you want to configure. 5. Rotate the dial to change the setting. • • • • • You can specify a pitch bend in the range of 0 to 24. After you rotate the dial once to select a value, you can change the value further using – and +. To return the setting to its initial default, press – and + at the same time. To go back to the previous screen, press BACK.
Controlling the Sound of a Performance Playing with Reverb You can use the procedure below to add reverb to the notes you play. 1. Press MENU. This displays the menu screen. 2. Use U and I to select the 5 buttons menu that includes SYS FX. 3. Press SYS FX. This displays the system effect screen. 4. Rotate the dial to select the reverb type. The following shows the available reverb type settings.
Controlling the Sound of a Performance Changing the Relationship of Keyboard and Song Reverb Effects You can use this procedure to sync the reverb effect of keyboard play and built-in song playback so they do not clash with each other. 1. Press MENU. This displays the menu screen. 2. Use U and I to select the 5 buttons menu that includes SYS FX. 3. Press SYS FX. This displays the system effect screen. 4. Press SONG REV to change the setting. Available settings are shown in the table below.
Controlling the Sound of a Performance Adding the Chorus Effect to a Tone Chorus is a function that adds depth and breadth to notes. 1. Press MENU. This displays the menu screen. 2. Use U and I to select the 5 buttons menu that includes SYS FX. 3. Press SYS FX. This displays the system effect screen. 4. Press CHORUS. 5. Rotate the dial to select the chorus type. Available chorus type settings are shown in the table below.
Controlling the Sound of a Performance Playing with a More Expanded Sound (Surround) Enabling surround creates a virtual surround effect. 1. Press SURROUND. This enables surround. • This causes the SURROUND LED to light. • You can also enable surround from the setting screen. 2. To disable surround, press SURROUND again. • This causes the SURROUND LED to go out. • The surround effect is not applied while you are listening over headphones. • Connecting headphones disables the surround effect.
Controlling the Sound of a Performance Sounding Arpeggio Phrases Automatically (Arpeggiator) With the arpeggiator, you can play various arpeggios and other phrases automatically by simply pressing keys on the keyboard. You can select from several different arpeggio options, including playing arpeggios from a chord, playing various phrases automatically, and more. 1. Press TONE. This displays the tone screen. 2. Press ARP. This displays “ARP” and enables the arpeggiator.
Controlling the Sound of a Performance 4. Rotate the dial to select the arpeggiator type. • You can specify an arpeggiator type within the range of 1 to 100. See “Arpeggiator List” (page EN-197). • After you rotate the dial once to select a type, you can change the selection further using – and +. • To go back to the previous screen, press BACK. 5. Hold down a key of the accompaniment keyboard. The arpeggiator starts to play in accordance with the keys you press. 6.
Controlling the Sound of a Performance ■ Configuring Recommended Arpeggiator Settings 1. Press TONE. This displays the tone screen. 2. Press ARP. This displays “ARP” and enables the arpeggiator. 3. Long-press ARP. This displays the arpeggiator screen. 4. Long-press ARP. This momentarily displays “RECOMMENDED” and changes the tone to its recommended arpeggiator type setting.
Controlling the Sound of a Performance ■ Configuring Settings so the Arpeggiator Pattern Keeps Playing After You Release Keyboard Keys 1. Press TONE. This displays the tone screen. 2. Press ARP. This displays “ARP”, which indicates the arpeggiator is enabled. 3. Long-press ARP. This displays the arpeggiator screen. 4. Press HOLD. This displays “HOLD”, which indicates arpeggiator hold is enabled. 5. Press and release a keyboard key. Even after you release the keys, the arpeggiator continues to play.
Controlling the Sound of a Performance ■ Changing the Part that Sound Arpeggiator Play 1. Press TONE. This displays the tone screen. 2. Press ARP. This displays “ARP”, which indicates the arpeggiator is enabled. 3. Long-press ARP. This displays the arpeggiator screen. 4. Press PART and then select the part you want to sound with the arpeggiator. Parts you can select are shown in the table below.
Controlling the Sound of a Performance Switching the Button Function from ARP (Arpeggiator) to AH (Auto Harmonize) A single button is used to control the arpeggiator (page EN-44) and auto harmonize (page EN-50). 1. Press MENU. This displays the menu screen. 2. Use U and I to select the 5 buttons menu that includes SETTING. 3. Press SETTING. This displays the setting screen. 4. Use U and I to select “ARP/AH Button”. 5. Rotate the dial or use – and + to toggle between button functions.
Controlling the Sound of a Performance Adding Harmony to Melody Notes (Auto Harmonize) Auto Harmonize adds harmony notes to a melody produced by chord play using the rhythm function, by chord song playback using the SONG function, and by other operations. This procedure uses chord play using the rhythm function as an example. 1. Press RHYTHM. This displays the currently selected rhythm number and name. 2. Press ACCMP. This enables chord play. 3. Press TONE. This displays the tone screen. 4. Press AH.
Controlling the Sound of a Performance 6. Rotate the dial or use – and + to select an auto harmonize type. • You can specify an auto harmonize type from 1 to 12. Type (displayed) Description 1: Duet 1 Adds closed (separated by 2 to 4 degrees) 1-note harmony below the melody note. 2: Duet 2 Adds open (separated by more than 4 to 6 degrees) 1-note harmony below the Melody note. 3: Country Adds country style harmony. 4: Octave Adds the note from the next lower octave.
Controlling the Sound of a Performance Layering and Splitting Tones You can configure the keyboard to play two different tones at the same time (Layer) or to play different tones in the left and right ranges (Split). You can even use Layer and Split in combination with each other and play three different tones at the same time. The part that is used when playing a single tone is called the UPPER1 part. If you layer two parts, the layered part is the UPPER2 part.
Controlling the Sound of a Performance • Splitting the keyboard into two ranges (left, right), and assigning two layered tones to the right side and a single tone to the left side (pages EN-54, EN-55) With this configuration, the UPPER1, UPPER2, and LOWER parts are all used (Layer: On, Split: On). UPPER1 LOWER UPPER2 • Changing the tone setting affects the UPPER2 part when layer is turned on, and the LOWER part when split is turned on.
Controlling the Sound of a Performance Layering Two Tones 1. Press TONE. This displays the tone screen. 2. Press LAYER. This displays “U2” to the left of the tone number and “LY” below it. “U2” is short for the UPPER2 part. 3. Rotate the dial to select the layer tone. • For tone information, see the “Tone List” (page EN-181). • After you rotate the dial once to select a tone, you can change the selection further using – and +.
Controlling the Sound of a Performance Splitting the Keyboard Between Two Different Tones 1. Press TONE. This displays the tone screen. 2. Press SPLIT. This displays “L” to the left of the tone number and “SP” below it. “L” indicates the LOWER part. 3. Rotate the dial to select the tone to be assigned to the low range keyboard. • For tone information, see the “Tone List” (page EN-181). • After you rotate the dial once to select a tone, you can change the selection further using – and +.
Controlling the Sound of a Performance ■ Changing the Split Point 1. Press TONE. This displays the tone screen. 2. Long-press SPLIT. This displays the setting screen, which shows setting items for the split point. F{3 Split point LOWER UPPER1 3. Rotate the dial or use – and + to specify the split point. 4. To exit the setting operation, press EXIT.
Controlling the Sound of a Performance Changing the Volume Balance Between Keyboard Play and Rhythm Play (Balance) 1. Press MENU. This displays the menu screen. 2. Use U and I to select the 5 buttons menu that includes BALANCE. 3. Press BALANCE. This displays the balance screen, which shows volume level setting items for the UPPER1 part. 4. Press UPPER1, UPPER2, LOWER, or RHYTHM as required to select the item whose volume level you want to adjust. 5. Rotate the dial to change the setting value.
Controlling the Sound of a Performance Changing the Pitch in Octave Units (Octave Shift) You can use the procedure below to raise or lower pitch in octave units. Shifting the Pitch of the UPPER Tone in Octave Units (Upper Octave Shift) You can use the procedure below to raise or lower the pitch of the UPPER part in octave units. 1. Press TONE. This displays the tone screen. 2. Long-press LAYER. This displays the octave shift screen, which shows setting items for the upper octave shift. 3.
Controlling the Sound of a Performance Changing the Pitch of Each Part in Octave Units (Part Octave Shift) 1. Press TONE. This displays the tone screen. 2. Long-press LAYER. This displays the octave shift screen. 3. Press the button that corresponds to the part whose pitch you want to change. 4. Rotate the dial to change the shift amount. • You can specify a value in the range of –3 to +3 octaves.
Controlling the Sound of a Performance Changing the Pitch in Semitone Units (Transpose) You can use the procedure below to raise the overall pitch in semitone steps. You can use this feature to raise or lower the key of the keyboard to make it easier to play a piece written in a difficult key, or to adjust to a key that better matches a vocalist, or another musical instrument. 1. Press MENU. This displays the menu screen. 2. Use U and I to select the 5 buttons menu that includes SETTING. 3.
Controlling the Sound of a Performance Fine Tuning (Tuning) You can use the procedure below to adjust the overall pitch by changing the frequency of A4. (0.1Hz units) A4 1. Press MENU. This displays the menu screen. 2. Use U and I to select the 5 buttons menu that includes SETTING. 3. Press SETTING. This displays the setting screen. 4. Use U and I to select “Tuning”. 5. Rotate the dial or use – and + to adjust the tuning. • You can specify a frequency in the range of 415.5 to 465.9 Hz.
Controlling the Sound of a Performance Changing the Keyboard Scale Tuning You can change the scale tuning of the keyboard from the standard equal temperament to another tuning that is more suitable for playing Indian music, Arabic music, classical music, etc. You can select from among 17 preset scale tunings. ■ Changing the Scale Tuning 1. Press MENU. This displays the menu screen. 2. Use U and I to select the 5 buttons menu that includes SCALE. 3. Press SCALE. This displays the scale tuning screen.
Controlling the Sound of a Performance 4. Rotate the dial to select the scale. Scale settings you can select are shown in the table below.
Controlling the Sound of a Performance ■ Specifying the Base Note of the Scale Tuning 1. Press MENU. This displays the menu screen. 2. Use U and I to select the 5 buttons menu that includes SCALE. 3. Press SCALE. This displays the scale tuning screen. 4. Press ROOT. 5. Rotate the dial to change the setting. • You can specify a base note in the range of C to B. • After you rotate the dial once to select a setting, you can change the selection further using – and +.
Controlling the Sound of a Performance ■ Reflecting the Scale Setting in the Rhythm Accompaniment as Well 1. Press MENU. This displays the menu screen. 2. Use U and I to select the 5 buttons menu that includes SCALE. 3. Press SCALE. This displays the scale tuning screen. 4. Press AC SCALE. This displays “AC SCALE”, and reflects the scale setting in rhythm accompaniment as well. 5. To cancel the scale setting for rhythm accompaniment, press AC SCALE again.
Controlling the Sound of a Performance 4. Press PIANO STRCH. “PIANO STRCH” disappears from the display and piano stretch tuning is disabled. 5. To enable piano stretch tuning, press PIANO STRCH again. This displays “PIANO STRCH”. 6. To exit the setting operation, press EXIT. Using the Equalizer You can use the equalizer to configure settings that boost or cut specific frequency components. 1. Press MENU. This displays the menu screen. 2. Use U and I to select the 5 buttons menu that includes EQ. 3.
Controlling the Sound of a Performance 4. Rotate the dial or use – and + to change the setting The table below shows available equalizer settings. Setting (Display Text) Description Standard (Standard) Standard setting Loudness (Loudness) Boosts all ranges. Treble + (Treble +) Boosts the high range. Bass + (Bass +) Boosts the low range. Mellow (Mellow) Produces a mellow sound. Bright (Bright) Produces a bright sound. Rock (Rock) Produces a sound optimized for rock music.
Saving and Recalling a Setup (MY SETUP) You can up to four setups (tone, rhythm, and other settings) of the Digital Keyboard. You can recall a saved setup when you need it to perform a particular song, etc. • Four setups are pre-stored in MY SETUP by default. If you store setups, they replace the pre-stored setups. Saving to MY SETUP 1. Press MENU. This displays the menu screen. 2. Press MY SETUP. This displays the MY SETUP screen. • You can also display the MY SETUP screen from the home screen.
Saving and Recalling a Setup (MY SETUP) 4. Press SAVE. This displays “Sure?” The name of the main setting (TONE, RHYTHM, SONG, Registration) you are using also appears. 5. Press YES. This saves the current setup to MY SETUP. • To cancel, press NO. This returns to the MY SETUP screen at the beginning of the procedure. 6. When “Complete” appears on the display, press OK. This exits the save operation.
Saving and Recalling a Setup (MY SETUP) Savable Settings The settings listed below can be saved with MY SETUP.
Saving and Recalling a Setup (MY SETUP) Recalling a MY SETUP 1. Press MENU. This displays the menu screen. 2. Press MY SETUP. This displays the MY SETUP screen. 3. Rotate the dial to select the setup number you want to recall. 4. Press LOAD. This displays “Sure?” and the main setting’s name (TONE, RHYTHM, SONG, REGISTRATION) saved to the setup. 5. Press YES. This recalls the saved settings. • To cancel, press NO. This returns to the MY SETUP screen at the beginning of the procedure. 6.
Saving and Recalling a Setup (MY SETUP) Enabling MY SETUP Power On Recall Use the procedure below to enable MY SETUP power on recall, which causes MY SETUP settings to be recalled whenever power is turned on. 1. Press MENU. This displays the menu screen. 2. Press MY SETUP. This displays the MY SETUP screen. 3. Rotate the dial to select the setup number you want to recall at startup. 4. Press AT PW-ON.
Saving and Recalling a Setup (MY SETUP) Renaming a MY SETUP 1. Press MENU. This displays the menu screen. 2. Press MY SETUP. This displays the MY SETUP screen. 3. Rotate the dial to select the setup number you want to rename. 4. Use I to select the 5 buttons menu that includes RENAME. 5. Press RENAME. 6. Edit the data name. • For information about viewing and editing text, see “Inputting Characters” (page EN-20). 7. To confirm the data name, press CONFIRM. This displays “Sure?”. 8. Press YES.
Saving and Recalling a Setup (MY SETUP) 9. When “Complete” appears on the display, press OK. This exits the rename operation. • A MY SETUP name can have up to 12 characters. Deleting a MY SETUP 1. Press MENU. This displays the menu screen. 2. Press MY SETUP. This displays the MY SETUP screen. 3. Rotate the dial to select the setup number you want to delete. 4. Use I to select the 5 buttons menu that includes CLEAR.
Saving and Recalling a Setup (MY SETUP) 5. Press CLEAR. This displays “Sure?”. • You can also delete a MY SETUP by long-pressing MENU. 6. Press YES. This deletes the currently selected MY SETUP. • To cancel, press NO. 7. When “Complete” appears on the display, press OK. This exits the MY SETUP delete operation.
Playing a Built-in Song Songs With this Digital Keyboard, the term “song” (SONG) is used to refer to a set of musical data (tune, song, performance, etc.) You can use your Digital Keyboard to play or listen to songs, or you can practice playing along with a song as it plays. Using the SONG Function 1. Press SONG. This displays the song screen. 2. To exit the SONG function, press HOME or long-press TONE.
Playing a Built-in Song Playing Songs Starting or Stopping Song Play 1. Press SONG. This displays the song screen. 2. Rotate the dial to select a song. This displays the category name of the selected song. • • • • For a list of song titles, see the “Song List” (page EN-179). After you rotate the dial once to select a song, you can change the selection further using – and +. If you want to select a category, use CAT–/CAT+. To go back to the previous screen, press BACK. 3. Press a to start playback.
Playing a Built-in Song Skip Forward and Skip Back Use the operations in this section to skip forward and skip back. ■ Skip Forward While a song is playing, press FF to skip forward. • Pressing FF once skips forward one measure, while long-pressing it skips until the button is released. ■ Skip Back While a song is playing, press REW button to skip back. • Pressing REW once skips back one measure, while long-pressing it skips back until the button is released.
Playing a Built-in Song Changing a Song’s Tempo (Speed) You can use the procedure below to change the tempo (speed) for your practice. 1. Press SONG. This displays the song screen. 2. Rotate the dial to select the song whose tempo you want to change. 3. Press TEMPO. This displays the tempo screen. 4. Rotate the dial or use – and + to change the tempo value. • You can specify a tempo value in the range of 20 to 255.
Playing a Built-in Song 3. Press SETTING. This displays the setting screen. 4. Use U and I to select “Song Volume”. 5. Rotate the dial or use – and + to change the SONG volume level. • You can specify a volume value from 0 to 127. • To return the setting to its initial default, press – and + at the same time. 6. To exit the setting operation, press EXIT. Changing the Keyboard Tone While a Song Playing 1. While a song is playing, press TONE.
Playing a Built-in Song Selecting a Song on a USB Flash Drive You can use the same operations as those for built-in songs to play back MIDI files* stored in the “MUSICDAT” folder on a USB flash drive. For information about the procedure for saving a MIDI file to a USB flash drive, see “Saving Digital Keyboard Data to a USB Flash Drive” (page EN-151). * Standard MIDI files (SMF format 0/1) and CASIO MIDI files (CMF format) 1. Insert the USB flash drive into the Digital Keyboard’s USB TO DEVICE port.
Playing a Built-in Song Matching the Keyboard Tone and Song Tone (Tone Sync) Use the procedure below to assign the song tone to the keyboard so you can play along. 1. Press SONG. This displays the song screen. 2. Rotate the dial to select a song. 3. Long-press SONG. This momentarily displays “TONE SYNC ON”. • “TS” is displayed while tone sync is enabled. Tone Sync enabled 4. To disable tone sync, long-press SONG again. This momentarily displays “TONE SYNC OFF”.
Playing a Built-in Song Practicing a Song Part (Part Off) You can turn off the right-hand part or the left-hand part of a song you are playing and practice along with the remaining part. Use this when you feel that a song is initially too difficult for you to play with both hands at the same time. 1. While a song is playing or stopped, press PART. Each press of PART cycles between the lesson parts.
Playing a Built-in Song Sounding a Count in Time with a Song You can configure count settings to sound a count in time with a song and to sound a pre-count before a song starts. If pre-count is enabled, a pre-count sounds to help you determine when to start playing along. 1. While the song stopped, press COUNT. This displays a count setting item. Each press of COUNT changes the setting. Setting (Displayed Setting Name) Description Off Count does not sound.
Playing a Built-in Song Increasing the Selection of Songs (User Songs) Song data transferred to Digital Keyboard memory using a USB flash drive is saved to Song Bank songs numbered 161 to 170. Such songs can be recalled as user songs for playback. See “Loading Data From a USB Flash Drive to Digital Keyboard Memory” (page EN-153). CMF (CASIO MIDI files, file name extension CMF) and SMF (standard MIDI files, file name extension MID) can be loaded. Supported formats for SMF songs are 0 and 1.
Playing a Built-in Song Deleting a User Song 1. Press SONG. This displays the song screen. 2. Rotate the dial to select the user song you want to delete. 3. Long-press MENU. This displays “Sure?”. 4. Press YES. This deletes the user song. • To cancel, press NO. 5. When “Complete” appears on the display, press OK. This exits the user song delete operation.
Playing with a Rhythm Backing You can use the procedures in this section to select the rhythm you want, and then automatically play accompaniments to suit it simply by playing chords with your left hand. It’s like having a personal backup group along with you wherever you go. • Auto Accompaniments are made up of the parts (instruments) below.
Playing with a Rhythm Backing Playing a Rhythm 1. Press RHYTHM. This displays the currently selected rhythm number and name. 2. Rotate the dial to select a rhythm. This displays the category name of the selected rhythm. • For information about rhythm types, see the “Rhythm List” (page EN-194). • After you rotate the dial once to select an option, you can change the selection further using – and +. • If you want to select a category, use CAT–/CAT+. • To go back to the previous screen, press BACK. 3.
Playing with a Rhythm Backing Changing the Tempo Use the procedure below to change tempo to a speed that suits you. 1. Press RHYTHM. This displays the currently selected rhythm number and name. 2. Rotate the dial to select the name of the rhythm whose tempo you want to change. 3. Press TEMPO. This displays the tempo screen. 4. Rotate the dial or use – and + to change the tempo value. • You can specify a tempo value in the range of 20 to 255.
Playing with a Rhythm Backing Changing the Volume Level of a Rhythm Use the procedure below to adjust the balance between the volume levels of keyboard play and the rhythm. 1. Press MENU. This displays the menu screen. 2. Use U and I to select the 5 buttons menu that includes SETTING. 3. Press SETTING. This displays the setting screen. 4. Use U and I to select “Rhythm Volume”. 5. Rotate the dial or use – and + to change the rhythm volume level. • You can specify a volume value from 0 to 127. 6.
Playing with a Rhythm Backing Changing the Keyboard Tone While a Rhythm is Playing 1. While a rhythm is playing, press TONE. The selected tone number and instrument name appears on the display. 2. Rotate the dial to select a tone. • For tone information, see the “Tone List” (page EN-181). • After you rotate the dial once to select an option, you can change the selection further using – and +. • To return the setting to its initial default, press – and + at the same time.
Playing with a Rhythm Backing Using Recommended Rhythm Settings (One Touch Presets) You can use the procedure below to configure tone and tempo settings that are most suitable for a particular rhythm pattern. 1. Press RHYTHM. This displays the currently selected rhythm number and name. 2. Rotate the dial to select the name of the rhythm whose setting you want to configure. 3. Long-press RHYTHM. This momentarily displays “RECOMMENDED”, which indicates the recommended rhythm settings are configured.
Playing with a Rhythm Backing Sounding Rhythm as You Use Tap Tempo 1. Press RHYTHM. This displays the currently selected rhythm number and name. 2. Rotate the dial to select the name of the rhythm whose setting you want to configure. 3. Press TEMPO. This displays TAP START above one of the 5 buttons. 4. Press TAP START. This displays “TAP START”. 5. Tap the TAP TEMPO button at least twice at a steady pace that matches the rhythm beat. The rhythm starts playing from the first beat of the next measure.
Playing with a Rhythm Backing Changing the Rhythm Pattern You can use the procedure below to add liveliness to your rhythm pattern. Use the procedure below to play intro and ending patterns, to play fill-in patterns, and to play variations of basic rhythm patterns. Switching Between the Basic Pattern and Variation Pattern Each rhythm number has a basic pattern (V1) and a variation pattern (V2). You can switch to the variation pattern to add a bit of variation to your performances. 1. Press RHYTHM.
Playing with a Rhythm Backing Inserting an Intro The intro you insert at the beginning of a song is followed by the basic pattern (V1) or variation pattern (V2). 1. Press RHYTHM. This displays the currently selected rhythm number and name. 2. Rotate the dial to select the name of the rhythm whose setting you want to configure. 3. Press INTRO. This displays “I >V1”. • “I >V1” indicates that “V1” starts to play following the introduction. • To remove an intro, press VARIATION.
Playing with a Rhythm Backing Inserting an Ending Inserting an ending causes it to play for the final measures of a song. 1. While a rhythm is playing, press ENDING. This displays “E”. The ending plays from the next measure and then the rhythm stops. • Pressing VARIATION while an ending is playing interrupts the ending play up to the current measure and then plays the current rhythm pattern (V1 or V2).
Playing with a Rhythm Backing Inserting a Fill-in Phrase A “fill-in” is a short phrase played where you want to change the mood of a song. A fill-in pattern can be used to create a link between two melodies or as an accent. 1. While a rhythm is playing, press VARIATION and then select a rhythm pattern (V1 or V2). 2. Press FILL-IN. This inserts a fill-in phrase that matches the current rhythm pattern (V1 or V2).
Playing with a Rhythm Backing Fingering a Chord to Play a Rhythm Accompaniment Playing a chord with your left hand automatically adds bass and harmony accompaniment parts to the currently selected rhythm. It is just like having a personal back up group on call. 1. Press RHYTHM. This displays the currently selected rhythm number and name. 2. Rotate the dial to select the name of the rhythm whose chords you want to input. 3. Press ACCMP.
Playing with a Rhythm Backing Selecting a Chord Fingering Mode You can select from among the six chord fingering modes below. • CASIO CHORD • FINGERED 1 • FINGERED 2 • FINGERED ON BASS • FINGERED ASSIST • FULL RANGE CHORD 1. Press MENU. This displays the menu screen. 2. Use U and I to select the 5 buttons menu that includes SETTING. 3. Press SETTING. This displays the setting screen. 4. Use U and I to select “Chord Mode”. 5. Rotate the dial or use – and + to select the chord fingering mode. 6.
Playing with a Rhythm Backing ■ CASIO CHORD With CASIO CHORD, you can use simplified fingerings to play the four types of chords described below Accompaniment keyboard Chord Type Example C (C Major) Major Chords Letters below the accompaniment keyboard indicate the name of the chord assigned to each key. Accompaniment keyboard keys marked with the same chord name play exactly the same chord.
Playing with a Rhythm Backing ■ FINGERED With this chord fingering mode, you play chords on the accompaniment keyboard using their normal chord fingerings. Note that some chords can also be formed using abbreviated fingerings of one or two keys. For information about the types of chords you can finger and their fingerings, see the “Fingering Guide” (page EN-208). Accompaniment keyboard ● FINGERED 1 Play the component notes of the chord on the keyboard.
Playing with a Rhythm Backing Starting Rhythm Play when a Chord is Played (Synchro Start) Synchro Start automatically starts the rhythm when something is played on the keyboard. 1. Press RHYTHM. This displays the currently selected rhythm number and name. 2. Rotate the dial to select the name of the rhythm you want to synchro start with. 3. Press SYNC START. This enters the synchro start standby state, with “SYN.ST” flashing on the display in time with the currently set tempo. 4.
Playing with a Rhythm Backing Configuring Rhythm Play to Stop Automatically when Chord Play is Stopped (Synchro Stop) With synchro stop, rhythm play stops and Synchro Start standby is entered automatically when the accompaniment keyboard keys are released. 1. Press RHYTHM. This displays the currently selected rhythm number and name. 2. Rotate the dial to select the name of the rhythm you want to synchro stop with. 3. Long-press ACCMP This displays “SYN.SP”, which indicates Synchro Stop is enabled. 4.
Playing with a Rhythm Backing Changing the Rhythm Pattern and the Fill-in Operation Type You can use the procedure below to change the rhythm pattern change operation method and fill-in operation method. ■ Changing the rhythm operation type to Type 2 1. Press MENU. This displays the menu screen. 2. Use U and I to select the 5 buttons menu that includes SETTING. 3. Press SETTING. This displays the setting screen. 4. Use U and I to select “Rhythm Controller Type”. 5.
Playing with a Rhythm Backing • Changing the rhythm operation type to Type 2 causes the 5 buttons menu on the rhythm screen to appear as shown below. • Changing the rhythm operation type can cause the rhythm to stop and/or the rhythm to be reset to its initial default setting. • In the case of rhythm operation Type 2, the rhythm pattern is not set when a rhythm is selected, even if rhythm auto setting (page EN-107) is enabled. ■ Switching Between the Basic Pattern and Variation Pattern 1.
Playing with a Rhythm Backing ■ Intro 1. While rhythm play is stopped, press INTRO. This displays “I” and plays the intro. • Pressing VAR1 while an intro is playing displays “I >V1”. Pressing VAR2 displays “I >V2”. • If “I” is left on the display without changing it, “V1” starts to play following the introduction.
Playing with a Rhythm Backing Disabling Automatic Setting of the Tempo and Pattern when a Rhythm is Selected Selecting a rhythm causes its recommended tempo and pattern to be automatically applied. You can disable auto setting, if you want. 1. Press MENU. This displays the menu screen. 2. Use U and I to select the 5 buttons menu that includes SETTING. 3. Press SETTING. This displays the setting screen. 4. Use U and I to select “Rhythm Auto Set”. 5. Rotate the dial or use – and + to select “Off”.
Playing with a Rhythm Backing Increasing the Number of Rhythms (User Rhythms) A USB flash drive song can be loaded as a user rhythm. (Rhythm number: 201 to 210) The file name extensions for loaded rhythms are AC7, CKF, and Z00. – For information about loading a USB flash drive song as a user rhythm, see “USB Flash Drive Operations” on page EN-150. Deleting User Rhythm Data Stored in Digital Keyboard Memory 1. Press RHYTHM. This displays the currently selected rhythm number and name. 2.
Saving and Recalling Setups (Registration) Registration memory lets you store keyboard setups (tone, rhythm, etc.) for instant recall whenever you need them. When recalling a setup, you can specify items that you do not want to include in the recall (Freeze). Registration memory simplifies performance of complex pieces that require successive tone and rhythm changes.
Saving and Recalling Setups (Registration) Saving a Setup Setup registrations are stored in a memory location that is divided into 8 banks. Each bank has four storage areas, which means you can register up to 32 (8 banks × 4 areas) setups. 1. Set up the Digital Keyboard with the tone, rhythm and other settings to suit the song you play. 2. Press REGISTRATION. This displays the registration screen. 3. Use I to select the 5 buttons menu that includes STORE. 4. Press STORE.
Saving and Recalling Setups (Registration) 8. When “Complete” appears on the display, press OK. 9. To exit the setting operation, press REGISTRATION. • During any type of playback, the display shows the current measure and beat numbers. Measure, Beat • Note that registration operation memory operations are not supported while the SONG function is being used. Pressing REGISTRATION in this case causes the message “CANNOT USE” to appear momentarily.
Saving and Recalling Setups (Registration) Recalling a Saved Setup 1. Press REGISTRATION. This displays the registration screen. 2. Rotate the dial to select a bank number. 3. Use buttons 1 through 4 to select an area. This causes the bank number and area number to appear momentarily. • If the last recalled bank number is selected, the area number will be displayed at the bottom of the LCD.
Saving and Recalling Setups (Registration) Disabling Recall of Specific Settings (Freeze) Recalling a setup normally causes all settings that can be modified by a recall to be replaced by the recalled settings. With the Freeze Function, you can disable overwriting of specific setting items whenever setup data is recalled. 1. Press REGISTRATION. This displays the registration screen. 2. Use I to select the 5 buttons menu that includes FREEZE. 3. Press FREEZE.
Saving and Recalling Setups (Registration) 6. Rotate the dial to the right or press ON. This displays “On”, which indicates the displayed item is not recalled and applied to the setup. • If an item’s status is currently FRZ ITEM ON (not recalled), you can change it back to FRZ ITEM OFF (recalled) by rotating the dial to the left or by pressing OFF. This displays “Off” for the setting. 7. To disable freeze, return to the registration screen and then press FREEZE.
Saving and Recalling Setups (Registration) Enabling Auto Exit of the Registration Screen when a Setup is Recalled 1. Press REGISTRATION. This displays the registration screen. 2. Use I to select the 5 buttons menu that includes AUTO EXIT. 3. Press AUTO EXIT. This displays “AUTO EXIT”, which indicates the registration screen will be exited automatically when you recall a setup. 4. To disable auto exit, press AUTO EXIT again.
Recording Your Keyboard Play You can use the procedures in this section to record your keyboard play for later playback. There are two ways to record: Easy Recording, which simplifies recording of your performances, and Multi-track Recording, which lets you overdub record performances. Your recordings can be saved to Song Bank locations 171 through 178 (Tone Recordings: 171, Rhythm Recording: 172, Auto-Off Recording: 173: Multi-track Recording: 174 to 178).
Recording Your Keyboard Play Easy Keyboard Play Recording Use the procedure below to record a performance using tone and rhythm functions. 1. Press TONE or RHYTHM. 2. Rotate the dial to select a tone or rhythm. 3. Press RECORD. This displays “(REC)” and enters record standby. • With Tone Recording, the initial default beat setting is the metronome beat setting. • With Rhythm Recording, the initial default time signature setting is the rhythm time signature setting.
Recording Your Keyboard Play • The maximum size of a single song recording is approximately 40,000 notes or 999 measures. “(REC)” appears on the display when there are 100 or fewer notes or 32 or fewer measures of free space remaining in memory. “(REC)” disappears from the display, and recording stops automatically when memory becomes full. • To exit recording standby or an ongoing record operation, press HOME.
Recording Your Keyboard Play Changing the Beat Setting for Recording 1. Press TONE or RHYTHM. 2. Rotate the dial to select a tone or rhythm. 3. Press RECORD. This displays “(REC)” and enters record standby. 4. Long-press RECORD. This displays a record settings screen. 5. Rotate the dial to change the beat value. • For the beat setting, you can select Off, or a value of 1 to 16. • After you rotate the dial once to select a value, you can change the value further using – and +.
Recording Your Keyboard Play Sounding a Count While Recording 1. Press TONE or RHYTHM. 2. Rotate the dial to select a tone or rhythm. 3. Press RECORD. This displays “(REC)” and enters record standby. 4. Long-press RECORD. This displays a record settings screen. 5. Press COUNT and then select a count operation. Each press of COUNT changes the setting. Setting (Displayed Setting Name) Description Off Count does not sound.
Recording Your Keyboard Play Recording Along with Song Part-off Playback 1. Press SONG. This displays the song screen. 2. Rotate the dial to select a song from among the built-in songs, user songs, and USB flash drive songs. 3. Press RECORD. • If the Part-off setting is normal, it will change to RIGHT OFF. • If the count setting is off, it will change to PRECOUNT. 4. Use PART and COUNT to select the settings you want.
Recording Your Keyboard Play Deleting an Easy Recording 1. Press SONG. This displays the song screen. 2. Rotate the dial to select the Easy Recording you want to delete. 3. Press CLEAR. This displays “Sure?”. • You can also delete an Easy Recording by long-pressing MENU. 4. Press YES. This deletes the Easy Recording. • To cancel, press NO. 5. When “Complete” appears on the display, press OK. This exits Easy Recording delete.
Recording Your Keyboard Play Overdub Recording (Multi-track Recording) 1. Press SONG. • If you long-press RECORD when you are not using the recorder function, you can select the first multi-track recorded song. 2. Rotate the dial to select the Multi-track Recording you want to overdub. 3. Press RECORD. This enters record standby. 4. Long-press RECORD. This displays a record settings screen. 5. Press REC TRACK. 6. Rotate the dial to select the record destination track.
Recording Your Keyboard Play 7. Press REC START. Recording starts from the first measure, which is a preparation measure. Playback of the recorded track starts simultaneously. Now you can play along with the playback. • If you want to record your performance from the beginning without a preparation measure, start playing without pressing REC START. 8. Press RECORD to exit the recording operation.
Recording Your Keyboard Play Copying a Tone Recording or Rhythm Recording as a Multi-track Recording 1. Press SONG. This displays the song screen. 2. Rotate the dial to select the Tone Recording or Rhythm Recording you want to copy as a multi-track recording. 3. Press MTR COPY. This displays “Sure?”. 4. Press YES. This copies the data to a blank Multi-track Recording number. • To cancel, press NO. 5. When “Complete” appears on the display, press OK. This exits the copy operation.
Recording Your Keyboard Play Muting a Multi-track Recording Track 1. Press SONG. This displays the song screen. 2. Rotate the dial to select the Multi-track Recording you want to mute. 3. Press TRACK MUTE. This displays the track mute setting screen. 4. Use U and I to select the 5 buttons menu that includes the number of the track you want to mute. 5. Press the button for the number of the track you want to mute.
Recording Your Keyboard Play Adjusting the Volume Level and Pan of Each Track of a Multi-track Recording (Mixing) Pan is a setting that controls the distribution of a sound signal. 0 indicates the center, while a smaller value shifts to the left and a larger value shifts to the right. 1. Press SONG. This displays the song screen. 2. Rotate the dial to select the Multi-track Recording you want to adjust. 3. Press MIX. This displays the parameter selection screen. 4.
Recording Your Keyboard Play 7. Rotate the dial to adjust. • The original (pre-adjusted) track is retained until you save your adjustments in steps 8 and 9 below. If you want to discard your adjustments and revert to the original (pre-adjusted) track, select press NO in step 9. • The range of both the volume and pan value is –127 to +127. These settings can be adjusted relative to the recorded value. The adjusted volume and pan value ranges are 0 to 127 and –64 to +63, respectively.
Recording Your Keyboard Play 10.When “Complete” appears on the display, press OK. This displays the parameter selection screen.
Recording Your Keyboard Play Copying a Multi-track Recording 1. Press SONG. This displays the song screen. 2. Rotate the dial to select the Multi-track Recording you want to copy. 3. Press MANAGE. This displays the Multi-track Recording management screen. 4. Press SONG COPY. This displays the multi-track copy destination selection screen. 5. Rotate the dial or use – and + to select the copy destination. 6. Press SELECT. This displays “Sure?”. 7. Press YES. This copies the multi-track recording.
Recording Your Keyboard Play 8. When “Complete” appears on the display, press OK. This completes the multi-track copy operation.
Recording Your Keyboard Play Deleting One or More of the Multi-track Recordings in Memory 1. Press SONG. This displays the song screen. 2. Rotate the dial to select the Multi-track Recording you want to delete. 3. Press MANAGE. This displays the Multi-track Recording management screen. 4. Press SONG CLEAR. This displays “Sure?”. 5. Press YES. This deletes the multi-track recording. • To cancel, press NO. 6. When “Complete” appears on the display, press OK.
Recording Your Keyboard Play Copying the Solo Track of a Multi-track Recording 1. Press SONG. This displays the song screen. 2. Rotate the dial to select the Multi-track Recording whose solo track you want to copy. 3. Press MANAGE. This displays the Multi-track Recording management screen. 4. Press TRACK COPY. This displays the solo track copy source selection screen. 5. Rotate the dial or use – and + to select the copy source. 6. Press SELECT.
Recording Your Keyboard Play 9. Press YES. This copies the solo track. • To cancel, press NO. 10.When “Complete” appears on the display, press OK. This exits the solo track copy operation.
Recording Your Keyboard Play Deleting a Multi-track Recording Track 1. Press SONG. This displays the song screen. 2. Rotate the dial to select the Multi-track Recording whose track you want to delete. 3. Press MANAGE. This displays the Multi-track Recording management screen. 4. Press TRACK CLEAR. This displays the track delete selection screen. 5. Rotate the dial or use – and + to select a track. 6. Press SELECT. This displays “Sure?”. 7. Press YES. This deletes the track. • To cancel, press NO.
Recording Your Keyboard Play 8. When “Complete” appears on the display, press OK. This exits the track delete operation.
Customizing the Home Screen (Home Customization) You can change the Home Screen’s Base Display and/or the 5 buttons to customize the screen as you like. You can also configure a setting so various type of playback do not stop when you press the HOME. Base display 5 buttons menu items • Saving Customize contents in MY SETUP keeps them from being deleted when the Digital Keyboard is turned off.
Customizing the Home Screen (Home Customization) Changing the Function of Each 5 buttons 1. Press MENU. This displays the menu screen. 2. Use U and I to select the 5 buttons menu that includes HOME CSTM. 3. Press HOME CSTM. This displays the Home Customization screen, which shows Base Display items. 4. Press 5 BTN (5 buttons). This displays the 5 buttons (5 BTN) setting screen. 5. Use U and I to select the button whose function you want to change. 6.
Customizing the Home Screen (Home Customization) Preventing Playback Stop when HOME is Pressed (PANIC function) Pressing the HOME normally stops all types of playback. This is the “PANIC function”. This lets you stop playback instantly, even if you do not know how to stop a particular type of playback. You can also disable the PANIC function if you want. 1. Press MENU. This displays the menu screen. 2. Use U and I to select the 5 buttons menu that includes HOME CSTM. 3. Press HOME CSTM.
Configuring Settings Setting Operation Use the procedure below to configure settings. 1. Press MENU. This displays the menu screen. 2. Use U and I to select the 5 buttons menu that includes SETTING. 3. Press SETTING. This displays the setting screen. 4. Use the U and I buttons to select a setting item. 5. Rotate the dial or use – and + to change the setting. 6. To exit the setting operation, press EXIT.
Configuring Settings Setting Item List Function Name Description Display Name Setting Transpose Can be used to raise the overall Transpose pitch in semitone steps to make it easier to play a piece written in a difficult key, or to adjust to a key that better matches a vocalist, another musical instrument, etc. Touch off velocity Can be used to specify the velocity value when Touch Response is disabled.
Configuring Settings Function Name Description Display Name Setting AUDIO IN center cancel Can be used to cancel the center part of audio input using the AUDIO IN jack or Bluetooth audio. Audio In Center Cancel Off, On (Initial Default: Off) MIDI OUT Channel UPPER1 Can be used to change the channel of MIDI messages that are MIDI output by UPPER1 play.
Configuring Settings • The settings below are retained even when power is turned off. – MIDI OUT Channel (Upper1, Upper2, Lower) – Bluetooth – MY SETUP power on recall – Auto Power Off – Battery type – Display contrast – Button long-press time Returning Settings to Their Initial Factory Defaults 1. Press MENU. This displays the menu screen. 2. Use U and I to select the 5 buttons menu that includes SETTING. 3. Press SETTING. This displays the setting screen. 4. Use U and I to select “All Initialize”.
Configuring Settings 6. Press YES. After initialization is complete, the message “Complete” appears for a few seconds, and then the Digital Keyboard restarts. • To cancel, press NO.
Using a USB Flash Drive Your Digital Keyboard supports the use of a commercially available USB flash drive to perform the operations below. • Formatting USB flash drives. • Saving of Digital Keyboard MY SETUP, recorded song, and other data to a USB flash drive. • Importing of MY SETUP, recorded song, and other data from a USB flash drive to Digital Keyboard memory. • Using the Digital Keyboard to play back general song data (MIDI files) copied to a USB flash drive using a computer.
Using a USB Flash Drive Inserting and Removing a USB Flash Drive on the Digital Keyboard Supported USB Flash Drives Your Digital Keyboard supports USB flash drives formatted to FAT (FAT32 or exFAT). If your USB flash drive is formatted to a different file system, use the Windows format function on a computer to reformat it to FAT (FAT32 or exFAT). Do not use quick format. • Never insert anything besides a CASIO specified device or a USB flash drive into the USB TO DEVICE port.
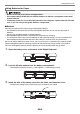
Using a USB Flash Drive Mounting a USB Flash Drive on the Digital Keyboard 1. As shown in the illustration below, insert a USB flash drive into the Digital Keyboard’s USB TO DEVICE port. • Carefully push the USB flash drive in as far as it goes. Do not use undue force when inserting the USB flash drive. USB TO DEVICE port USB flash drive Removing a USB Flash Drive From the Digital Keyboard 1.
Using a USB Flash Drive USB Flash Drive Formatting • Be sure to format a USB flash drive on the Digital Keyboard before using it for the first time. • Formatting a USB flash drive deletes all data currently stored on it. Before formatting a USB flash drive, make sure it does not have any valuable data stored on it. • The format operation performed by this Digital Keyboard is a “quick format”.
Using a USB Flash Drive 8. When “Complete” appears on the display, press OK. This exits the formatting operation. • Formatting a USB flash drive on the Digital Keyboard creates a folder named “MUSICDAT” in its root directory. Use this folder when exchanging data between the Digital Keyboard and USB flash drive.
Using a USB Flash Drive USB Flash Drive Operations The section provides information about the operations below. • Saving Digital Keyboard data to a USB flash drive • Importing Data (Files) from a USB Flash Drive to Digital Keyboard Memory • Deleting Digital Keyboard Importable Data (Files) on a USB Flash Drive • Renaming Digital Keyboard Importable Data (Files) on a USB Flash Drive ■ Data Types Data types supported by your Digital Keyboard are those shown in the table below.
Using a USB Flash Drive Saving Digital Keyboard Data to a USB Flash Drive 1. Insert the USB flash drive into the Digital Keyboard’s USB TO DEVICE port. 2. Press MENU. This displays the menu screen. 3. Use U and I to select the 5 buttons menu that includes MEDIA. 4. Press MEDIA. This displays the media screen. 5. Press SAVE. 6. Press the button that corresponds to the data type you want to save. • If you select ALL DATA as the data type, steps 7 and 8 are not necessary. Proceed to step 9.
Using a USB Flash Drive 11.Press the YES to save the file. This saves the file to the USB flash drive. • To cancel, press NO. 12.When “Complete” appears on the display, press OK. • When saving Multi-track Recording data as a standard MIDI file (SMF), only the system track data is saved if the system track contains data. If the system track does not contain any data, only the solo track data is saved.
Using a USB Flash Drive Loading Data From a USB Flash Drive to Digital Keyboard Memory 1. Insert the USB flash drive into the Digital Keyboard’s USB TO DEVICE port. 2. Press MENU. This displays the menu screen. 3. Use U and I to select the 5 buttons menu that includes MEDIA. 4. Press MEDIA. This displays the media screen. 5. Press LOAD. 6. Press the button that corresponds to the type of data you want to load.
Using a USB Flash Drive 11.Press YES. This loads the file. • To cancel, press NO. 12.When “Complete” appears on the display, press OK.
Using a USB Flash Drive Deleting a USB Flash Drive File 1. Insert the USB flash drive into the Digital Keyboard’s USB TO DEVICE port. 2. Press MENU. This displays the menu screen. 3. Use U and I to select the 5 buttons menu that includes MEDIA. 4. Press MEDIA. This displays the media screen. 5. Press DELETE. 6. Touch the data type of the data you want to delete. • If you pressed SONG, press the button that corresponds to the song type you want to delete. 7.
Using a USB Flash Drive Renaming a File on a USB Flash Drive 1. Insert the USB flash drive into the Digital Keyboard’s USB TO DEVICE port. 2. Press MENU. This displays the menu screen. 3. Use U and I to select the 5 buttons menu that includes MEDIA. 4. Press MEDIA. This displays the media screen. 5. Use U and I to select the 5 buttons menu that includes RENAME. 6. Press RENAME. 7. Press the button that corresponds to the data type you want to rename.
Using a USB Flash Drive 12.Press YES. This renames the file. • To cancel, press NO. 13.When “Complete” appears on the display, press OK. • Changing the letters in a file name from upper case to lower case or vice versa does not count as a name change. Change the file name to something else.
Connecting with External Devices Linking with a Smart Device (APP Function) You can use the APP function to connect the Digital Keyboard with a phone, tablet or other smart device and perform the operations described below. • Using the lesson functions of an app on the smart device, playing notes on the Digital Keyboard. • Using the Digital Keyboard sound source to sound music data played using an app on the smart device. • Configure the settings of your smart device (Airplane Mode, etc.
Connecting with External Devices Connecting with a Smart Device There are two ways to connect with a smart device: using a commercially available USB cable and connection via Bluetooth. ■ Using a Cable to Connect the Digital Keyboard with a Smart Device For information about the requirements for a cable used for connection, visit the website below. https://web.casio.com/app/en/play/support/connect.html 1. Referring to “Downloading the Smart Device App” (page EN-158), install the app on the smart device.
Connecting with External Devices ■ Using Bluetooth to Connect the Digital Keyboard with a Smart Device You can use the Wireless MIDI & audio adaptor (Option: WU-BT10) for Bluetooth connection. 1. Referring to “Downloading the Smart Device App” (page EN-158), install the app on the smart device. 2. Plug the Wireless MIDI & audio adaptor into the USB TO DEVICE port (page EN-13). • After connecting the smart device to the Digital Keyboard, use the smart device app to perform operations.
Connecting with External Devices Connecting to a Computer and Using MIDI You can connect the Digital Keyboard to a computer and exchange MIDI data between them. You can record your performance using computer music software, and use the Digital Keyboard to play data sent from a computer. ■ Minimum Computer System Requirements The following shows the minimum computer system requirements for sending and receiving MIDI data. Be sure to check your computer system setup before trying to install the driver.
Connecting with External Devices ■ Connecting to a Computer • Incorrect connections can make data exchange impossible. Be sure to follow the steps of the procedure below. 1. Turn off the Digital Keyboard and then start up your computer. • Do not start up the music software on your computer yet! 2. Use a commercially available USB cable to connect your computer to the Digital Keyboard’s USB TO HOST port. • Use a USB 2.0 or 1.1 A-micro-B connector type USB cable that supports data communication. 3.
Connecting with External Devices Using a Cable to Connect with an Audio Device You can connect this Digital Keyboard to a commercially available playback device or amplifier, or to a recording device. You can also use this Digital Keyboard to sound output from a portable audio player or another device, and use that as backing for your keyboard play. ■ Sounding Output from the Digital Keyboard on an External Device Connection requires commercially available connecting cords, supplied by you.
Connecting with External Devices ■ Sounding Input From an External Device on This Digital Keyboard Connection requires commercially available connecting cords, supplied by you. The connecting cord should have a stereo mini plug on one end for connection to this Digital Keyboard and a plug that matches the configuration of the output jack of external device on the other end. When sounding input from an external device with this Digital Keyboard, use the external device controls to adjust the volume level.
Connecting with External Devices Sounding a Bluetooth Audio Capable Device (Bluetooth Audio Pairing) You can use a Wireless MIDI & audio adaptor (optional: WU-BT10) to pair this Digital Keyboard with an external Bluetooth audio capable audio device and then playback from the external device through this Digital Keyboard’s speakers. • Before performing the pairing operation, turn down the volume levels of this Digital Keyboard and the external device.
Connecting with External Devices 6. Press BLUETOOTH. This displays the Bluetooth screen. 7. Press PAIRING. This displays the Bluetooth audio pairing screen with “Pairing” shown, indicating Bluetooth audio pairing. • A broken line is under the Bluetooth icon while the Digital Keyboard is Bluetooth audio paired with another device. • To stop Bluetooth audio pairing, press CANCEL. 8. Use the setting screen of the Bluetooth-capable audio device to select “WU-BT10 AUDIO” to pair with this Digital Keyboard.
Connecting with External Devices Deleting Bluetooth Audio Capable Device Pairing Registration • Performing the procedure below will delete the pairing registration between this Digital Keyboard and it’s currently paired Bluetooth audio capable device. If you are experiencing connectivity problems with a Bluetooth audio capable device, perform the procedure below and then perform the procedure under “Sounding a Bluetooth Audio Capable Device (Bluetooth Audio Pairing)” (page EN-165).
Connecting with External Devices 8. Press YES. This deletes the Bluetooth audio pairing registration. • To cancel, press the NO button. 9. When “Complete” appears on the display, press OK. This exits the Bluetooth audio-capable pairing registration delete operation.
Connecting with External Devices Connecting with a Bluetooth MIDI Capable Device You can use a Wireless MIDI & audio adaptor (optional WU-BT10) to pair this Digital Keyboard with a Bluetooth MIDI-capable audio device. 1. Long-press P (Power) to turn off the Digital Keyboard. 2. Plug the Wireless MIDI & audio adaptor into the USB TO DEVICE port (page EN-13). 3. Press P (Power) to turn on the Digital Keyboard. 4.
Connecting with External Devices Turning Off Bluetooth You can use the procedure below to turn off Bluetooth if you do not need to connect via Bluetooth using the Wireless MIDI & Audio adaptor (Option: WU-BT10). 1. Press MENU. This displays the menu screen. 2. Use U and I to select the 5 buttons menu that includes BLUETOOTH. 3. Press BLUETOOTH. This displays the Bluetooth screen. 4. Press BT. This turns off Bluetooth, which causes “BT” and the Bluetooth icon to disappear from the display.
Reference Troubleshooting Symptom Required Action Included Accessories I can’t find included items during unpacking. Carefully check inside all of the packing materials. Power Requirements Power does not turn on. • Check the AC adaptor or make sure that the batteries are facing correctly (page EN-8). • Replace the batteries with new ones. Or use AC adaptor power (page EN-8). Press P (Power) to turn power back on. When P (Power) is pressed, the display appears momentarily, but power does not turn on.
Reference Symptom Required Action Nothing happens when I start playing a song’s Auto Accompaniment. • It takes a little time after you press the button until the song starts to play. Wait for the song to start. • Check and adjust the song volume level (page EN-79). • Song play does not start if a is pressed while there is no song data stored in song numbers 161 through 178 (page EN-85, EN-116). • Try turning the Digital Keyboard off and then back on again (page EN-23) to initialize settings.
Reference Symptom Required Action Operation Tone, rhythm, and other settings revert to their initial defaults whenever I turn on the Digital Keyboard. Turning power off and then back on again initializes Digital Keyboard settings (page EN-23). You can save setups to registration memory (page EN-109). Connecting to a computer I can’t send or receive MIDI data.
Reference Error Indicators Display Name Cause Action Measure Limit You are attempting to record more than 1,000 measures. Make your recordings up to 999 measures long. Memory Full You are attempting a recording that exceeds the allowable per-song size limit. Keep song recordings with the allowable per-song size limit Data Full You are attempting to copy a Tone Recording and Rhythm Recording as a Multi-track Recording when there is no empty Multi-track Recording number.
Reference Display Name Cause Action Version Not Supported The USB flash drive file version is not supported by the Digital Keyboard. Use a version that is supported by the Digital Keyboard. Unformatted The USB flash drive format is not compatible with the Digital Keyboard. Use a computer to format the USB flash drive to a format that is compatible with the Digital Keyboard The USB flash drive is corrupted. Use a different USB flash drive.
Reference Product Specifications Model CT-S400/CT-S410 Keyboard 61 keys Touch Response 3 types, Off Maximum Polyphony 48 notes Tones Preset Tones Other 600 Layer, Split, Sustain Effects Reverb (20 types, Off); Chorus (10 types, Tone); DSP (Built into some tones) Master Effects Equalizer (10 presets) Active Effects Volume sync equalizer, Surround External Input Effects Vocal Cut. Cancels the vocal (center) part in audio input using the AUDIO IN terminal or Bluetooth audio.
Reference Other Functions Transpose ±1 octave (–12 to 0 to +12 semitones) Octave Shift –3 to 0 to +3 octaves Tuning A4 = 415.5 to 465.9Hz (Initial Default: 440.0Hz) Scales 17 preset scales Auto Harmonize 12 types Arpeggiator 100 types Pitch Bend Wheel 0 to 24 semitones APP Function Supported Devices MIDI Function iOS, Android (USB terminal connection) 16-channel multi-timbre receive; GM Level 1 standard Jacks PHONES/OUTPUT jack Stereo mini jack (3.5 mm) AUDIO IN jack Stereo mini jack (3.
Reference AC Adaptor Handling Precautions Model: AD-E95100L 1. Read these instructions. 2. Keep these instructions on hand. 3. Heed all warnings. 4. Follow all instructions. 5. Do not use this product near water. 6. Clean only with a dry cloth. 7. Do not install near radiators, heat registers, stoves, or any other source of heat (including amplifiers). 8. Use only attachments and accessories specified by the manufacturer. 9. Refer all servicing to qualified service personnel.
Reference Song List No. Title PIANO/CLASSICS 1 FÜR ELISE 2 LA PRIÈRE D’UNE VIERGE 3 VALSE op.64 no.1 “PETIT CHIEN” 4 TURKISH MARCH (MOZART) 5 TRÄUMEREI 6 ETUDE op.10 no.3 “CHANSON DE L’ADIEU” 7 LIEBESTRÄUME no.3 8 NOCTURNE op.9 no.2 (CHOPIN) 9 CANON (PACHELBEL) 10 JE TE VEUX 11 MARY HAD A LITTLE LAMB 12 LE CYGNE FROM “LE CARNAVAL DES ANIMAUX” 13 SONATA op.13 “PATHÉTIQUE” 2nd Mov. 14 HEIDENRÖSLEIN 15 AIR FROM “SUITE no.
Reference No.
Reference Tone List No. Tone Name PIANO 1 STAGE PIANO 2 GRAND PIANO 3 BRIGHT PIANO 4 MELLOW PIANO 5 POP PIANO 6 ROCK PIANO 7 DANCE PIANO 8 LA PIANO 9 TACK PIANO 10 MONO PIANO 11 HONKY-TONK 12 OCTAVE PIANO 13 WIDE GRAND PIANO 14 STRINGS PIANO 15 PIANO PAD 16 ELEC.GRAND PIANO 17 MODERN E.G.PIANO 18 HARPSICHORD 1 19 HARPSICHORD 2 20 COUPLED HARPSICHORD ELEC.PIANO 21 GALAXIA EP 22 DYNAMIC EP 23 LUCENT EP 24 ELEC.PIANO 1 25 ELEC.PIANO 2 26 ELEC.PIANO 3 27 ELEC.PIANO 4 28 ELEC.PIANO 5 29 ELEC.
Reference No. Tone Name 47 MARIMBA 48 XYLOPHONE 49 CELESTA 50 GLOCKENSPIEL 51 MUSIC BOX 52 TUBULAR BELL 53 CHURCH BELLS ORGAN 54 JS ORGAN 55 RTF FD ORGAN 56 ROCK OD ORGAN 57 TREMOLO ORGAN 58 DP ORGAN 59 JAZZ ORGAN 1 60 JAZZ ORGAN 2 61 ELEC.ORGAN 1 62 ELEC.ORGAN 2 63 ELEC.ORGAN 3 64 ELEC.ORGAN 4 65 ELEC.ORGAN 5 66 PERC.ORGAN 1 67 PERC.
Reference No. Tone Name 95 96 97 98 99 100 101 102 103 104 105 106 107 108 109 110 111 112 113 114 115 116 117 118 119 120 121 122 123 124 125 126 127 128 129 130 131 132 133 134 135 136 137 BASS 138 139 140 141 142 143 STEEL STR.GUITAR 3 STEEL STR.GUITAR 4 12 STR.
Reference No.
Reference No. Tone Name 193 CHAMBER 194 OCTAVE STRINGS 195 ORCHESTRA HIT 196 SOLO VIOLIN 197 VIOLIN 198 SLOW VIOLIN 199 VIOLA 200 CELLO 201 CONTRABASS 202 HARP 203 VIOLIN SECTION 204 HARP & STRINGS BRASS 205 STEREO BRASS 206 SOLO TRUMPET 207 SYNTH-BRASS 1 208 BRASS 209 BRASS SECTION 1 210 BRASS SECTION 2 211 BIG BAND BRASS 212 HARD BRASS 213 BRASS SFZ 214 BRASS VELO.FALL 215 BRASS VELO.SHAKE 216 BRASS VELO.
Reference No. Tone Name 241 SOLO BASSOON 242 ALTO SAX 243 TENOR SAX 244 BREATHY TENOR SAX 245 SOPRANO SAX 246 BARITONE SAX 247 HARD ALTO SAX 248 TENOR SAXYS 249 CLARINET 250 VELO.
Reference No.
Reference No.
Reference No. 387 388 389 390 391 392 393 394 395 396 397 398 399 400 401 402 403 404 405 406 407 408 409 410 411 412 413 414 415 416 417 418 419 420 421 422 423 424 425 426 427 428 429 430 431 432 433 434 435 436 Tone Name SHANAI BANSURI PUNGI TABLA CAVAQUINHO VIOLA CAIPIRA BERIMBAU PANDEIRO ANGKLUNG TREM.
Reference No. Tone Name 437 ARABIC STRINGS 438 BANJO 439 MUTE BANJO 440 STEEL DRUMS 441 FIDDLE GM TONES 442 GM PIANO 1 443 GM PIANO 2 444 GM ELEC.GRAND PIANO 445 GM HONKY-TONK 446 GM E.PIANO 1 447 GM E.
Reference No.
Reference No.
Reference No.
Reference Rhythm List No.
Reference No.
Reference No.
Reference Arpeggiator List No.
Reference Drum Assignment List Key C-1 C{-1 D-1 E-1 F-1 E}-1 F{-1 G-1 A}-1 A-1 B-1 C0 B}-1 C{0 D0 E0 F0 E}0 F{0 G0 A}0 A0 B0 C1 B}0 C{1 D1 E1 F1 E}1 F{1 G1 A}1 A1 B1 C2 B}1 C{2 D2 E2 F2 E}2 F{2 G2 A}2 A2 B2 C3 B}2 C{3 D3 E3 F3 E}3 F{3 G3 A}3 A3 B}3 B3 C4 C{4 D4 E}4 E4 F4 G4 A4 F{4 A}4 B}4 B4 C5 D5 C{5 E}5 E5 F5 F{5 G5 A}5 A5 B5 C6 B}5 C{6 D6 E}6 E6 F6 F{6 G6 A}6 A6 B6 C7 B}6 C{7 D7 E}7 E7 F7 F{7 G7 A}7 A7 B}7 B7 C8 C{8 D8 E}8 E8 F8 G8 F{8 A}8 A8 B}8 B8 C9 C{9 D9 E}
Reference Key C-1 C{-1 D-1 E-1 F-1 E}-1 F{-1 G-1 A}-1 A-1 B-1 C0 B}-1 C{0 D0 E0 F0 E}0 F{0 G0 A}0 A0 B0 C1 B}0 C{1 D1 E1 F1 E}1 F{1 G1 A}1 A1 B1 C2 B}1 C{2 D2 E2 F2 E}2 F{2 G2 A}2 A2 B2 C3 B}2 C{3 D3 E3 F3 E}3 F{3 G3 A}3 A3 B}3 B3 C4 C{4 D4 E}4 E4 F4 G4 A4 F{4 A}4 B}4 B4 C5 D5 C{5 E}5 E5 F5 F{5 G5 A}5 A5 B5 C6 B}5 C{6 D6 E}6 E6 F6 F{6 G6 A}6 A6 B6 C7 B}6 C{7 D7 E}7 E7 F7 F{7 G7 A}7 A7 B}7 B7 C8 C{8 D8 E}8 E8 F8 G8 F{8 A}8 A8 B}8 B8 C9 C{9 D9 E}9 E9 F9 G9 F{9 Note
Reference Key C-1 C{-1 D-1 E-1 F-1 E}-1 F{-1 G-1 A}-1 A-1 B-1 C0 B}-1 C{0 D0 E0 F0 E}0 F{0 G0 A}0 A0 B0 C1 B}0 C{1 D1 E1 F1 E}1 F{1 G1 A}1 A1 B1 C2 B}1 C{2 D2 E2 F2 E}2 F{2 G2 A}2 A2 B2 C3 B}2 C{3 D3 E3 F3 E}3 F{3 G3 A}3 A3 B}3 B3 C4 C{4 D4 E}4 E4 F4 G4 A4 F{4 A}4 B}4 B4 C5 D5 C{5 E}5 E5 F5 F{5 G5 A}5 A5 B5 C6 B}5 C{6 D6 E}6 E6 F6 F{6 G6 A}6 A6 B6 C7 B}6 C{7 D7 E}7 E7 F7 F{7 G7 A}7 A7 B}7 B7 C8 C{8 D8 E}8 E8 F8 G8 F{8 A}8 A8 B}8 B8 C9 C{9 D9 E}9 E9 F9 G9 F{9 Note
Reference Key C-1 C{-1 D-1 E-1 F-1 E}-1 F{-1 G-1 A}-1 A-1 B-1 C0 B}-1 C{0 D0 E0 F0 E}0 F{0 G0 A}0 A0 B0 C1 B}0 C{1 D1 E1 F1 E}1 F{1 G1 A}1 A1 B1 C2 B}1 C{2 D2 E2 F2 E}2 F{2 G2 A}2 A2 B2 C3 B}2 C{3 D3 E3 F3 E}3 F{3 G3 A}3 A3 B}3 B3 C4 C{4 D4 E}4 E4 F4 G4 A4 F{4 A}4 B}4 B4 C5 D5 C{5 E}5 E5 F5 F{5 G5 A}5 A5 B5 C6 B}5 C{6 D6 E}6 E6 F6 F{6 G6 A}6 A6 B6 C7 B}6 C{7 D7 E}7 E7 F7 F{7 G7 A}7 A7 B}7 B7 C8 C{8 D8 E}8 E8 F8 G8 F{8 A}8 A8 B}8 B8 C9 C{9 D9 E}9 E9 F9 G9 F{9 Note
Reference Key C-1 C{-1 D-1 E-1 F-1 E}-1 F{-1 G-1 A}-1 A-1 B-1 C0 B}-1 C{0 D0 E0 F0 E}0 F{0 G0 A}0 A0 B0 C1 B}0 C{1 D1 E1 F1 E}1 F{1 G1 A}1 A1 B1 C2 B}1 C{2 D2 E2 F2 E}2 F{2 G2 A}2 A2 B2 C3 B}2 C{3 D3 E3 F3 E}3 F{3 G3 A}3 A3 B}3 B3 C4 C{4 D4 E}4 E4 F4 G4 A4 F{4 A}4 B}4 B4 C5 D5 C{5 E}5 E5 F5 F{5 G5 A}5 A5 B5 C6 B}5 C{6 D6 E}6 E6 F6 F{6 G6 A}6 A6 B6 C7 B}6 C{7 D7 E}7 E7 F7 F{7 G7 A}7 A7 B}7 B7 C8 C{8 D8 E}8 E8 F8 G8 F{8 A}8 A8 B}8 B8 C9 C{9 D9 E}9 E9 F9 G9 F{9 Note
Reference Versatile Tone Map Key Velocity Sound 135 VERSATILE NYLON GUITAR C1 - B6 1-30 Normal mp 31-60 Normal mf 61-75 Ghost Note 76-90 Mute 91-105 Hammering 106-120 Glissando 121-127 Open Harmonics C7 1-127 Strum 1 C{7 1-127 Strum 2 D7 1-127 Strum 3 E}7 1-127 Strum 4 E7 1-127 Strum 5 F7 1-127 Strum 6 F{7 1-127 Strum 7 G7 1-127 Strum 8 A}7 1-127 Strum 9 A7 1-127 Strum 10 B}7 1-127 Strum 11 B7 1-127 Strings Slap 1 C8 1-127 Strings Slap 2 C{8 1-127 Strings Slap 3 D8 1-127 Strings Slap 4 D{8 1-127 Strings Sl
Reference Key Velocity Sound A{7 1-127 Strum 11 B7 1-127 Strum 12 C8 1-127 Strum 13 C{8 1-127 Strum 14 D8 1-127 Low Ghost Note 1 D{8 1-127 Low Ghost Note 2 E8 1-127 Low Ghost Note 3 F8 1-127 Low Ghost Note 4 F{8 1-127 Low Ghost Note 5 G8 1-127 Low Ghost Note 6 G{8 1-127 Low Ghost Note 7 A8 1-127 Low Ghost Note 8 A{8 1-127 Low Ghost Note 9 B8 1-127 Low Ghost Note 10 C9 1-127 Fret Noise1 C{9 1-127 Fret Noise2 D9 1-127 Fret Noise3 D{9 1-127 Fret Noise4 E9 1-127 Fret Noise5 F9 1-127 Fret Noise6 F{9 1-127 Fret
Reference Home Customization 5 buttons Function List Category Screen BLANK BLANK MENU MENU TONE BALANCE OCTAVE SHIFT TONE BALANCE OCTAVE SHIFT Display Name Screen Empty Blank Menu Item My Setup My Setup on Menu Menu Item Metronome Metronome on Menu Menu Item Balance Balance on Menu Menu Item Octave Shift Octave Shift on Menu Menu Item Sustain Sustain on Menu Menu Item Pedal Pedal on Menu Menu Item Pitch Bend Wheel Pitch Bend on Menu Menu Item Arpeggiator Arpeggiator on Menu
Reference Category ARPEGGIATOR AUTO HARMONIZE Screen ARPEGGIATOR AUTO HARMONIZE Display Name Arpeggiator Screen Arpeggiator Hold Arpeggiator Hold Part Arpeggiator Part Auto Harmonize Auto Harmonize METRONOME METRONOME Start/Stop Metronome St/Sp TEMPO TEMPO + Tempo + – Tempo – REGISTRATION REGISTRATION Tap tempo Tap Tempo 1 Registration Area 1 2 Registration Area 2 3 Registration Area 3 4 Registration Area 4 Next bank Reg Bank Next Previous bank Reg Bank Prev Next area
Reference Category MIDI Screen MIDI Display Name MIDI OUT channel MIDI Out Ch Upper1 Upper2 MIDI Out Ch Upper2 Lower MIDI Out Ch Lower Local Control SETTING SETTING Transpose Screen Upper1 Local Control + Transpose + – Transpose – Transpose Transpose Tuning Tuning Surround Surround Audio center cancel Audio In Center Cxl *1 Not shown on the tone screen. *2 Rhythm Variation 1 in the case of Operation Type 2. *3 Rhythm Variation 2 in the case of Operation Type 2.
Reference Fingering Guide ■ FINGERED 1, FINGERED 2 Chords *4 C *4 CM7}5 *4 Caug7 *4 Cm CaugM7 Cdim C7sus4 Caug *3 C6 *1 *3 C}5 Cm6 *2 *3 Csus4 *3 Cadd9 Csus2 *3 Cmadd9 C7 *4 C69 *3 Cm69 *3 Cm7 *3 CM7 *4 *1 *2 *3 *4 CmM7 Cdim7 *3 *4 CdimM7 C7}5 *3 Cm7}5 *3 EN-208 With FINGERED 2, interpreted as Am7. With FINGERED 2, interpreted as Am7}5. Inverted form not supported in some cases.
Reference ■ FINGERED ON BASS, FULL RANGE CHORD In addition to the chords that can be fingered with FINGERED 1 and FINGERED 2, the chords below also are recognized.
Reference Chord Example List *1 *2 C C /(DD) D (D )/ED E F M m dim aug sus4 sus2 7 m7 M7 m7D5 7D5 7sus4 add9 madd9 mM7 dim7 69 6 m6 *1 Root *2 Chord Type • Since the chord input range is limited, this model may not support some of the chords shown above.
Reference *1 *2 F /(GD) G (G )/AD A (A )/BD B M m dim aug sus4 sus2 7 m7 M7 m7D5 7D5 7sus4 add9 madd9 mM7 dim7 69 6 m6 *1 Root *2 Chord Type • Since the chord input range is limited, this model may not support some of the chords shown above.
Model: CT-S400/CT-S410 Version : 1.
MA2104-A