Important Notice Due to the nature of wireless communications, transmission and reception of data can never be guaranteed. Data may be delayed, corrupted (i.e., have errors) or be totally lost.
Limitation of Liability The information in this manual is subject to change without notice and does not represent a commitment on the part of Axesstel.
Table of Contents 1. Introduction ……………………………………….…...……….. 5 2. Product Overview …………………………….………...…...… 7 3. Knowing your Modem ……………………….……..………… 10 Package Contents ………………………………………………. 10 Modem Interface ………………………………………………… 10 System Components ……………………………………………. 13 4. Connecting and Configuring your Modem ….………..…… 15 5. Using USB with your Modem ……………….……..………… 19 6. Connection using Ethernet (RJ45) Ports ….………….…… 24 Configuring Your PC …………………………….……………… 24 Configuring Ethernet Connection ……………….
Introduction Thank you for purchasing the Axesstel MV400/MV400R/MV400i-series EV-DO Modem (the Modem). This user manual will help you setup, configure and outline best practices for maximizing your wireless home network performance with the Modem. Please be sure to read through this User Manual completely, and pay special attention to the section entitled “Placement of your Modem for Optimal Performance” on page 2.
• • and are positioned vertically (toward the ceiling). If your Modem itself is positioned vertically, point the antennas as much as possible in an upward direction. In multistory homes, place the Modem on an upper floor. Try not to place the Modem near a cordless phone (MV400-series only). 2. Avoid Obstacles and Interference Avoid placing your Modem near devices that may emit radio “noise,” such as microwave ovens.
Product Overview In minutes you will be able to connect your computers to the Internet, share your Internet connection and network your computers. The following is a list of features that make your new Axesstel EV-DO Modem an ideal solution for your home or small office network. Implementation of these features depends on the particular service provider and account features you have chosen.
Plug-and-Play Each Modem has been provisioned at the factory for use with a particular service provider. This sets the Modem to use particular radio channels and enables services specific for that provider. Although the Modem comes with drivers and enabling software, you don’t have to install and use them if you simply want to connect to the Internet, assuming that your Modem has been activated with the network (The process of setting up your account is called activation.
Integrated 10/100 4-Port Switch The Modem has a built-in, 4-port network switch to allow your wired computers to share printers, data and MP3 files, digital photos, and much more. The switch features automatic detection so it will adjust to the speed of connected devices. The switch will transfer data between computers and the Internet simultaneously without interrupting or consuming resources.
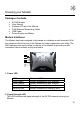
Knowing your Modem Packages Contents • • • • • • EV-DO Modem User Manual Software CD with User Manual RJ45 Ethernet Networking Cable USB Cable Power Supply and Battery Modem Interfaces The Modem has been designed to be placed on a desktop or wall mounted. All of the cables exit from the front of the Modem for better organization and utility. The LED indicators are easily visible on the top of the Modem to provide you with information about network activity and status. 1.
OFF Solid Green Solid Orange Solid Red No EV-DO signal Strongest level Medium level Low signal 3. Connect LED This LED informs you that the Modem is connected to a wireless network and passed through the user/password validation. OFF Solid Green Modem is not connected to network Modem is connected to network 4. 1x/EV-DO LED This LED informs you that the Modem is tuned to a 1x or EV-DO wireless network. Normally your Modem is programmed to search and use EV-DO network.
7. USB Connection to Computers Connect your wired (non-wireless) computer to this port using the supplied USB cable. 8. USB/RJ-45 Switch This switch allows your Modem to connect with your computer via either USB port or RJ-45 ports. 9. Connections to Computers (Wired Computer Ports) Connect your wired (non-wireless) computers to these ports. These ports are RJ45, 10/100 auto-negotiation, auto up-linking ports for standard UTP category 5 or 6 Ethernet cable. The ports are labeled 1 through 4. 10.
System components Your Modem is just one part of a system designed to provide you with a wide range of communication features. Every component of the system is needed to enable these capabilities. Your host computing device Your notebook or PC hosts the Modem and runs the communication software: your web browser or email application and Connection Manager—the Modem enabling software.
A CDMA service provider account Companies that operate CDMA networks and provide access to these networks are called service providers. To use the Modem, you must have an account with a CDMA service provider. Each service provider has its own pricing options. There may be flat rate accounts, which provide you a maximum number of minutes of network usage for a fixed monthly fee. There may be accounts for which you are charged for network usage by the minute or by the amount of data transmitted.
Connecting and Configuring your Modem Each Modem has been provisioned at the factory for use with a particular service provider. This sets the Modem to use particular radio channels and enables services specific for that provider. MV400-series and MV400i-series: Although the Modem comes with drivers and enabling software, you don’t have to install and use them if you simply want to connect to the Internet through the Ethernet (RJ-45) ports, assuming that your Modem has been activated with the network.
1.2 Make sure you have the following items at the computer that is going to be the main connection with the Modem. DO NOT CONNECT THE MODEM AT THIS TIME. • The Installation Software CD with User Manual • The Modem • The Modem’s Power Supply • RJ45 Ethernet Networking Cable 1.3 Turn off any firewall or Internet-connection-sharing software on your computer. 1.4 Insert the installation software CD into your CD-ROM drive. The Installation screen will automatically appear on your screen within 15 seconds.
Step 3 │ Preparing your PC Your Modem’s Ethernet is configured with DHCP by default. This means that IP address of your PC is automatically assigned by the Modem. Make sure that your PC has the correct TCP/IP setting for its "Local Area Connection" by following the steps below. 3.1 Click "Start", select "Connect To" and scroll down to "Show all connections" and left click it. 3.2 Right click "Local Area Connection" scroll down to "Properties" and left click it 3.3 Select the “Internet Protocol (TCP/IP)”.
3.4 Check “Obtain an IP address automatically” 3.5 Check “Obtain DNS Server address automatically” 3.6 Click Ok to exit Properties 3.7 If asked to re-start the PC, click “YES”.
Using USB with your Modem The Modem has one USB Type B port to provide connectivity for computers equipped with USB. If you choose to use the USB with your Modem, you first need to install the provided USB device driver into your computer. This chapter provides the step-by-step process to install the USB device driver. IMPORTANT: Run the USB device driver installation from the computer that is going to be the main connection with the Modem. DO NOT CONNECT THE MODEM AT THIS TIME.
1.5 Click “OK”. Step 2 │Connecting the Modem to your PC 2.1. Turn off both the EV-DO modem and your PC. 2.2. Connect the included USB Cable to the USB port on your PC. 2.3. The Modem cable select switch, located between Ethernet and USB connectors, should be set to USB. 2.4. Connect other end of the USB Cable to USB port on the Modem. 2.5. Connect the included Power Adapter to Power connector of EV-DO modem. 2.6. Connect the other end of Power Adapter to an electrical outlet. 2.7.
Step 3 │Window Device Setup 3.1 Power ON the PC. After the boot-up process, you will see “Found New Hardware” screen appears. Select Next to install USB 3.2 Select “Continue Anyway”. 3.3 Press “Finish” to complete the process.
3.4 Axesstel Diagnostic Port will be detected on your PC. Select Next to install. 3.5 Select “Continue Anyway”. 3.6 Press “Finish” to complete the process.
Connecting to Data Service with USB connection After USB driver has been installed, you must use AxessManager to configure and connect the Modem to the network. Please refer to AxessManager Operational Guide chapter for detailed instructions. Make sure the Modem selector switch is set to USB position before attempting the connection. Normally Windows OS will automatically detect your Modem USB connection after you have installed AxessManager.
Connection Using Ethernet (RJ45) Ports Although the Modem comes with drivers and enabling software, you don’t have to install and use them if you simply want to connect to the Internet through the Ethernet (RJ-45) ports, assuming that your Modem has been activated with the network If you have MV400R-series, first go to AxessManager Operation Guide to authenticate and configure your RUIM (if needed) before returning to the below instructions.
2 25 Double-click on “Network Connection”. 3 Go to Local Area Connection Properties. 4 Select the “Internet protocol (TCP/IP)”. If there is no TCP/IP line listed, you will need to install TCP/IP first. 5 Press the “Properties” button.
6 Check “Obtain an IP address automatically”. 7 Check “Obtain DNS Server address automatically”. 8 Click OK to exit Properties 9 If asked to re-start the PC, click “YES”. Configuring Ethernet Connection Your EV-DO Modem provides an embedded Web-based Management Utility to help you configure it using your Web Browser. Follow these steps to configure your Modem’s Ethernet connection. 1. Open your Web browser and enter 192.168.0.
2. A pop-up window will appear. When prompt for User name and password, enter the following user id and password. User Name: admin Password: admin * If you have changed the user name and the password, enter the new user name and password. Note: This user name and password are only for the Web Manager access. Changing these settings does not change AxessManager user profile name and password. After entering the correct user name and password, the pop up window will change to a web-based window.
AxessManager Operational Guide AxessManager is a SW utility that allows the administration of your Modem. One computer at a time can log into the Modem via AxessManager for the purposes of making changes to the settings of the Modem. Once a user has logged in to make changes, all other computers connected to the Modem inherit the same settings. For example, if the Modem is set to use only 1X packet data, all connections to the network through the Modem RJ-45 ports or Wi-Fi will be 1X.
Using the Main Window User Interface The Main window is the first page you will see when you access the AxessManager User Interface (UI). The Main window shows you a quick view of the Modem’s status and settings. All advanced setup pages can be reached from this page. 1. Signal Strength Icon This icon indicates the signal strength of the EV-DO network serving your Modem. The range below applied to EV-DO signal only.
Low signal (-111 ≤ sig. < -103 dBm ) Medium-Low (-103 ≤ sig. < -98 dBm) Medium signal (-98 ≤ sig. < -93 dBm) Medium-high (93 ≤ sig. < -88 dBm) Strongest signal (≥ -88 dBm) Antenna + 1 bar Antenna + 2 bars Antenna + 3 bars Antenna + 4 bars Antenna + 5 bars 2.
5. Activity Icon This icon indicates data activity between your Modem and the network. OFF Blinking arrows Steady arrows No data activity Data passing through your Modem Modem is in connect or dormant state 6. Info Text Messages There are various Info messages displayed in this window. These messages inform you various statuses of your Modem.
button exits AxessManager utility. Note that exiting the utility does not mean turning off your Modem. For example, if you exit the utility while the Modem is in Connected or Connected (Dormant) mode, other computers can be plugged in one of the ports and use the service. The - button allows you to minimize AxessManager utility into Window tray. Using the Menu Window The Menu window is the main Interface that gives you access to more advanced settings of your Modem.
A. System Selection This drop down menu lets you specify the wireless network that your Modem will scan and seek service from. There are 4 modes for which your Modem can operate: • • • • EV-DO only EV-DO and 1xRTT 1xRTT only Not available Note that EV-DO allows broadband high speed (up to 3.1 Mbps) while 1xRTT only supports up to 153 kbps. The default setting of your Modem is set by your service provider and is normally "EV-DO and 1xRTT".
3. Status Tab This tab shows you various performance statuses of your Modem. There are no further actions needed in this tab. 4. USB Connection Profile Tab This tab lets you define and manage the USB connection of your Modem. You only have to specify items in this tab if you choose to connect and operate your computer with the Modem via the USB port. Note that there is only one USB port on the Modem hence there is only one single user who can use the Modem in this mode.
A. Profile List This window contains all the USB connection profiles previously defined in the computer currently in use to connect with the Modem and indicates which profile is active. Note that this list is stored in the computer and not in the Modem, hence any changes you make in the profiles are only stored locally. If you have more than one PC and intent to use the USB connection with the Modem (not simultaneously) you will need to make the same changes in each PC. B.
attempting this step. To delete an existing profile, first highlight it by clicking the profile name in the list then hit the "Delete" button. To modify some settings of an existing profile, highlight it in the profile list then click the "Edit" button. A secondary pop up window similar to the "Add" pop up window will appear. This window is populated with existing parameter values. You simply change the appropriate parameter as needed.
Web Manager User Interface The Web Manager User Interface is a web-based tool that you can use to set up the Modem if you don’t want to use the default setting of Install CD. You can also use it to manage advanced functions of the Modem.
advance to step 2. Skip the rest of step 1. 1.3 From Menu window, select "Network" tab. A secondary pop up window will appear and ask you to enter User Name and Password. 1.4 Enter the User Name and Password then click "OK". The pop up window will change to a web-based window Step 2 │Navigate web-based UI 2.1 The Basic Setting page is the first page you will see when you access the web based Advanced User Interface (UI). The basic setting page shows you a quick view of the Modem’s login setting.
1. Quick Navigation Links You can go directly to any of the Modem’s UI pages by clicking directly on these links. The links are divided into logical categories and grouped by tabs to make finding a particular setting easier to find. 2. Page Name The page you are on can be identified by this name. This User Manual will sometimes refer to pages by name. For instance “Advanced > LAN IP Setup” refers to the “LAN IP Setup” page.
Configuring the Wireless Network Settings MV400-series only Clicking on the header of the “Wireless Settings” tab will take you to the “Wireless Settings” header page. From this page, the Modem’s Wi-Fi router wireless radio can be enabled or disabled (the default setting is enabled). There are options that allow you to make changes to the Wi-Fi wireless network settings. Changing the Wireless Network Name (SSID) To identify your wireless network, a name called the SSID (Service Set Identifier) is used.
g and b Mode In this mode, the Modem is compatible with 802.11b and 802.11g wireless clients simultaneously. This is the factory default mode and ensures successful operation with all Wi-Fi compatible devices. If you have a mix of 802.11b and 802.11g clients in your network, we recommend setting the Modem to g and b mode. This setting should only be changed if you have a specific reason to do so. g only Mode g only mode works with 802.11g clients only.
the other wireless networks. For best performance, use a channel that is at least five channels away from the other wireless network. For instance, if another network is operating on channel 11, then set your network to channel 6 or below. To change the channel, select the channel from the drop-down list. Click “Apply Changes”. The change is immediate.
changed if needed. 2. Subnet Mask This is a unique, advanced feature of your Axesstel Modem. It is possible to change the subnet mask if necessary; however, do NOT make changes to the subnet mask unless you have a specific reason to do so. The default setting is “255.255.255.0”. From this page, users can see all settings associated with the Modem’s router network functions.
Configuring Port Forwarding Clicking on the header of the “Port Forwarding” tab will take you to the “Port Forwarding” header page. This function will allow you to route external (Internet) calls for services such as a web server (port 80), FTP server (Port 21), or other applications through your Router to your internal network. Since your internal computers are protected by a firewall, computers outside your network (over the Internet) cannot get to them because they cannot be “seen.
Block Services The Modem can be configured to restrict access to the Internet, email, or other network services at specific days and times. Restriction can be set for a single computer, a range of computers, or multiple computers. To restrict Internet access to a single computer, for example, enter the IP address of the computer you wish to restrict access to in the IP fields. Next, enter “80” in both the port fields. Select “Block”.
¾ Allow. In this mode, the service table shows the client MAC address allowed by the Modem. To modify the service table (i.e. to add, change address or remove clients) simply enter the correct value and click “Apply”. Note: You will not be able to delete the MAC address of the computer you are using to access the Router’s administrative functions (the computer you are using now). WAN Setup Clicking on the header of the “WAN Setup” tab will take you to the “WAN Setup” header page.
the outside. This heightens the level of security of your Modem. To turn OFF the ping response, select “Not Respond to Ping on Internet Port” and click “Apply”. The Modem will not respond to an ICMP ping. HTTP Ping Blocking To turn OFF the HTTP response, select “Not Respond to HTTP on Internet Port” and click “Apply”. The Modem will not respond to an HTTP ping. LAN IP Setup Clicking on the header of the “LAN IP Setup” tab will take you to its header page.
10.x.x.x (where x is anything between 0 and 255). 2. Subnet Mask: There is no need to change the subnet mask. This is a unique, advanced feature of your Modem. It is possible to change the subnet mask if necessary; however, do NOT make changes to the subnet mask unless you have a specific reason to do so. The default setting is “255.255.255.0”. Use Router as DHCP Server The DHCP server function makes setting up a network very easy by assigning IP addresses to each computer on the network automatically.
Troubleshooting Problem: Installation CD does not automatically start. Solution: If the CD-ROM does not start the Install software automatically, it could be that the computer is running other applications that are interfering with the CD drive. 1. If the Install screen does not appear within 15—20 seconds, open up your CD-ROM drive by double-clicking on the “My Computer” icon that is located on your desktop. 2.
• If you are still unable to access the Internet after verifying these settings, please contact your Service Provider Technical Support. Problem: • The Install software completed installation, but my web browser doesn’t work. • I am unable to connect to the Internet. The Modem’s “Signal” light is on and the “Connect” light is on.
• • • The “Power” light should be on. The “Connected” light should be on and not blinking. The “WAN” light should be either on or blinking. 2. Open your wireless utility software by clicking on the icon in the system tray at the bottom, right-hand corner of the screen. 3. The exact window that opens will vary depending on the model of wireless card you have; however, any of the utilities should have a list of “Available Networks”—those wireless networks it can connect to.
property, go to the Windows Control Panel, open “Network Connections” and double-click on your wireless card’s connection. In the “Properties” dialog, select the “Configure” button on the “General” tab (Windows 98 users will have to select the wireless card in the list box and then click “Properties”), then choose the “Advanced” tab and select the rate property.
Technical Specifications This chapter provides technical product data for the Modem. Radio frequency and electrical specifications Frequency Rx: 463 ~ 468 MHz MV410 Range Tx: 453 ~ 458 MHz Frequency Rx: 859.64 ~ 893.37 MHz MV420 & MV440 Range Frequency Tx: 824.64 ~ 848.37 MHz MV430 & MV440 Rx: 1930 ~ 1989.95 MHz Range Tx: 1850 ~ 1909.95 MHz Channel Bandwidth CDMA 1.23 MHz Stability of frequency 0.
Appendix A: Glossary 1X 1x-EVDO One Times Radio Transmission Technology (the “one times” refers to the frequency spectrum). Supports Internet connections with data rates up to 153 Kbps. Actual speed depends on the network conditions. Compare to 1x EV-DO. A high speed standard for cellular packet data communications Rev. A supports Internet connections with data rates up to3.1 Mbps (downlink from the network) and 1.8 Mbps (uplink to the network). Rev.
original PPP session resumes. ESN Electronic Serial Number—The unique first generation serial number assigned to the Modem for cellular network use. Compare to MEID. FCC Federal Communications Commission. The U.S. federal agency that is responsible for interstate and foreign communications. The FCC regulates commercial and private radio spectrum management, sets rates for communications services, determines standards for equipment, and controls broadcast licensing. Consult www.fcc.gov.
packet A short fixed length block of data including a header that is transmitted as a unit in a communications network. PCS Personal Communications Services—A cellular communication infrastructure that uses a different frequency range than AMPS. roaming A cellular subscriber is in an area where service is obtained from a cellular service provider that is not the subscriber’s provider. RUIM Removable User Identity Module.
SAR INFORMATION THIS MODEL PHONE MEETS THE GOVERNMENT’S REQUIREMENTS FOR EXPOSURE TO RADIO WAVES. Your wireless phone is a radio transmitter and receiver. It is designed and manufactured not to exceed the emission limits for exposure to radiofrequency (RF) energy set by the Federal Communications Commission of the U.S. Government. These limits are part of comprehensive guidelines and establish permitted levels of RF energy for the general population.
be found under the Display Grant section of http://www.fcc.gov/ oet/fccid after searching on FCC ID: PH7MV440. Additional information on Specific Absorption Rates (SAR) can be found on the Cellular Telecommunications Industry Asso-ciation (CTIA) web-site at http://www.wow-com.com. * In the United States and Canada, the SAR limit for mobile phones used by the public is 1.6 watts/kg (W/kg) averaged over one gram of tissue.
Safety Information 1 . SAFETY INFORMATION FOR FIXED WIRELESS TERMINALS .POTE NTIALLY EXPLOSIVE ATMOSPHERES Turn your phone OFF when in any area with a potentially explosive atmosphere and obey all signs and instructions. Sparks in such areas could cauls e an explosion or fire resulting in bodily injury or even death. INTERFERENCE TO MEDICAL DIVICES Certain electronic equipment may be shielded against RF signal from you wireless phone.
U.S.A. U.S.FEDERAL COMMUNICATIONS COMMISSION RADIO FREQUENCY INTERFERENCE STATEMENT INFORMATION TO THE USER NOTE : This equipment has been tested and found to comply with the limits for a Class B digital device pursuant to Part 15 of the FCC Rules.