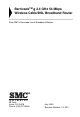
BarricadeTM g 2.4 GHz 54 Mbps Wireless Cable/DSL Broadband Router From SMC’s Barricade line of Broadband Routers 38 Tesla Irvine, CA 92618 Phone: (949) 679-8000 July 2003 Revision Number: V.
COPYRIGHT Information furnished by SMC Networks, Inc. (SMC) is believed to be accurate and reliable. However, no responsibility is assumed by SMC for its use, nor for any infringements of patents or other rights of third parties which may result from its use. No license is granted by implication or otherwise under any patent or patent rights of SMC. SMC reserves the right to change specifications at any time without notice. Copyright © 2003 by SMC Networks, Inc.
COMPLIANCES Federal Communication Commission Interference Statement This equipment has been tested and found to comply with the limits for a Class B digital device, pursuant to Part 15 of the FCC Rules. These limits are designed to provide reasonable protection against harmful interference in a residential installation.
Compliances EC Conformance Declaration - Class B SMC contact for these products in Europe is: SMC Networks Europe, Edificio Conata II, Calle Fructuós Gelabert 6-8, 2o, 4a, 08970 - Sant Joan Despí, Barcelona, Spain.
Compliances Industry Canada - Class B This digital apparatus does not exceed the Class B limits for radio noise emissions from digital apparatus as set out in the interference-causing equipment standard entitled “Digital Apparatus,” ICES-003 of the Department of Communications.
Compliances Wichtige Sicherheitshinweise (Germany) 1. Bitte lesen Sie diese Hinweise sorgfältig durch. 2. Heben Sie diese Anleitung für den späteren Gebrauch auf. 3. Vor jedem Reinigen ist das Gerät vom Stromnetz zu trennen. Verwenden Sie keine Flüssigoder Aerosolreiniger. Am besten eignet sich ein angefeuchtetes Tuch zur Reinigung. 4. Die Netzanschlu ßsteckdose soll nahe dem Gerät angebracht und leicht zugänglich sein. 5. Das Gerät ist vor Feuchtigkeit zu schützen. 6.
TABLE OF CONTENTS About the Wireless Barricade g Router . . . . . . . . 1 LED Indicators . . . . . . . . . . . . . . . . . . . . . . . . . . . . . . . . . . . . . . 1 Features and Benefits . . . . . . . . . . . . . . . . . . . . . . . . . . . . . . . . 2 Installing the Wireless Barricade g Router . . . . . . 3 Package Contents . . . . . . . . . . . . . . . . . . . . . . . . . . . . . . . . . . . 3 Hardware Description . . . . . . . . . . . . . . . . . . . . . . . . . . . . . . . . . 4 System Requirements .
TABLE OF CONTENTS LAN . . . . . . . . . . . . . . . . . . . . . . . . . . . . . . . . . . . . . . . . Wireless . . . . . . . . . . . . . . . . . . . . . . . . . . . . . . . . . . . . . NAT - Network Address Translation . . . . . . . . . . . . . . . . Firewall . . . . . . . . . . . . . . . . . . . . . . . . . . . . . . . . . . . . . . DDNS (Dynamic DNS) Settings . . . . . . . . . . . . . . . . . . . UPnP (Universal Plug and Play) Setting . . . . . . . . . . . . Tools . . . . . . . . . . . . . . . . . . . . .
ABOUT THE WIRELESS BARRICADE G ROUTER Congratulations on your purchase of the Wireless Barricade™ g Broadband Router. SMC is proud to provide you with a powerful yet simple communication device for connecting your local area network (LAN) to the Internet. LED Indicators The Wireless Barricade g Router includes status LED indicators, as described in the following figure and table.
About the Wireless Barricade g Router Features and Benefits 2 • Internet connection to DSL or cable modem via a 10/100 Mbps WAN port • Local network connection via 10/100 Mbps Ethernet ports or 54 Mbps wireless interface (supporting up to 253 mobile users) • 802.11g draft Compliant – interoperable with multiple vendors • Advanced security through 64/128-bit WEP encryption, 802.
INSTALLING THE WIRELESS BARRICADE G ROUTER Before installing the Wireless Barricade™ g Broadband Router, verify that you have all the items listed under “Package Contents.” If any of the items are missing or damaged, contact your local SMC distributor. Also be sure that you have all the necessary cabling before installing the Router. After installing the Router, refer to the web-based configuration program in “Configuring the Wireless Barricade g Router” on page 26 for information on configuring the Router.
Installing the Wireless Barricade g Router Hardware Description The Router can be connected to the Internet or to a remote site using its RJ-45 WAN port. It can be connected directly to your PC or to a local area network using any of the Fast Ethernet LAN ports. Access speed to the Internet depends on your service type. Full-rate ADSL can provide up to 8 Mbps downstream and 640 Kbps upstream. G.lite (or splitterless) ADSL provides up to 1.5 Mbps downstream and 512 Kbps upstream.
Hardware Description • One RJ-45 port for connection to a DSL or cable modem (WAN). This port also auto-negotiates operating speed to 10/100 Mbps, the mode to half/full duplex, and the pin signals to MDI/MDI-X. The following figure shows the components of the Router: Figure 1. Front and Rear Panels Item Description Reset Button Use this button to reset the power and restore the default factory settings. LEDs Power, WLAN, WAN and LAN port status indicators. (See “LED Indicators” on page 1.
Installing the Wireless Barricade g Router System Requirements You must have an ISP that meets the following minimum requirements: • Internet access from your local telephone company or Internet Service Provider (ISP) using a DSL modem or cable modem. • A PC using a fixed IP address or dynamic IP address assigned via DHCP, as well as a Gateway server address and DNS server address from your service provider.
Connect the System Basic Installation Procedure 1. Connect the LAN: Connect the Router to your PC, or to a hub or switch. Run Ethernet cable from one of the LAN ports on the rear of the Router to your computer’s network adapter or to another network device. You may also connect the Router to your PC (using a wireless client adapter) via radio signals. Position both antennas on the back of the Router into the desired positions. For more effective coverage, position the antennas along different axex.
Installing the Wireless Barricade g Router Attach to Your Network Using Ethernet Cabling The four LAN ports on the Router auto-negotiate the connection speed to 10 Mbps Ethernet or 100 Mbps Fast Ethernet, and the transmission mode to half duplex or full duplex. Use twisted-pair cable to connect any of the four LAN ports on the Router to an Ethernet adapter on your PC.
Connect the System Attach to Your Network Using Radio Signals Install a wireless network adapter in each computer that will be connected to the Internet or your local network via radio signals. SMC currently offers several wireless network cards, including the SMC2802W and SMC2835W wireless cards. Rotate both antennas on the back of the Router to the desired position. For more effective coverage, position the antennas around 45 to 90 degrees apart.
Installing the Wireless Barricade g Router A wireless infrastructure can be used for access to a central database, or for connection between mobile workers, as shown in the following figure: Wired to Wireless Network Extension Internet Internet Access Device Notebook with Wireless PC Card Adapter LAN PWR SMC7004 WLAN WAN 1 2 3 Link Activity AWBR Wireless Cable/DSL Broadband Router Wired LAN PC with Wireless PCI Adapter Figure 4.
Connect the System Attach the Wireless Barricade g Router to the Internet If Internet services are provided through an xDSL or cable modem, use unshielded or shielded twisted-pair Ethernet cable (Category 3 or greater) with RJ-45 plugs to connect the broadband modem directly to the WAN port on the Router. DSL/Cable Modem ISP (Primary) Figure 5.
CONFIGURING CLIENT TCP/IP If you have not previously installed the TCP/IP protocols on your client PCs, refer to the following section. If you need information on how to configure a TCP/IP address on a PC, refer to “Setting Up TCP/IP” on page 15. Installing TCP/IP Windows 95/98/Me 1. Click Start/Settings/Control Panel. 2. Double-click the Network icon and select the Configuration tab in the Network window. 3. Click the Add button. 4. Double-click Protocol.
Installing TCP/IP 5. Select Microsoft in the manufacturers list. Select TCP/IP in the Network Protocols list. Click the OK button to return to the Network window. 6. The TCP/IP protocol will be listed in the Network window. Click OK. The operating system may prompt you to restart your system. Click Yes and the computer will shut down and restart. Windows 2000 1. Click the Start button and choose Settings, then click the Network and Dial-up Connections icon. 2.
Configuring Client TCP/IP 4. Double-click Protocol. 5. Choose Internet Protocol (TCP/IP). Click the OK button to return to the Network window. 6. The TCP/IP protocol will be listed in the Network window. Click OK to complete the installation procedure.
Setting Up TCP/IP Setting Up TCP/IP To access the Internet through the Router, you must configure the network settings of the computers on your LAN to use the same IP subnet as the Router. The default network settings for the Router are: Gateway IP Address: 192.168.2.1 Subnet Mask: 255.255.255.0 Note: These settings may be changed to suit your network requirements, but you must first configure at least one computer as described in this chapter to access the Router’s web configuration interface.
Configuring Client TCP/IP 3. On the Network window Configuration tab, double-click the TCP/IP entry for your network card. 4. Click the IP Address tab. 5. Click the “Obtain an IP address“ option. 6. Next click on the Gateway tab and verify the Gateway field is blank. If there are IP addresses listed in the Gateway section, highlight each one and click Remove until the section is empty. 7. Click the OK button to close the TCP/IP Properties window.
Setting Up TCP/IP 8. On the Network Properties Window, click the OK button to save these new settings. Note: Windows may ask you for the original Windows installation disk or additional files. Check for the files at c:\windows\options\cabs, or insert your Windows CD-ROM into your CDROM drive and check the correct file location, e.g., D:\win98, D:\win9x. (if D is the letter of your CD-ROM drive). 9. Windows may prompt you to restart the PC. If so, click the Yes button.
Configuring Client TCP/IP Configuring Your Computer in Windows NT 4.0 1. From the Windows desktop click Start/Settings/Control Panel. 2. Double-click the Network icon. 3. Click on the Protocols tab. 4. Double-click TCP/IP Protocol. 5. Click on the IP Address tab. 6. In the Adapter drop-down list, be sure your Ethernet adapter is selected.
Setting Up TCP/IP 7. Click on “Obtain an IP address from a DHCP server.” 8. Click OK to close the window. 9. Windows may copy files and will then prompt you to restart your system. Click Yes and your computer will shut down and restart. Obtain IP Settings From Your Wireless Barricade g Router Now that you have configured your computer to connect to the Router, it needs to obtain new network settings.
Configuring Client TCP/IP 3. Type IPCONFIG /RENEW and press the key. Verify that your IP Address is now 192.168.2.xxx, your Subnet Mask is 255.255.255.0 and your Default Gateway is 192.168.2.1. These values confirm that the Router is functioning 4. Type EXIT and press to close the Command Prompt window. Configuring Your Computer in Windows 2000 1. Access your Network settings by clicking Start, then choose Settings and then select Control Panel. 2.
Setting Up TCP/IP 4. In the Local Area Connection Properties box, verify the box next to Internet Protocol (TCP/IP) is checked. Then highlight the Internet Protocol (TCP/IP), and click the Properties button. 5. Select “Obtain an IP address automatically” to configure your computer for DHCP. Click the OK button to save this change and close the Properties window. 6. Click the OK button again to save these new changes. 7. Reboot your PC. 8.
Configuring Client TCP/IP 2. Locate and double-click the Local Area Connection icon for the Ethernet adapter that is connected to the Router. Next, click the Properties button. 3. In the Local Area Connection Properties box, verify the box next to Internet Protocol (TCP/IP) is checked. Then highlight the Internet Protocol (TCP/IP), and click the Properties button. 4. Select “Obtain an IP address automatically” to configure your computer for DHCP.
Setting Up TCP/IP 2. Make sure that Built-in Ethernet is selected in the Show field. 3. On the TCP/IP tab, select Using DHCP in the Configure field. 4. Close the TCP/IP dialog box. Manual IP Configuration (for all Windows OS) 1. Check Specify an IP address on the IP Address tab. Enter an IP address based on the default network 192.168.2.x (where x is between 2 and 254), and use 255.255.255.0 for the subnet mask.
Configuring Client TCP/IP 2. In the Gateway tab, add the IP address of the Router (default: 192.168.2.1) in the New gateway field and click Add. 3. On the DNS Configuration tab, add the IP address for the Router and click Add. This automatically relays DNS requests to the DNS server(s) provided by your ISP. Otherwise, add specific DNS servers into the DNS Server Search Order field and click Add. 4. After finishing TCP/IP setup, click OK, and then reboot the computer.
Setting Up TCP/IP Verifying Your TCP/IP Connection After installing the TCP/IP communication protocols and configuring an IP address in the same network as the Router, use the Ping command to check if your computer has successfully connected to the Router. The following example shows how the Ping procedure can be executed in an MS-DOS window. First, execute the Ping command: ping 192.168.2.1 If a message similar to the following appears: Pinging 192.168.2.1 with 32 bytes of data: Reply from 192.168.2.
CONFIGURING THE WIRELESS BARRICADE G ROUTER The Wireless Barricade g Router can be configured by Internet Explorer 4.0 or above. Using the web management interface, you can configure the Router and view statistics to monitor network activity. Note: Before you attempt to configure your router, if you have access to the Internet please visit www.smc.com and download the latest firmware update to ensure your Router is running the latest firmware.
Browser Configuration Disable Proxy Connection You will also need to verify that the HTTP Proxy feature of your web browser is disabled. This is so that your web browser will be able to view the Router configuration pages. The following steps are for Internet Explorer. Internet Explorer 5 or above (For Windows) 1. Open Internet Explorer. Click Tools, and then select Internet Options. 2. In the Internet Options window, click the Connections tab. 3. Click the LAN Settings button. 4.
Configuring the Wireless Barricade g Router Navigating the Web Browser Interface To access the Router’s management interface, enter the Router IP address in your web browser http://192.168.2.1 Then click LOGIN. (By default, there is no password.) The home page displays the Setup Wizard and Advanced Setup options.
Navigating the Web Browser Interface The Router’s management interface features a Setup Wizard and an Advanced Setup section. Use the Setup Wizard if you want to quickly set up the Router for use with a cable modem or DSL modem. Advanced setup supports more advanced functions like hacker attack detection, IP and MAC address filtering, intrusion detection, virtual server setup, virtual DMZ hosts, and other advanced functions.
Configuring the Wireless Barricade g Router Setup Wizard Time Zone Click on the Setup Wizard picture. The first item in the Setup Wizard is Time Zone setup. For accurate timing of client filtering and log events, you need to set the time zone. Select your time zone from the drop-down list, and click NEXT.
Setup Wizard Broadband Type Select the type of broadband connection you have. For a cable modem connection see the following page. For a Fixed-IP xDSL connection see “Fixed-IP xDSL” on page 32, for a PPPoE xDSL connection, see “PPPoE xDSL” on page 33, for a PPTP connection, see “Point-to-Point Tunneling Protocol (PPTP)” on page 34, and for BigPond connection, see “BigPond” on page 35.
Configuring the Wireless Barricade g Router Cable Modem Your Internet Service Provider may have given you a host name. If so, enter it into the field. Click Finish to complete the setup. The Status page will open to allow you to view the connection status, as well as other information. See “Status” on page 68 for details. Fixed-IP xDSL Some xDSL Internet Service Providers may assign a fixed (static) IP address.
Setup Wizard PPPoE xDSL Enter the PPPoE User Name and Password assigned by your Service Provider. The Service Name is normally optional, but may be required by some service providers. Leave the Maximum Transmission Unit (MTU) at the default value (1454) unless you have a particular reason to change it. Enter a Maximum Idle Time (in minutes) to define a maximum period of time for which the Internet connection is maintained during inactivity.
Configuring the Wireless Barricade g Router Point-to-Point Tunneling Protocol (PPTP) Point-to-Point Tunneling Protocol is a common connection method used for xDSL connections in Europe. It can be used to join different physical networks using the Internet as an intermediary. If you have been provided with the information as shown on the screen, enter the PPTP Account name and password, Host Name, Service IP Address, the assigned IP address, and subnet mask.
Advanced Setup BigPond If you use the BigPond Internet Service which is available in Australia, enter the the user name, password and service name for BigPond authentication. Click FINISH to complete the setup. Advanced Setup Use the web management interface to define system parameters, manage and control the Router and its ports, or monitor network conditions. The following table outlines the selections available from this program.
Configuring the Wireless Barricade g Router Menu Description Wireless Configures the radio frequency, SSID, encryption, and 802.1x for wireless communications. Firewall Configures a variety of security and specialized functions, including: Access Control, Hacker Prevention, and DMZ. DDNS Dynamic DNS provides users on the Internet with a method to tie their domain name to a computer or server.
Advanced Setup System Time Zone Set the time zone and time server for the Router. This information is used for log entries and client access control. Check Enable Automatic Time Server Maintenance to automatically maintain the Router’s system time by synchronizing with a public time server over the Internet. Then configure two different time servers by selecting the options in the Primary Server and Secondary Server fields.
Configuring the Wireless Barricade g Router Password Settings Use this menu to restrict access based on a password. By default, there is no password. For security you should assign one before exposing the Router to the Internet. Passwords can contain from 3–12 alphanumeric characters and are not case sensitive.
Advanced Setup Note: If your password is lost, or you cannot gain access to the user interface, press the Reset button on the rear panel (holding it down for at least five seconds) to restore the factory defaults. (The default is no password.) Enter a maximum Idle Time Out (in minutes) to define a maximum period of time for which the login session is maintained during inactivity.
Configuring the Wireless Barricade g Router WAN Specify the WAN connection type provided by your Internet Service Provider, then click More Configuration to enter detailed configuration parameters for the selected connection type. Dynamic IP The Host Name is optional, but may be required by some ISPs. The default MAC address is set to the WAN’s physical interface on the Router. Use this address when registering for Internet service, and do not change it unless required by your ISP.